


Adding and Adjusting Flight Paths
In this first exercise, you'll assign a path constraint to the spacefighter and have it fly along a path. You'll also set a few path parameters to improve the flight dynamics of the spacefighter.
Set up the lesson:
Files for this lesson are in the tutorials\intro_to_animation folder.
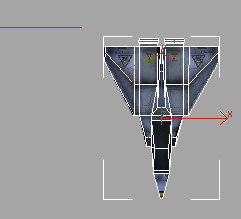
This scene includes the following:
Assign a path constraint:
A dotted line now links the spacefighter and the mouse cursor.
Once you pick the path, the spacefighter jumps to the start point of the path.
(Any kind of spline can become an animation path.)
Also, the command panel automatically switches to the Motion panel.
 From
the Motion panel, slide the rollouts up until you can see all of the
Path Parameters rollout, if necessary.
From
the Motion panel, slide the rollouts up until you can see all of the
Path Parameters rollout, if necessary.You'll see that Path01 has been added to the path list.
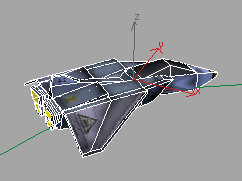
The spacefighter moves along the path, but it doesn't point in the correct direction.
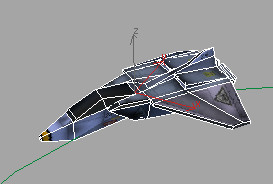
Now the spacefighter is moving along the path properly, but its flight dynamics don't look very realistic.
Improving the Flight Characteristics
In this section, you'll improve the flight characteristics of the spacefighter. You'll make it move more realistically as it enters and exits turns.
Make the flight more realistic:
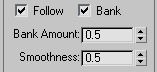
The spacefighter now banks as it goes through the turns. However, the motion is subtle; it needs to be more pronounced. You'll use the Bank Amount and Smoothness settings to make the spacefighter look as though it's banking sharply into the curves of the path.
Bank Amount controls how far an object rolls to either side of the path it travels along.
If you were sitting in the cockpit, positive values roll the starfighter to the left and negative values roll to the right. Be careful how high you set Bank Amount. If too high, the spacefighter will roll all the way over. Experiment with different settings and put it back to 7.0 before continuing.
Smoothness controls how rapidly the roll changes as the starfighter moves through bends in the path. Smaller values make the object more responsive to changes in the curve while larger values smooth out jerkiness.
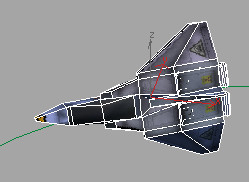
The spacefighter's motion as it rights itself coming out of the turns is more even. Try increasing and decreasing the Smoothness value to see what happens.
Animating the Path of the Spacefighter
You can animate the Path Parameters settings for more dynamic-looking animation. In this section, you'll add a bit of drama to the action by animating some settings changes.
Animate path parameters:
 Turn
on Auto Key and set Bank Amount to 6.0.
Turn
on Auto Key and set Bank Amount to 6.0.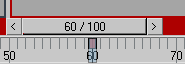
You'll see a new key added to the timeline at frame 60.
As the spacefighter enters the second curve, it makes a drastic rolling turn, as if evading a missile or dodging a laser.
So far, you've worked with a single path. 3ds Max allows you to combine motion along multiple paths, which can result in some interesting effects.
Set up the lesson:
Files for this lesson are in the \tutorials\intro_to_animation folder.
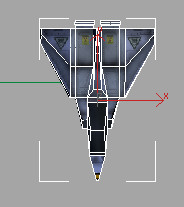
This scene includes the following:
Fly the spacefighter along blended paths:
Select SpaceFighter and
open the Motion panel.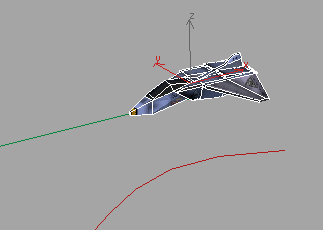
The spacefighter is already constrained to Path01.

The spacefighter is now positioned halfway between the two paths. This is because each path is influencing the spacefighter equally.
The Weight setting controls how much the spacefighter is affected by each path.
The spacefighter follows Path02 more closely because it has a greater weight then Path01. Experiment with different Weight settings for each path and see what happens.