


Animating the Spacefighter with Constraints and Controllers

In this lesson, you'll use an assortment of constraints and controllers with a flight of spacefighter on a mission.
Set up the lesson:
Files for this lesson are in the tutorials\intro_to_animation folder.
The scene already contains the following:
Using a Dummy Object to Control the Flight
Dummy objects are helper objects. You can create them from the Helpers button on the Create panel. They can be useful when setting up an animation. By animating a dummy, you can focus on getting your motion set up using a very simple object that doesn't slow down your system. Once the dummy animation is complete you link objects to the dummy. Now wherever the dummy moves, the object goes with it.
Link the spacefighters to the dummy:
 Activate
the Top viewport, if it's not already active, and click the Select
And Link button from the Main toolbar.
Activate
the Top viewport, if it's not already active, and click the Select
And Link button from the Main toolbar.FlightLeader is now linked to the SpaceshipControl. Wherever you move SpaceshipControl, FlightLeader will follow.
Add a path constraint to the dummy:
 In the
Top viewport, use Zoom Extents to view the scene.
In the
Top viewport, use Zoom Extents to view the scene.SpaceshipControl jumps to the beginning of the path. The spacefighters follow along since they're linked to the dummy.
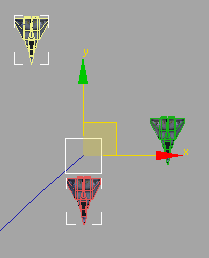
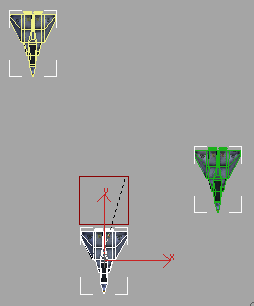
All three spacefighters move along the flightpath.
Making the Camera Follow the Action
In this exercise, you'll use the Link Constraint to make the camera follow the flight as it passes by. Continue from the last lesson or load flyingspacefighter04.max
Add link constraint to the camera:
 Open
the Display panel and turn off Cameras in the Hide By Category rollout.
Open
the Display panel and turn off Cameras in the Hide By Category rollout.The camera, SpaceCam, will appear.
In the
Top viewport, use Zoom Extents to view the scene. Select the camera
target.Also make sure the time slider is set to frame 0 (zero).

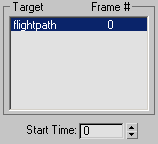
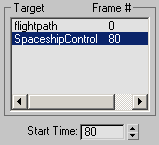
The camera target is linked to the flightpath from frames 0 to 79. At frame 80, the camera target begins to specifically track the SpaceshipControl object.
Your flight leader has a pretty bold character. He or she feels a victory roll is in order as the flight passes by your vantage point from SpaceCam. In this exercise, you'll use the Orientation Constraint to control the rotation of the flight leader's spacefighter as it performs a barrel roll. Continue from the last lesson or load flyingspacefighter05.max.
 In the
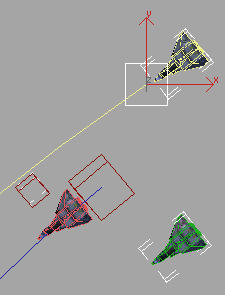
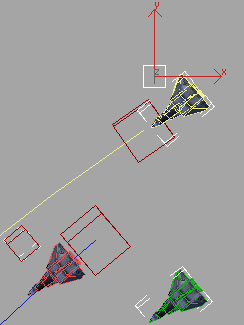
Top viewport, use Region Zoom to view the three spacefighters.
In the
Top viewport, use Region Zoom to view the three spacefighters.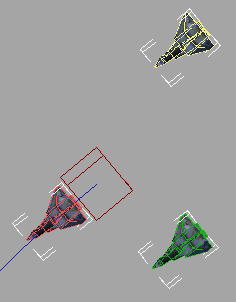
 On the
Create panel, click Helpers, then Dummy. Create a new dummy object
near the FlightLeader and name it barrelroll.
On the
Create panel, click Helpers, then Dummy. Create a new dummy object
near the FlightLeader and name it barrelroll.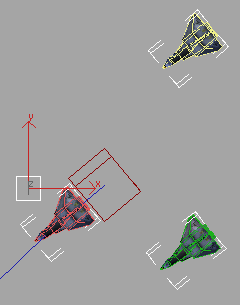
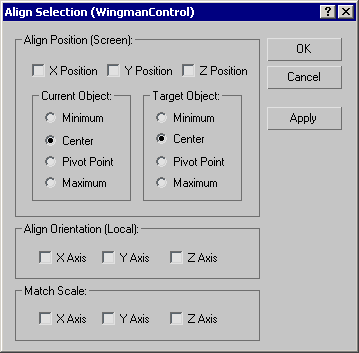
Click
Select And Link and link barrelroll to SpaceshipControl.The Align Selection (SpaceshipControl) dialog appears.

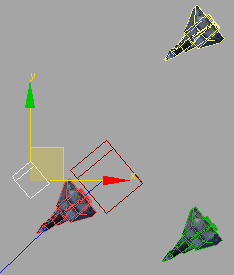
The barrelroll dummy now has the same orientation as the SpaceshipControl.
 On the
Motion panel, open the Assign Controller rollout, if it's not open,
and select the Rotation: Euler XYZ controller.
On the
Motion panel, open the Assign Controller rollout, if it's not open,
and select the Rotation: Euler XYZ controller. Click
the Assign Controller button and choose TCB Rotation from the Assign
Rotation Controller dialog.
Click
the Assign Controller button and choose TCB Rotation from the Assign
Rotation Controller dialog.Animate the victory roll:
You'll see barrelroll added to the Orientation Constraint Target list on the Motion panel.


 Turn
on the Set Key toggle and click the Set Key button. Move
the time slider to frame 110 and click Set Key again.
Turn
on the Set Key toggle and click the Set Key button. Move
the time slider to frame 110 and click Set Key again.You've added two keys that will keep the FlightLeader flying normally from frames 0 to 110.
 Click
Select And Rotate and change the Reference Coordinate System to
Local.
Click
Select And Rotate and change the Reference Coordinate System to
Local.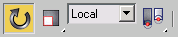

While the FlightLeader is performing stunts, Wingman01 seems to be having some trouble. He doesn't seem to be flying as smoothly as the others. In this exercise, you'll use the Noise Controller to add some turbulence to Wingman01 flight dynamics. Continue from the last lesson or load flyingspacefighter06.max.
Add turbulence:
In the
Top viewport, use Region Zoom to view the three spacefighters, if
you haven't done so already.You might have to do a Zoom Extents first, then a Region Zoom to see the three fighters.
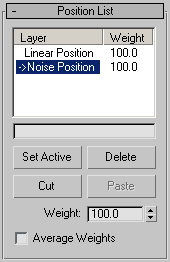
Doing this automatically adds a List Controller to the Wingman01. The Position List contains the original Linear Position and the new Noise Position controller with default Weight settings of 100.0 percent.
Now the flight path of the Wingman01 spacefighter is affected by slight battle damage.
Now it looks like Wingman02 has received a transmission and is being ordered to peel off and fly somewhere else. You'll revisit the Link Constraint to make Wingman02 follow the FlightLeader for a little while then take off on another path. Continue from the last lesson, or load flyingspacefighter07.max.
Alter course for Wingman02:

A yellow path appears in front of Wingman02.
The WingmanControl jumps to the beginning of wingmanpath.
If you play the animation, you'll see WingmanControl on its own path.
 To better see Wingman02 fly
away, before you play the animation go to frame 0, activate the
SpaceCam viewport, turn on the Field-of-View navigation button,
and drag downward in the SpaceCam viewport until in frame 0 you
can see the entire loop of wingmanpath, and a bit of FlightLeader, at
the right-hand side of the viewport.
To better see Wingman02 fly
away, before you play the animation go to frame 0, activate the
SpaceCam viewport, turn on the Field-of-View navigation button,
and drag downward in the SpaceCam viewport until in frame 0 you
can see the entire loop of wingmanpath, and a bit of FlightLeader, at
the right-hand side of the viewport.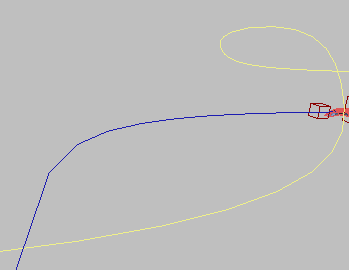
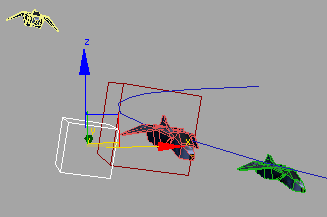
SpaceCam viewport with a larger Field-of-View
Make Wingman02 change paths:
 In the
Top viewport, select Wingman02 and click the Select
And Unlink button.
In the
Top viewport, select Wingman02 and click the Select
And Unlink button.Wingman02 is no longer linked to the SpaceshipControl dummy object.
Wingman02 will work as it did before, but the link constraint will give you the flexibility to have it follow a different path.
You will see WingmanControl is added to the Target list, and when Wingman02 gets to frame 45, the spacefighter begins to follow the WingmanControl dummy on the other path.
Make Wingman02 roll out of formation:
To make Wingman02 roll out of formation, you'll use the Orientation Constraint again.
Watch the Front and Right viewports to help you position it. This will help you keep the objects in your scene organized.
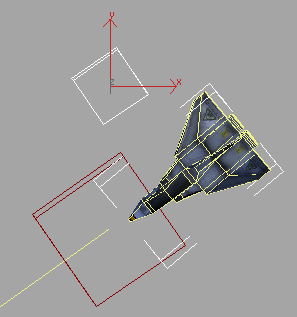
Click
Select And Link and link wingmanroll to WingmanControl.The Align Selection (WingmanControl) dialog appears.
The wingmanroll dummy aligns to WingmanControl.
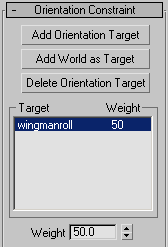
Click
the Assign Controller button and choose TCB Rotation from the Assign
Rotation Controller dialog.You'll see wingmanroll added to the Orientation Constraint target list in the Orientation Constraint rollout on the Motion panel.
Turn
on the Set Key toggle and click the Set Key button. Move
the time slider to frame 60 and click Set Key again.You've added two keys that will keep Wingman02 flying normally from frames 0 to 60.
Click
Select And Rotate and change the Reference Coordinate System to
Local.
