Material Combinations: Using Blend to Create a Floor Material

Materials for Interior Scenes

Ink 'n Paint Material

Using the UVW Map Modifier to Adjust the Floor Tiles
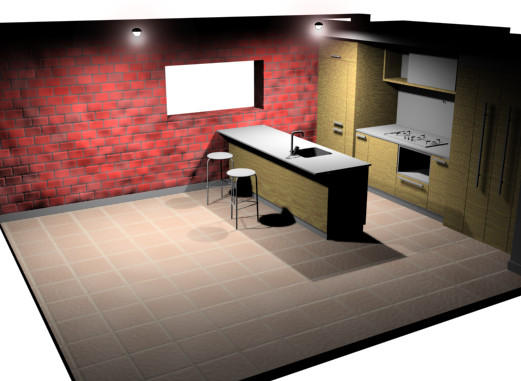
In
the previous lesson, you tiled the floor, but found that with default
mapping, the tiles appeared too large. The tiles should be 10” x
10”, with roughly 1/4” grout lines between each tile. You can use
the UVW Map modifier to set these values.
Set
up the scene:
- Continue
from the previous lesson, or open the file, kitchen_with_tile_floor.max found
in the \tutorial\designviz
folder.
- Close
the Material Editor and the Asset Browser.
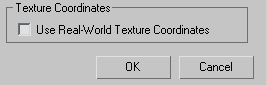
Setting
Texture Coordinates Preferences:
- From
the Customize menu, choose Preferences.
- In
the General tab, under the Texture Coordinates group, make sure
the Use Real-World Texture Coordinates option is turned off.
- Click
OK to exit the Preferences dialog.
Adjust
the floor tile size:
-
 Select the Floor object.
 -
 Go to
the Modify panel.
Go to
the Modify panel. - With
UVW Mapping selected in the modifier stack display, go to the Parameters
rollout and change the Length and Width values to 3’5”.
(The Floor Tile material has four tiles in each dimension, with
grout lines around them.)
-
 Click Quick Render.
The tile dimensions are now correct.
Save
your work:
- On
the menu bar, choose File menu > Save As and name the finished
model mykitchen_final.max.
Summary
This completes the material design tutorial.
Features it has covered include:
- Using
the Material Editor to create and assign materials.
- Creating
a simple “one-color” material.
- Using
a map in a material.
- Creating
a multi/sub-object material for assigning multiple materials to
a single object.
- Using
the Architectural material to use the material presets.
- Creating
a Blend material that includes a procedural map.
- Using
the Asset Browser to find textures.
- Using
the UVW Map modifier.