


Material Combinations: Using Blend to Create a Floor Material
The Material Editor provides a number of ways to combine materials. Bitmaps and procedural (3D) materials will probably serve your needs for most models, but this lesson is an example of the versatility of the Material Editor.
In this lesson, you create a complex Blend material for the tile floor in the kitchen.
Set up the scene:
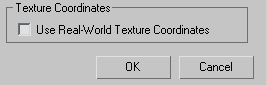
Setting Texture Coordinates Preferences:
Create the floor material:
 In the Material Editor,
select an unused sample slot.
In the Material Editor,
select an unused sample slot.The Replace Material dialog opens.
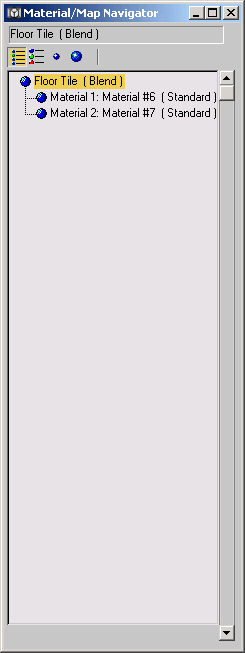
Like the Multi/Sub-Object material, the Blend material is a container for other materials. While Multi/Sub-Object apportions sub-materials among different sub-objects, Blend instead mixes the colors and other attributes of its sub-materials. You can also control the amount and the method of blending.
Configure the sub-materials:
 On the
Material Editor toolbar, open the Material/Map Navigator.
On the
Material Editor toolbar, open the Material/Map Navigator.The Material/Map Navigator is a dialog that shows the components of the material in the active sample slot. For complex materials such as Blend, it can help you to visualize and navigate the material hierarchy.

 The
Navigator is one way to move about the hierarchy of a complex material.
Another is to use the Go To Parent and Go Forward To Sibling buttons
on the Material Editor toolbar.
The
Navigator is one way to move about the hierarchy of a complex material.
Another is to use the Go To Parent and Go Forward To Sibling buttons
on the Material Editor toolbar.Sub-material names are automatically updated in the Material/Map Navigator.
Set the texture and color of the grout:
The map button is the gray square to the right of the diffuse color swatch.
This applies a Noise map as a texture for the Grout material.
 This
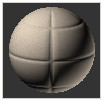
gives the Grout material a grainy texture, as you can see in the
sample slot if you turn off Show End Result in the Material Editor
toolbar.
This
gives the Grout material a grainy texture, as you can see in the
sample slot if you turn off Show End Result in the Material Editor
toolbar.
 When
the Show End Result button is on, the final result of the top-level
material is shown on the sample sphere.
When
the Show End Result button is on, the final result of the top-level
material is shown on the sample sphere.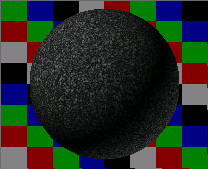
Show End Result is on; Background is on for clarity.
When
Show End Result is off, you are shown only the material level you
are working on. That way it is easier to view your adjustments to
a specific map.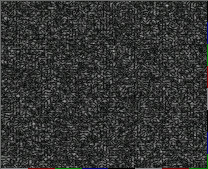
Show End Result is off.
Add a bump pattern to the grout:
Previously, the Noise map was active.
You
can also click the Go to Parent button to move up one level to the
Grout material. Go to
the Utilities panel. Click Asset Browser. Answer OK to the warning
dialog, then resize the Asset Browser window so you can see both
the Browser controls and the Material Editor.
Go to
the Utilities panel. Click Asset Browser. Answer OK to the warning
dialog, then resize the Asset Browser window so you can see both
the Browser controls and the Material Editor.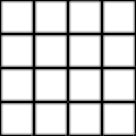
The image in glasblkb.gif
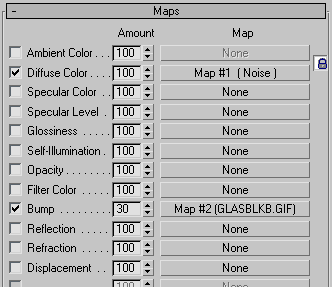
The Maps rollout with glasblkb.gif assigned to the Bump map button
Just as you can search for geometry models, you can use the Asset Browser to find bitmap files and use them in the scene. The Asset Browser also gives you the freedom to search for models and bitmaps anywhere on your local hard drives or across the Internet.
The Grout material now has a grid-like bumpiness.
Set the texture and color of the tile surfaces:
On the
Material Editor toolbar, click to turn off Show End Result.
The map button is the gray square to the right of the diffuse color swatch.
This applies a Noise map as a texture for the Tile Surface material.
The tile surface is also “noisy” or rough, and somewhat darker than the grout.
Change the shininess and bumpiness of the tile surfaces:
Previously, the Noise map was active.
Click
Go To Parent.This takes you to the parent Tile Surface material. The highlight in the Navigator indicates the change.
Combine the two materials by using a mask:
The Blend material now has two sub-materials, Grout and Tile Surface. You will use a bitmap file as a mask to combine them.
This is the top level of the material. The Blend Basic Parameters rollout shows the two component sub-materials.
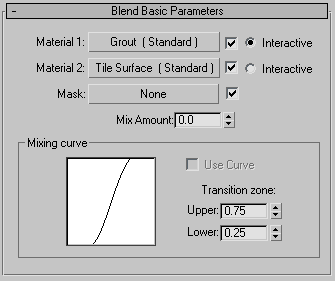
Rename the mask:
Adjust the blending:
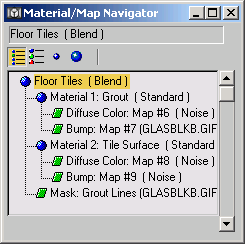
Floor Tile, the blend material, is the top material in the tree.
The Navigator now shows all component materials and maps of the Floor Tile material.
This gives a crisp appearance to the grooves.
Apply the material to the floor:
 In the viewport, select
the Floor object.
In the viewport, select
the Floor object. In the
Material Editor, click Assign Material To Selection.
In the
Material Editor, click Assign Material To Selection.Assign coordinates to the floor:
 With
the Floor still selected, go to the Modify panel.
With
the Floor still selected, go to the Modify panel.This guarantees that the floor has mapping coordinates the Floor Tile material can use, and gives you a means to adjust them. You will need to, as the following steps demonstrate.
Render the scene:
 On the toolbar, click Quick Render.
The floor has a tiled appearance, but the tiles are far too large.

You will correct the tile size in the following lesson.
Save your work:
You can use this file in the following lesson.