


Materials of One Color: Applying Standard Materials
In this lesson, you create simple, “one-color” materials and apply them to objects in the scene. Specifically, you create the materials for a pair of chairs and an end table.
Material Components: Colors and Other Controls
In general, we think of simple standard materials (with no maps) as being of “one color”. In fact, an 3ds Max material consists of a number of component controls, and among these are a number of color components. The default Blinn shader, for example, uses three color components: ambient, diffuse, and specular. Ambient is the color of the material in shadow, and specular is the color of highlights if the material is shiny. Diffuse, the color of the material under diffuse light, is what we usually think of as “the” color of a material. In the lessons of this tutorial, you work with the diffuse color component exclusively.
Materials have other non-color components, such as highlight and opacity controls. In these lessons, you adjust some highlights and map amounts, but don’t otherwise work with numeric material components.
Set up the scene:
If you see the File Load: Units Mismatch dialog , choose the option Adopt The File's Unit Scale. This will change your system unit, so be sure to reset your system unit after completing this tutorial .
To reset your system unit, go to the Customize menu and choose Units Setup > System Unit Setup > System Unit Scale > Inches.
 If the
geometry is not visible in the viewport, click the Zoom Extents
All button twice to correct the display.
If the
geometry is not visible in the viewport, click the Zoom Extents
All button twice to correct the display.
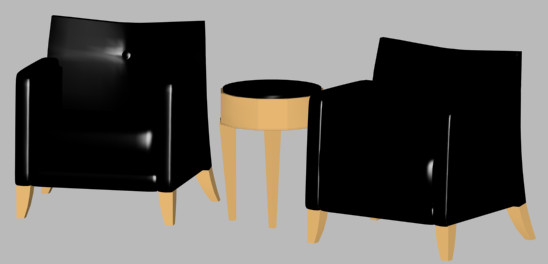
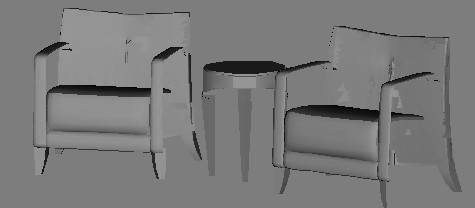
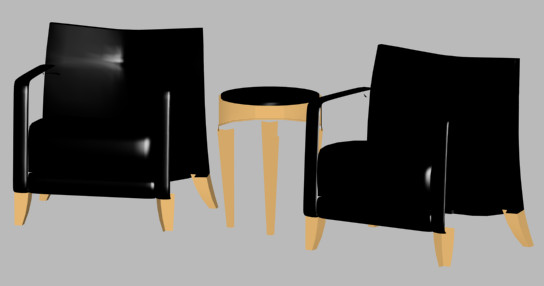
This scene contains only the chairs and the end table. At present, they are simply a dull gray.
You will make the seats and the table top a glossy black leather, and the wood a flat brown.
Create a black leather material:
 On the toolbar, click Material Editor.
The Material Editor is displayed. This is a large dialog for designing and applying materials. At the top of the dialog are sample slots that display material previews.
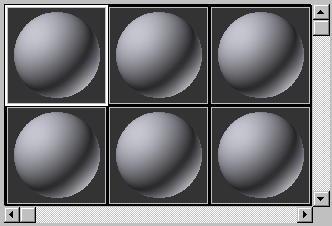
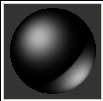
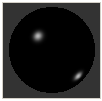
Sample slots show previews of materials on small sample objects such as spheres.
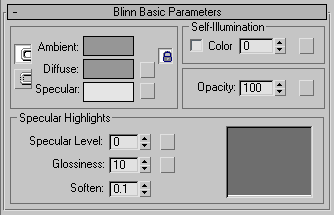
Below and to the right of the sample slots are various buttons and other controls. Below these tools are rollouts that are specific to a particular material type.
A Color Selector appears.
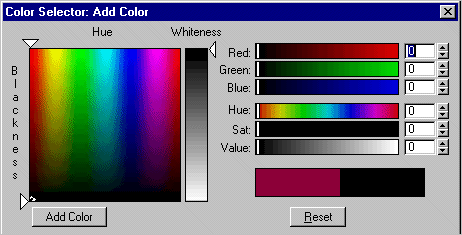
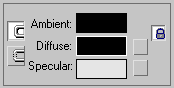
By default, the diffuse component is locked to the ambient component, so both the Diffuse and Ambient color swatches now appear black.
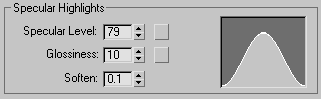
The material is very dark, as you can see in its sample slot. To look like leather, it needs to be shiny, too. To do this, you increase the intensity and size of the highlight.
As the highlight graph shows, there is now a large highlight. Increasing the value of Specular Level increases the height of the highlight curve.
The effect is also apparent in the sample slot.
The highlight graph shows that the highlight curve has become much narrower.
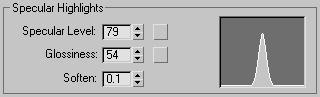
Increasing the value of Glossiness narrows the highlight curve. In general, small but intense highlights give the effect of shiny materials, as you can see in the sample slot.
This is the effect intended for the leather upholstery, so give this material a name.
Apply the black leather material to the upholstered parts of the chairs:
 In a viewport, click to
select the upholstered parts of the chairs and table.
In a viewport, click to
select the upholstered parts of the chairs and table.In the wireframe viewports, these parts are blue.

 The
name Leather Parts should appear in the Name And Color rollout on
the Create panel. If you go to the Modify panel, it should also
appear in the object name field at the top of the panel.
The
name Leather Parts should appear in the Name And Color rollout on
the Create panel. If you go to the Modify panel, it should also
appear in the object name field at the top of the panel.
 In the
Material Editor, make sure the Black Leather material’s sample slot
is still active, then click Assign Material To Selection.
In the
Material Editor, make sure the Black Leather material’s sample slot
is still active, then click Assign Material To Selection.In viewports, the upholstered areas now appear dark and the Black Leather sample slot has solid, white triangles at each corner indicating that the material is applied to the selected object(s) in the scene.
Create a simple wood material:
For this model, which is a small part of a much larger scene, the wood can be a simple brown color. Future exercises will show how to create more realistic wood textures.
The red, green, blue (RGB) spinners update to show 146, 116, 72.
The Diffuse and Ambient color swatches now show a medium brown.
Broad, shallow highlights give a material a matte appearance, as intended for the wood parts.
Apply the wood material to the wooden parts of the chairs, and the table:
In a viewport, click to
select the leg of a chair or table.In the wireframe viewports, this is the orange part of the model.
If you
go to the Modify panel, the name Wood Parts should appear in the
object name field at the top of the panel.
In the
Material Editor, make sure the Wood 1 material’s sample slot is
still active, then click Assign Material To Selection.In viewports, the wooden areas now appear brown.
Render the scene to see more of the effect:
 On the main toolbar, click Quick
Render.
On the main toolbar, click Quick
Render.The materials appear in the rendering. They are simple, but adequate as details of an architectural scene.
One problem with this rendering is that certain faces don’t appear; specifically, the front of the end table and one side of the chair on the right. One way to fix this would be to go into the scene and flip the face normals of the nonrendering geometry, but there is a fix available in the Material Editor itself.

Turning on 2-sided is one way to make sure all of an object’s geometry renders in a scene. Be aware that this can increase rendering time, especially in complex scenes.
Click Quick Render again.This time, all of the furniture geometry renders.
Save your work: