


Adding Complexity: Applying Mapped Materials
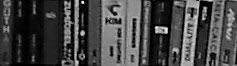
You can create more complex materials quite easily, by assigning a map to the diffuse color. A map applied to the diffuse color component is often described as a texture map. For example, the bookshelves used in the library model have two textures: wood grain for the shelves, and books for the shelves’ contents.
In this lesson, you create the mapped materials and apply them to a bookshelf model.
Set up the scene:
If you see the File Load: Units Mismatch dialog , choose the option Adopt The File's Unit Scale. This will change your system unit, so be sure to reset your system unit after completing this tutorial .
To reset your system unit, go to the Customize menu and choose Units Setup > System Unit Setup > System Unit Scale > Inches.
 If the
geometry is not visible in the viewport, click the Zoom Extents
All button twice to correct the display.
If the
geometry is not visible in the viewport, click the Zoom Extents
All button twice to correct the display.
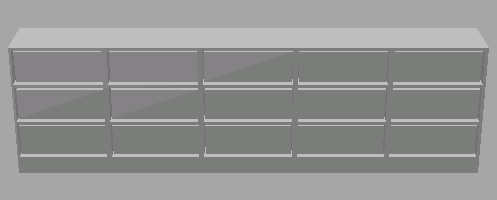
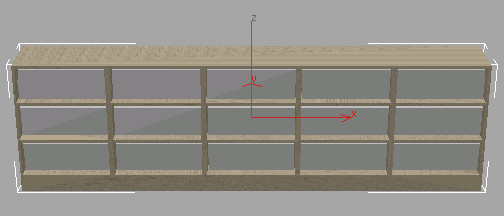
This scene contains the bookshelf model, but with no textures applied.
Setting Texture Coordinates Preferences:
Create the wood material:
 On the toolbar, click Material Editor.
The Material/Map Browser dialog is displayed.
The map button is the gray square to the right of the diffuse color swatch.
If a map has been assigned, it shows the letter ‘M.’
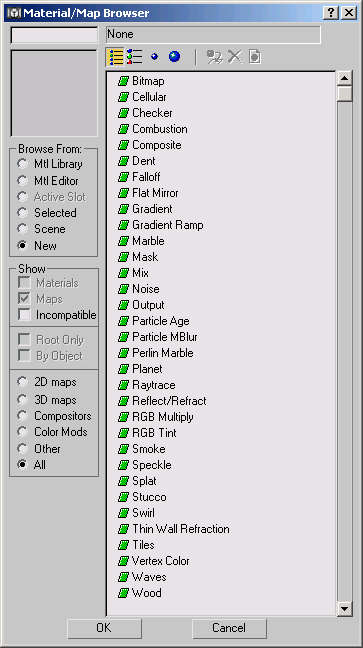
A Select Bitmap Image File dialog appears. Most of the controls in this dialog are standard Windows file controls.
In the Material Editor, the sample slot updates to show that the diffuse color of the material is now an image of the map file you chose. Also, the rollouts area of the dialog now shows controls for the map, rather than the parent material.
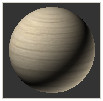
Mapped wood material in sample slot
 Click
the Go To Parent button to get back to the top level of your new
material.
Click
the Go To Parent button to get back to the top level of your new
material.By default, the material name is a generic name, 01 – Default. Giving your materials more descriptive names will help you manage them more efficiently in the future.
Apply the wood to the bookshelves:
 On the toolbar, click Select By
Name. In the Select By Name dialog that appears, choose Shelves
in the list, then click Select.
On the toolbar, click Select By
Name. In the Select By Name dialog that appears, choose Shelves
in the list, then click Select. In the
Material Editor, make sure the Wood 2 sample slot is still active,
then click Assign Material To Selection.
In the
Material Editor, make sure the Wood 2 sample slot is still active,
then click Assign Material To Selection.The material is now applied to the shelves, and would appear in a rendering. However, it doesn’t yet appear in shaded viewports.
Incidentally, when you apply the material, the sample slot shows solid, angled tabs at the corners. This is an indication in the Material Editor that the material in the slot is a material used in the scene.
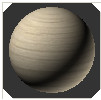
Solid corner tabs of a sample slot indicate that the material is used in the scene.
 In the
Material Editor, click to turn on Show Map In Viewport.
In the
Material Editor, click to turn on Show Map In Viewport.Now the shaded Perspective viewport shows that the shelves have a wood grain.
Create the book material:
The map button is the gray square to the right of the diffuse color swatch.
Although it is somewhat hard to see on the sphere in the sample slot, the texture for this material is a scanned image of books on a bookshelf.
Click
the Go To Parent button to get back to the top level of the material.Apply the book material to the shelves:
On the toolbar, click Select By
Name. In the Select By Name dialog that appears, choose Books in
the list, then click Select. In the
Material Editor, make sure the Books sample slot is still active,
then click Assign Material To Selection. In the
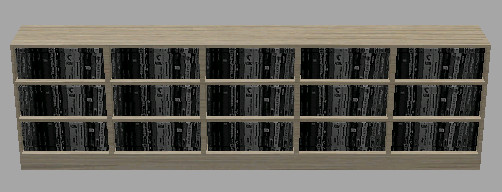
Material Editor, click to turn on Show Map In Viewport.Now the shaded Perspective viewport shows the shelves with books on them.
With just two image files, you have given the model a convincing amount of detail, especially if the model is meant, like the bookshelf, to be a detail in a larger scene. Texture-mapped materials are a convenient way to add textures and images to your scene. (You can also use a map as a scene background image.)
Save your work: