Adding Files to the Vault


  1. From the C:\Exercise2\Scene folder open Full House.max.
  2. From the File menu choose Asset Tracking.

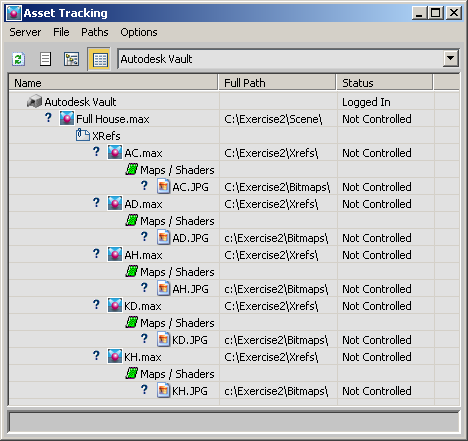
    The dialog displays the MAX file and its dependants. Question marks appear next to the files because they are uncontrolled; that is, they're not associated with Autodesk Vault.

  3. Highlight the Full House.max entry in the Asset Tracking dialog list.
  4. From the File Menu choose Add Files.

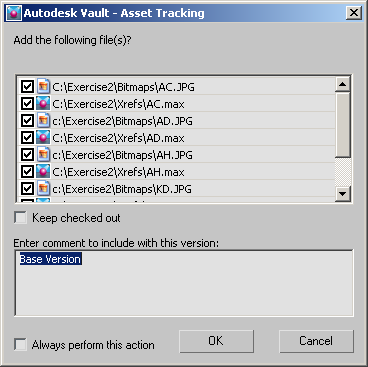
    The Autodesk Vault – Asset Tracking dialog opens. Here you can add comments and opt to keep an added file checked out.

  5. Turn on Keep Checked Out.
  6. Enter a comment for this version of the file. Because you haven't made any changes yet, a comment such as “Base Version” is appropriate.

  7. Click OK to add the file.
  8. Next, highlight all the subordinate files, as shown in the following illustration.

  9. From the File menu, choose Add Files.

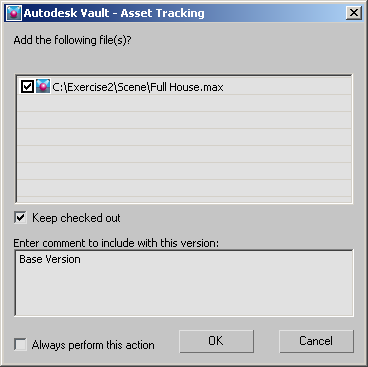
    The Autodesk Vault – Asset Tracking dialog reopens. Note that Keep Checked Out is no longer on.

  10. Enter “Base Version” in the comment section, but don't turn on Keep Checked Out, and then click OK.

    NoteEach of the files now has a circle next to it to indicate that the vault version is identical to the local version. A check mark appears in the circle adjacent to Full House.max because it is checked out of the vault.

Next

Changing the File