Creating Reactions in a Hand
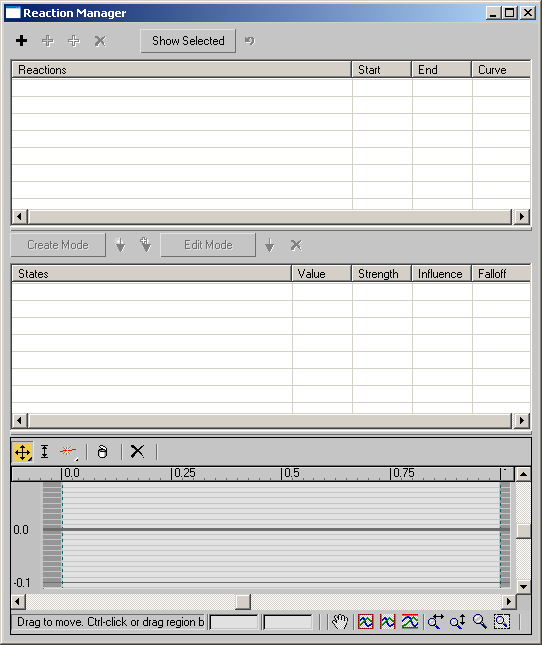
In this lesson, you will use the Reaction Manager dialog to establish a master-slave relationship between some custom dialog elements and the fingers on a hand. The dialog elements (sliders, in this case) will be the masters, and the fingers in the hand will be the slaves.
Set up the lesson:
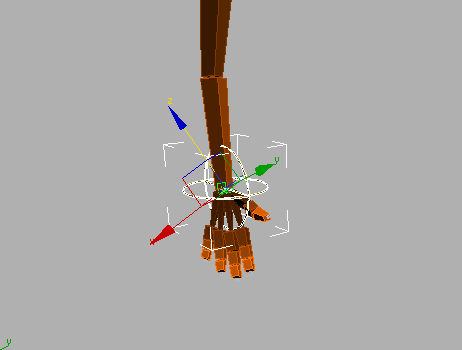
The scene contains a simple arm and hand rig. An IK chain has already been set up on the arm. The chain is controlled by moving the yellow spline object CNT_HAND. Drag CNT_HAND around a bit to confirm that the IK is working, and right-click before your release the left mouse button in order to return the effector to its original position.
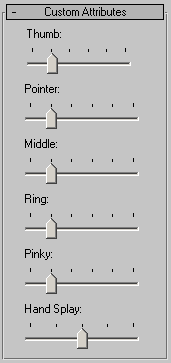
 With CNT_HAND still
selected, go to the Modify panel. The editable spline object has
an Attribute Holder modifier assigned to it, which in turn contains
six custom attributes sliders on the Custom Attributes rollout.
The sliders don't do anything yet: you will use Reaction controllers
so that these sliders drive the movement of the fingers.
With CNT_HAND still
selected, go to the Modify panel. The editable spline object has
an Attribute Holder modifier assigned to it, which in turn contains
six custom attributes sliders on the Custom Attributes rollout.
The sliders don't do anything yet: you will use Reaction controllers
so that these sliders drive the movement of the fingers.
You can examine the setup by highlighting the Attribute Holder entry in the modifier stack, choosing Animation > Parameter Editor, and then clicking the Parameter Editor > Edit/Delete button. This opens the Edit Attributes/Parameters dialog. Click each attribute in turn to see its settings on the Parameter Editor dialog. Then close both dialogs.
Set up the reactions:
 Click
the Add Master button.
Click
the Add Master button.From the pop-up menu, choose Modified Object > Attribute Holder > Custom_Attributes > Pointer.
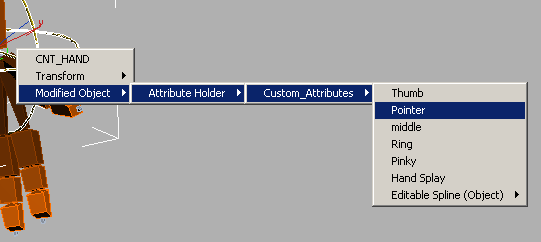
A new entry, CNT_HAND / Pointer, appears in the Reactions list of the Reaction Manager dialog, indicating that the Pointer attribute of the CNT_HAND object is the new master for the Reaction controller that you'll set up. Technically, the controller is actually applied to the slave objects that you'll specify in the next few steps.

Next, you'll use Reaction Manager to specify the slave tracks that this master drives.
 In the
Reaction Manager dialog, with the pointer finger bones still selected,
click the Add Selected Button.
In the
Reaction Manager dialog, with the pointer finger bones still selected,
click the Add Selected Button.
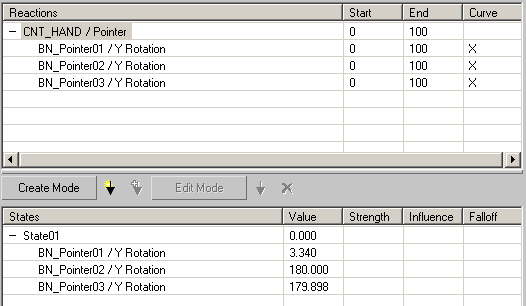
This applies a Reaction controller to each of the slave objects. The slave objects and the parameters that will be driven by the Reaction controllers appear in the Reaction Manager dialog. The States list shows the initial values for the Y rotation of the bone objects.
 You
could also designate slave objects by clicking the Add Slave button
and then selecting the individual objects, but in this case it is
faster to use the Add Selection button, especially since you wish
to affect the same parameter (Y rotation) of each of the selected
objects.
You
could also designate slave objects by clicking the Add Slave button
and then selecting the individual objects, but in this case it is
faster to use the Add Selection button, especially since you wish
to affect the same parameter (Y rotation) of each of the selected
objects.Now that you've defined the relationship between a master object, a Reaction controller, and the slave objects' parameter, the next step is to tie specific master values to the specific parameter values you want to see in response.
Adding reaction states:
 Click
the Create Mode button to turn it on.
Click
the Create Mode button to turn it on.The button is highlighted, indicating that you can now create new Reaction states interactively.
If the CNT_HAND custom
attributes aren't visible, select CNT_HAND again,
and go to the Modify panel.Remember, at this value the finger will be fully curled.

 On the
Main toolbar, click the Select And Rotate button to turn it on.
Then set the Reference Coordinate System to Local.
On the
Main toolbar, click the Select And Rotate button to turn it on.
Then set the Reference Coordinate System to Local.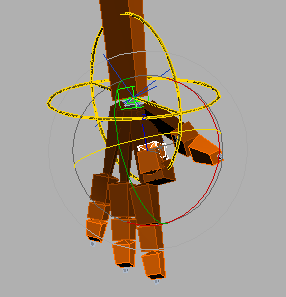

 On the
Reaction Manager dialog, click the Create State button.
On the
Reaction Manager dialog, click the Create State button.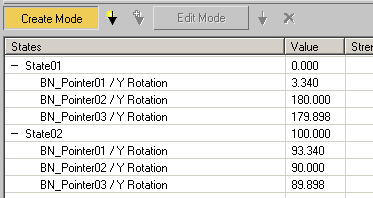
The newly created Reaction state is displayed in the States list as a new entry. Now create another state:
On the
Reaction Manager dialog, click Create State again.
A third Reaction state appears as a new entry in the States list.
 Click
Create Mode to turn it off.
Click
Create Mode to turn it off.The button turns gray to indicate that you have exited Create mode.
You have now successfully defined the reactions for a single finger. To test them out, select CNT_HAND, and then, on the Modify panel, drag the Pointer slider right and left to see the finger curl and uncurl.
Your scene should now be similar to hand_reactions02.max, which has the reactions created for the pointer finger according to the previous steps.
Complete the hand setup:
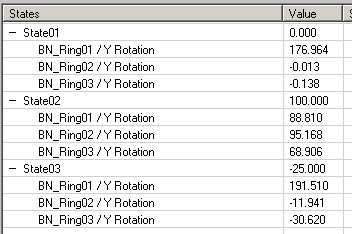
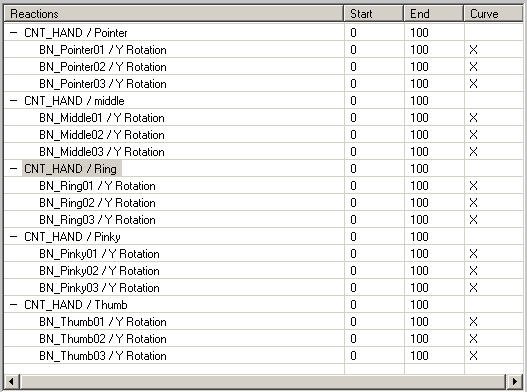
When you have completed these steps, the Reactions list should look something like this:
For each master in the Reactions list, the States list should contain three states that look something like this: