


Modify Hatches and Solid-Filled
Areas |
|
Modify Hatches and Solid-Filled
Areas |
|
You can modify both the pattern fill and the boundaries of hatches.
You can also modify solid-filled areas, but the method you use depends on whether the solid-filled area is a solid-filled hatch, a 2D solid, or a wide polyline or donut. You can also modify the draw order of your hatch.
Hatching can produce a very large number of line and point objects. Although stored as hatch objects, these line and point objects do use disk space and take time to generate. If you use a relatively small scale factor when hatching an area, the hatch could require millions of line and point objects, thus taking a very long time to complete and possibly exhausting the available resources. You can avoid this problem by imposing a limit on the number of objects created by a single HATCH command. If the approximate number of objects needed for a particular hatch (considering the boundary extents, pattern, and scale) exceeds the limit, HATCH displays a message indicating that the hatch scale is too small or that its dash length is too short, and the hatch request is rejected. If this occurs, carefully examine your hatch settings. The scale factor may be unreasonable and may need to be adjusted.
The hatch object limit is set by the MaxHatch environment setting, which is stored in the system registry. Its default value is 10000. You can change this limit by setting the MaxHatch system registry variable using (setenv “MaxHatch” “n”) where n is a number between 100 and 10000000 (ten million).
Change the Hatch Properties of an Existing Hatch
You can modify hatch-specific properties, such as pattern, scale, and angle, of an existing hatch. You can use the following:
You can also copy properties from one hatch to another. With the Inherit Properties button in the Hatch Edit dialog box, you can copy all hatch-specific properties, including the hatch origin, from one hatch to another. Use the Match Properties dialog box to copy general properties and hatch-specific properties (with the exception of the hatch origin), from one hatch to another.
You can use EXPLODE to disassemble a hatch into its component objects.
If the editing you do maintains a closed boundary, an associative hatch is updated automatically. If the editing produces an open boundary, the hatch loses any associativity with the boundary and remains unchanged. Associativity may also be lost during editing of a hatch boundary if the hatch pattern file is not available at the time of editing. If you trim a hatch and the hatch pattern (PAT) file is no longer available, the hatch will disappear.
Hatch associativity depends on whether you choose Associative in the Hatch and Gradient (HATCH) and Hatch Edit (HATCHEDIT) dialog boxes. Nonassociative hatches are not updated when their original boundary is changed.
You can remove hatch associativity at any time, but once it is removed for an existing hatch, it cannot be reestablished. The hatch must be recreated to restore associativity or a new hatch boundary must be created and associated with the hatch.
To create a boundary around a nonassociative or unbounded hatch, in the Hatch and Gradient dialog box, use the Recreate Boundary option. With this option you can also specify that the new boundary is associated with the hatch.
The Select Boundary Objects option in the Hatch Edit dialog box displays grips for a selected hatch. When you manually select or use the Select Boundary Objects option to select a nonassociative hatch, the hatch is selected and the grips display on the boundary of the hatch. You can use these grips to change the extents of nonassociative hatches.
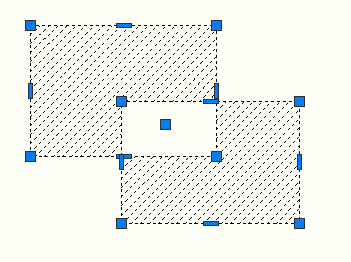
Nonassociative hatch grips
When you manually select an associative hatch, it displays only a single grip point of the hatch. With the Select Boundary Objects option, you can select an associative hatch and display the boundary grip controls of the objects associated with it. You can extend by editing the grip controls of the associated objects.

Associative hatch grips
The grip control tooltip displays more edit options available based on the grip type. You can cycle through these options by pressing the CTRL key. For example, an edge grip for a polyline segment has an option to convert the segment to an arc while an edge grip for a polyline arc segment has an option to convert to line.
Solid-filled areas can be represented by
You modify each of these solid-filled objects just as you would any other hatch, 2D solid, wide polyline, or donut. In addition to PROPERTIES, you can use HATCHEDIT for solid-filled hatches and gradient fills, grip editing for 2D solids, and PEDIT for wide polylines and donuts.
Modify the Draw Order of a Hatch
When you edit a hatch, you can change its draw order, so that it is displayed behind the hatch boundary, in front of the hatch boundary, behind all other objects, or in front of all other objects.
 Expand All
 Collapse All


