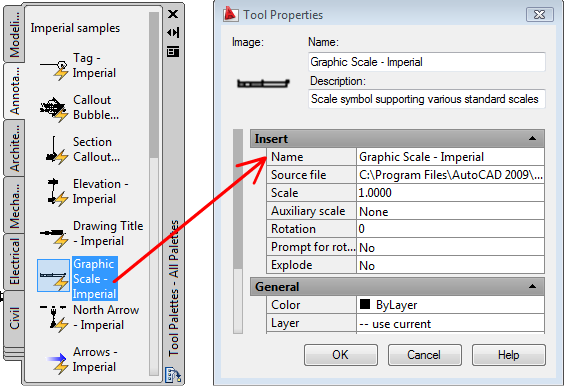
You can change the properties of any tool on a tool palette.
Once a tool is on a tool palette, you can change its properties. For example, you can change the insertion scale of a block or the angle of a hatch pattern.

To change tool properties, right-click on a tool, and then click Properties on the shortcut menu to display the Tool Properties dialog box. The Tool Properties dialog box has the following two categories of properties:
You can expand and collapse the property categories by clicking the arrow buttons.
Specify a Different Icon for a Tool
You can replace the icon for a tool with an image that you specify. This is useful when the automatically generated icon is too cluttered to be easily recognizable.
To replace the image, right-click the tool in the tool palette and click Specify Image on the shortcut menu.
To restore the default image for a tool, right-click the tool and click Remove Specified Image.
The icon for a block, xref, or raster image in a tool palette is not automatically updated if its definition changes. If you change the definition for a block, xref, or raster image, you can update the icon by right-clicking the tool in the palette and clicking Update Tool Image. You must save the drawing before you can update the tool image.
Alternatively, you can delete the tool, and then replace it using DesignCenter™.
Specify Overrides for Tool Properties
In some cases, you may want to assign specific property overrides to a tool. For example, you may want a hatch to be placed automatically on a pre-specified layer, regardless of the current layer setting. This feature can save you time and reduce errors by setting properties automatically when creating certain objects.
The Tool Properties dialog box provides areas for each possible property override.
Layer property overrides affect color, linetype, lineweight, plot style, and plot. Layer property overrides are resolved as follows: