Previous Next


Inventory > Inventory System > Creating a Transfer Entry


Creating a Transfer Entry
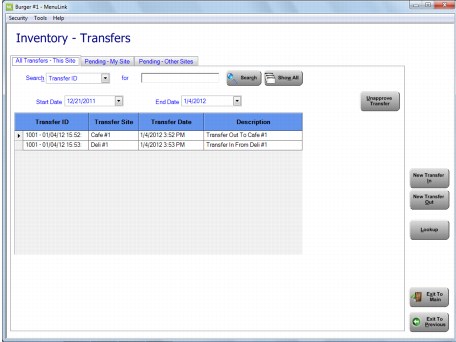
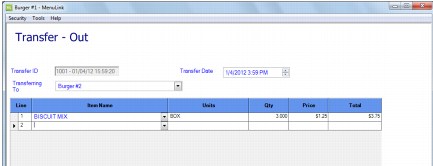
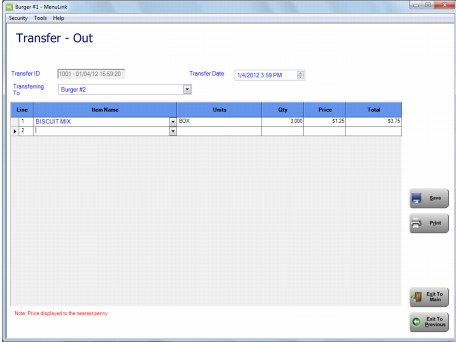
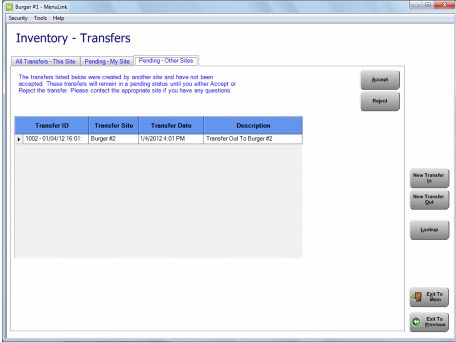
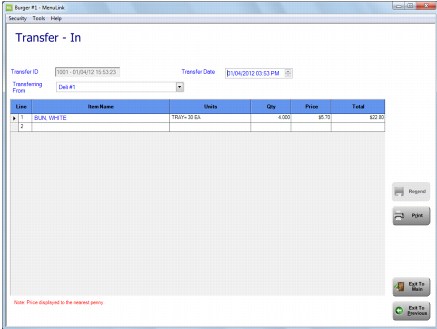
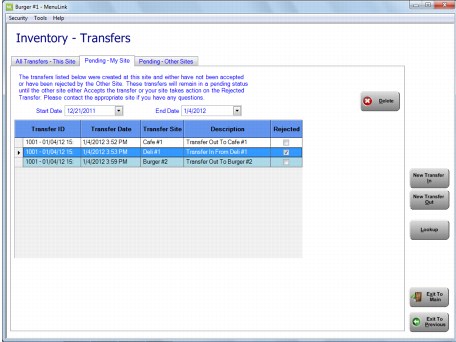
The following instructions describe how to create a Transfer In or Transfer Out entry. Keep in mind that the each site must have corresponding and identical transfers for MenuLink Client to complete them.
Note: Some transfer functionality may be limited by your system administrator. For example, you may only have the ability to create Transfer Outs to prevent redundant transfer entries.
Note: Each transfer can only be to or from a single site; multiple sites cannot be selected.
Tip: If another site has already created a Transfer Out entry to transfer product to your site, you can automatically create a Transfer In entry in the Pending -- Other Sites tab. See ‘Accepting a Transfer’ on page 91.
1.
2.
Click New Transfer In or New Transfer Out.
3.
In the Transfer In or Transfer Out screen, enter the transfer number in the Transfer ID field. The number should have a maximum of 14 characters and can include letters. Note: Your system administrator may have this field automatically populate, like in the example below.
4.
Select a site from the Transferring To or Transferring From drop-down list.
5.
6.
7.
In the Units field, select the transfer units.
8.
In the Qty field, enter the quantity transferred. This quantity must be based on the unit of measure that you selected in the Units field.
9.
The Price that appears is the last price paid. Depending on the security setting, this may or may not be available for change.
10.
11.
Repeat steps 6-9 for each additional item you are transferring to or from the same site.
12.
Click Save after all items have been entered for this transfer.
13.
Click Print to print this transfer
Accepting a Transfer
If another site has already created a transfer entry for items being transferred to or from your site, you can automatically create a corresponding transfer entry by accepting the transfer in the Pending - Other Sites tab. Accepting a transfer saves time and eliminates the possibility of accidentally creating a mismatched transfer.

To Accept a Transfer:
1.
2.
3.
The Transfer In or Transfer Out screen appears.
4.
Verify the information in the transfer entry is correct. If it is not correct, you may adjust it here. Note that the corresponding transfer must also be adjusted or a mismatched transfer will result.
5.
Click Print to print the accepted transfer.
Deleting a Transfer
You can delete a transfer from the All Transfers -- This Site tab or from the Pending -- This site tab.
Warning: Use caution when deleting a transfer, as there is no ‘undo’ if you accidentally choose the wrong transfer.
To Delete a Transfer:
1.
2.
Click the Pending – This Site tab
3.
Note: You can only delete transfers that you have created. If a corresponding site has created an incorrect transfer, that site is responsible for deleting or modifying it.


MenuLink Online Help
Copyright © 2012 Radiant Systems, Inc. All rights reserved.