|
Groups |

  
|
|
Groups |
|
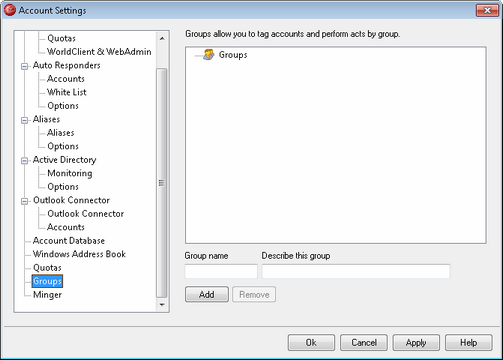
Groups
Use this dialog to create account Groups to which your user accounts can belong. You can add accounts to a Group by double-clicking the Group in the list. You can also add a user to a Group from the user's account settings.
Using the Content Filter, you can create rule conditions based on whether or not the sender or recipient of a message is a member of a specific Group. Further, you can assign Access Control List rights for Shared Folders to specific Groups. Then, all members of that Group will share those access rights.
Group name
To create a new group, type its name here, add a short description in the Describe... option below, and then click Add.
Describe this group
Use this text box to add a short description when creating a group.
Add
After naming and describing your group, click this button to add it to the Groups list.
Remove
To remove a group, select it in the Groups list and then click Remove.
Adding Accounts to a Group
To add accounts to a Group, double-click a Group in the list. You can also add an account to a Group from the Folder, Attachments, Groups screen of the Account Editor.
See:
Creating a New Content Filter Rule