Styling Hair with a Spline Emitter

Styling Hair with a Spline Emitter

Working with Hair Presets

Generate the Hair
Set
up the lesson:
- Open
the file spline_emitter_start.max.
The scene consists of a simple head mesh and
three shadow-casting spot lights that are hidden at this time. Instead
of using the mesh as a hair emitter, you'll create a spline-based
outline for the hair.
- Select
the head in the scene and right-click it. From the quad menu that appears,
choose Freeze Selection.
-
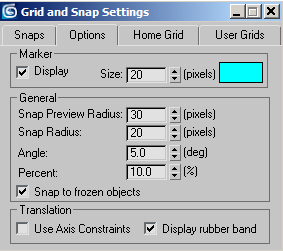
 On the
main toolbar, right-click the Snaps Toggle button to open the Grid
And Snap Settings dialog.
On the
main toolbar, right-click the Snaps Toggle button to open the Grid
And Snap Settings dialog. - The
only snaps option that should be on is Face. As necessary, turn
off any other options and turn on Face.
- In
the Grid And Snap Settings > Options panel, turn on Snap To Frozen Objects.
- Click
the close button in the upper-right corner to exit the dialog, and then
left-click the Snaps Toggle button to turn on snapping to faces.
Create
the spline cage for the hair:
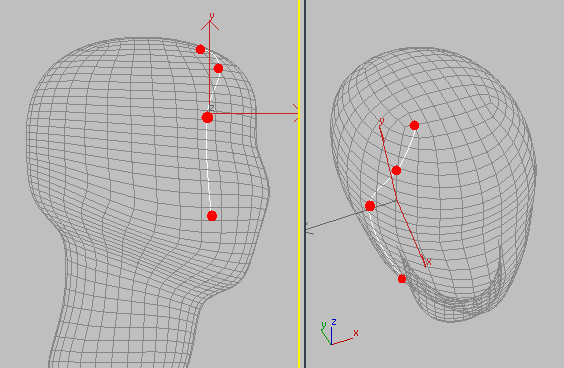
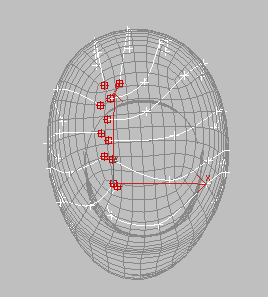
In this section you'll create the splines for
the hair. In that respect, you have to consider the design of the
hairdo and the parting of the hair. The red line in the following
illustration shows where the hair part will be. You will use it as
a base line for the hair splines as they flow on either side of
the head.
- Go
to the Create panel and choose Splines > Line. Make sure Initial
Type and Drag Type are both set to Smooth.
- In
the Perspective viewport, position the mouse at the front of the
parting line seen above, and then click to start the spline. Move
the mouse partway down the left side of the head and click again.
Move it farther down and slightly back, click again, and then move
it down and closer to the front to create a nice flowing curve.
Right-click to end.
The four-vertex spline is not smooth enough
to follow the contours of the head. You will make the necessary
adjustments later but for now, press F3 to
view the scene in wireframe mode.
ImportantBefore
you create additional splines, make sure that Start New Shape (on
the Object Type rollout) is turned on. Each spline should be its
own object until you attach the splines later.
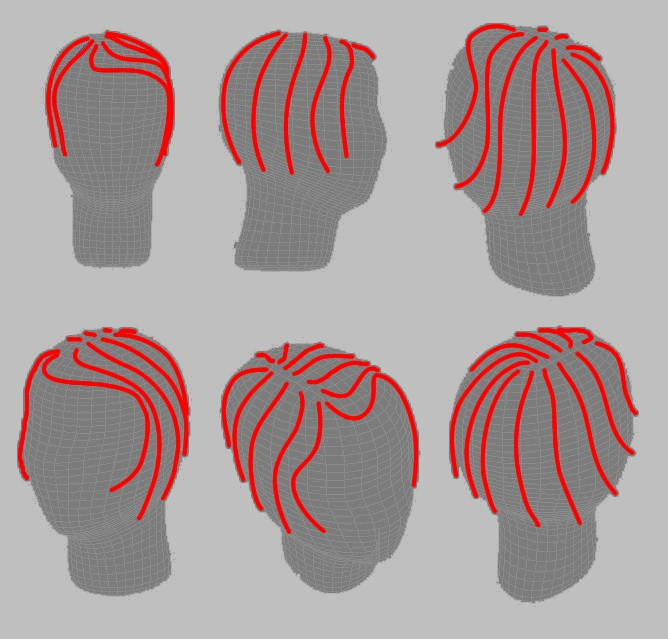
- Continue
adding splines. Start the next one a little further back from the first.
Likewise for the third and fourth. Continue around the back, always placing
the spline base points along the parting line of the hair. use the following
image as a reference.
Adjust
the spline cage
-
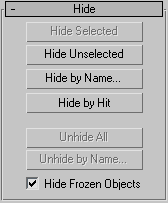
 Go to
the Display panel. In the Hide rollout, turn on Hide Frozen Objects.
This hides the head object from the scene.
Go to
the Display panel. In the Hide rollout, turn on Hide Frozen Objects.
This hides the head object from the scene.
-
 Select
the first spline you created: Line01, and
then go to the Modify panel.
Select
the first spline you created: Line01, and
then go to the Modify panel. - From
the Geometry rollout, click the Attach button.
- Attach
the splines sequentially, moving clockwise around the head. The sequential
order of splines in the spline cage is very important for the hair modifier
to work properly.
NoteThe
names of the individual splines are not important to this step. What
is important is the order in which you attach them.
-
Go back
to the Display panel and turn off Hide Frozen Objects.
-
With
the spline cage selected, go to the Modify panel and rename the
object Hair.
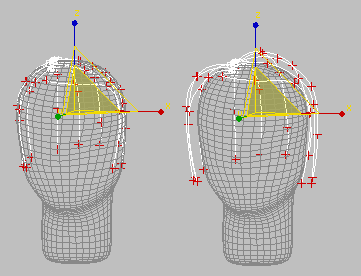
- Go
to the Vertex sub-object level. Looking at the top of the head,
select all the first vertices representing the hair roots.
- Press Ctrl+I to invert the selection.
-

 From
the main toolbar, choose the Scale tool and set the scale pivot
to Use Selection Center
From
the main toolbar, choose the Scale tool and set the scale pivot
to Use Selection Center - Scale
the selection up so that the splines flow more naturally around
the head.
- Adjust
the individual vertices so they fit the shape of the head nicely, floating
just above the mesh. Make the necessary adjustments to follow the
design of the hairdo you have set yourself to achieve. If necessary,
click Refine to add vertices to the splines, and then shape the
spline cage with more detail.
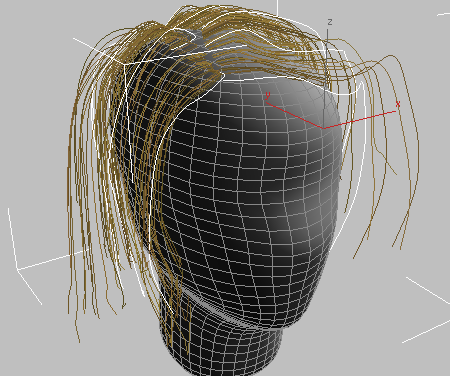
Generate
the hair:
- Continue
working on your file or open the file spline_emitter_hair.max
- With
the Hair object selected, apply a
Hair And Fur (WSM) modifier.
Adjust
the hair settings:
The settings described in the following steps
were arrived at through experimentation. You might find other settings
that work better for your hair, so feel free to experiment yourself,
and revise the suggested values.
- Open
the General Parameters rollout and set these values:
These settings control the number of hairs,
their curvature, and their size.
- Open
the Material Parameters rollout and set these values:
- Occluded
Amb. =0.0
- Tip
Color = dark brownRGB (34,28,13)
- Tip
Color = dark brownRGB (29,24,11)
- Hue
Variation =15
These settings control the material properties
of the hair, such as color and shininess.
- Open
the Frizz Parameters rollout and set this value:
This setting adds a certain amount of noise
to the root of the hair, making it look denser and more natural.
- Open
the Multi Strand Parameters rollout and set these values:
- Count
=5
- Root
Splay =0.85
- Randomize
=15
These parameters add a certain amount of clumping
to the rendered hair.
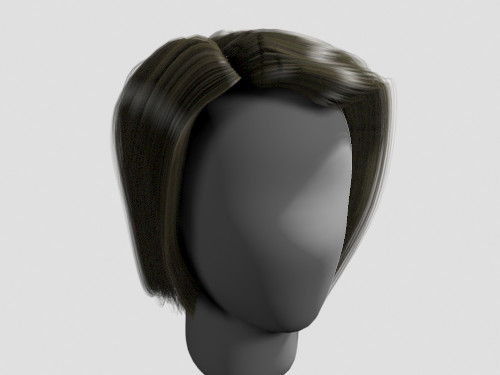
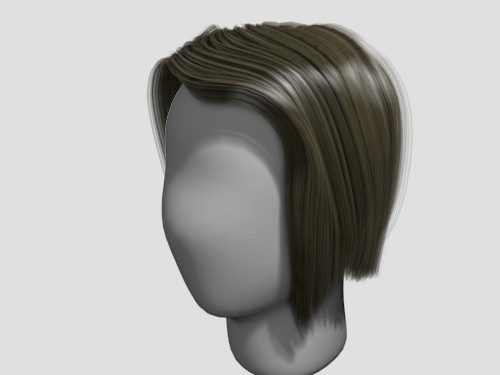
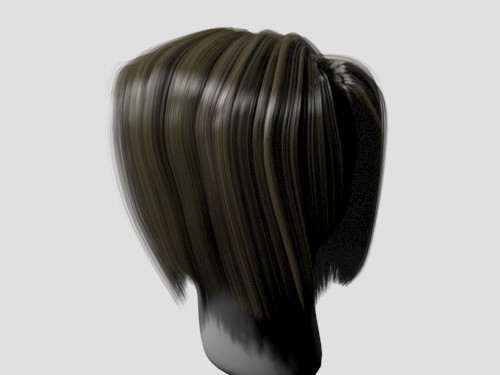
Render
the hair:
- Render
the hair in the Perspective viewport.
If you have time, try rendering the hair from
various angles.
To see our final results, open the scene spline_emitter_final.max. Your results
might differ significantly; there are many variables in projects
like this.
Also if you have time, try adjusting spline
vertices to further style the hair. Notice that as you adjust the
splines, the display hairs in the viewports are updated interactively.