


Autodesk 3ds Max Tutorials > Modeling Tutorials > Modeling a Low-Poly Character > Modeling a Low-Poly Head >
Creating the Ears
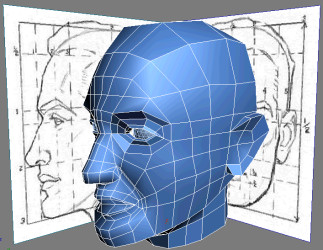
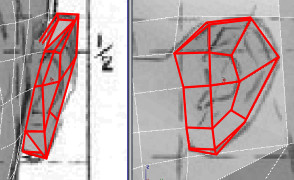
In this lesson, you take a minimalist approach to modeling the ears by using very rough shapes. This is one area that is often voluntarily simplified by choosing simplicity over needs. When your character is geared towards game production, a detailed texture converted into a normal map can be an alternative to achieve the same results.
Extrude the ears:
 Go into
Polygon sub-object level. On the Edit Geometry rollout, click Cut
and draw a series of edges around the tragus and ear canal.
Go into
Polygon sub-object level. On the Edit Geometry rollout, click Cut
and draw a series of edges around the tragus and ear canal.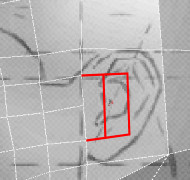
This gives the ear its volume.
Next, you'll expand and shape it to match the reference image.
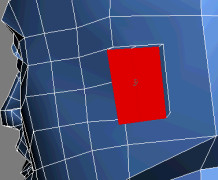
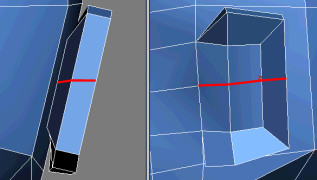
Each selected polygon is extruded along its respective normal. This defines the general mass of the ear.
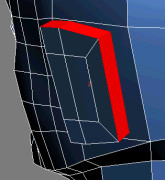
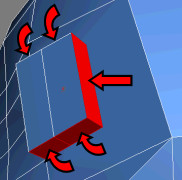
 Keep
your current polygon selection and move it slightly away from the
head.
Keep
your current polygon selection and move it slightly away from the
head.
Refine the ears:
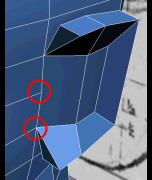
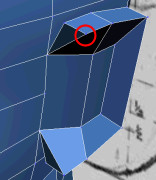
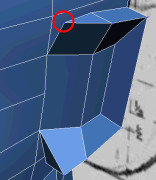
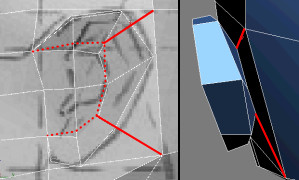
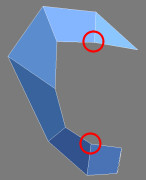
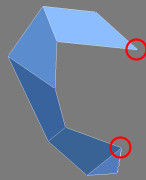
 Go into
Vertex sub-object level. Click Target Weld and merge down the ear
vertex highlighted in the following image:
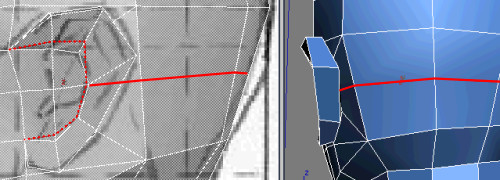
Go into
Vertex sub-object level. Click Target Weld and merge down the ear
vertex highlighted in the following image:|
|
|
|
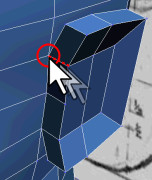
Before Target Weld
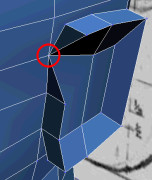
After Target Weld
|
|
|
|
Before Target Weld
After Target Weld
|
|
|
|
|
|
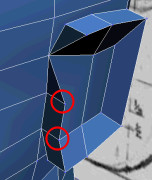
Before Target Weld
After first Target Weld
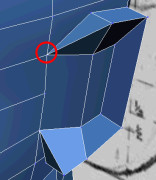
After second Target Weld
This breaks down the head polygons into manageable quads (four-sided polygons).
|
|
|
|
Before Target Weld
After Target Weld