Autodesk 3ds Max Tutorials > Modeling Tutorials > Modeling a Low-Poly Character > Modeling a Low-Poly Head >
Refining the Head and Neck

In this lesson, your progressively expand the face's edge loops towards the back of the head and then cover the neck. You can always come back afterwards and add a hairline to give your character more personality.
Refine the head volume:
 Go into
Vertex sub-object level, and then on the Edit Geometry rollout,
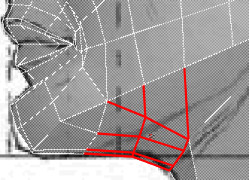
click Cut and extend the cheek, eye, and forehead edges to the side
of the head.
Go into
Vertex sub-object level, and then on the Edit Geometry rollout,
click Cut and extend the cheek, eye, and forehead edges to the side
of the head.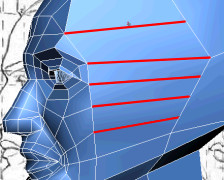
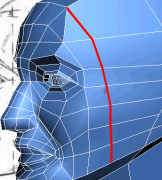
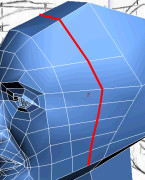
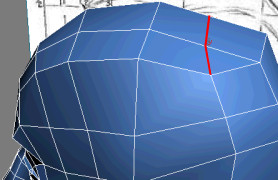
 Go into
Edge sub-object level, and then select the forehead edge that does
not match the face's circular edge flow.
Go into
Edge sub-object level, and then select the forehead edge that does
not match the face's circular edge flow.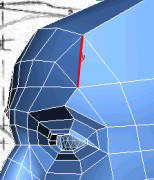

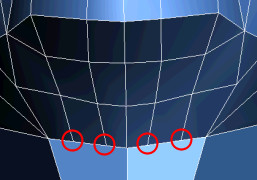
Go into
Vertex sub-object level and reposition the new vertices to match
the width of the head in the reference images.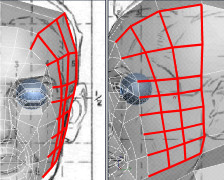
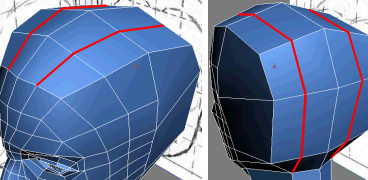
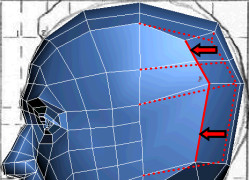
Go into
Edge sub-object level. On the Edit Geometry rollout, choose Face
from the Constraints drop-down. Select
the edges from the outside row of the back of the head and move
them on the Y axis towards to the ears.
Select
the edges from the outside row of the back of the head and move
them on the Y axis towards to the ears.Note that the face constraint helps retain the skull volume.
Go into
Vertex sub-object level and adjust the vertices to refine the head's
volume and retain an uniform spacing between polygons.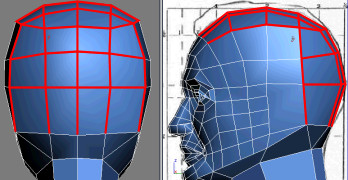
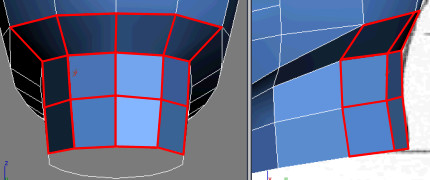
Refine the neck:

This removes unnecessary edges while retaining the neck volume. Also when you need to connect objects together (for example, this head with its body), synchronizing each object's polygon count facilitates the bridging process.
|
Before using Target Weld |
|
After using Target Weld |
Before using Target Weld
After using Target Weld
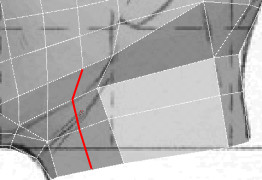
Go into
Edge sub-object level, then select an unnecessary edge located near
the jugular vein.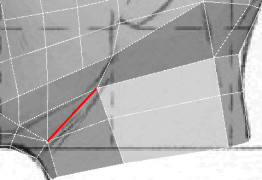
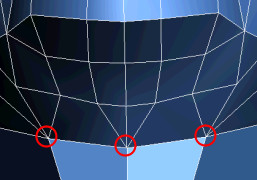
Go back
into Vertex sub-object level and reposition the vertices to equalize
their spacing and alignment.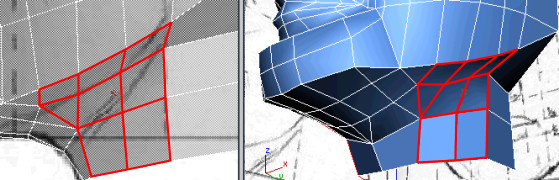

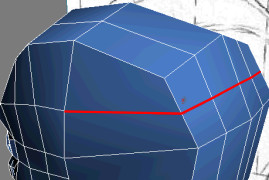
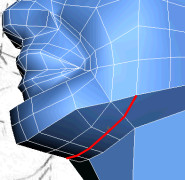
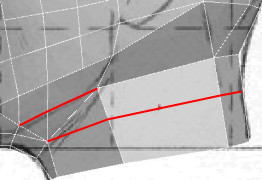
Go into
Edge sub-object level, and then select the diagonal edge that does
not match the surrounding edge flow.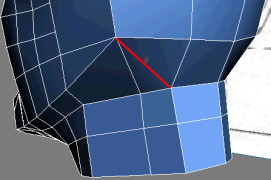
Go back
into Vertex sub-object level and adjust the vertices to round out
the back of the neck.