Creating the Eyes

Modeling a Low-Poly Head

Refining the Head and Neck

Refining the Forehead, Chin, and Cheeks
This
lesson unfolds into three sections. You first add more details to
the forehead, then the chin, and finally the cheeks. You'll orient
the edge loops progressively to interconnect these regions.
Remember the importance of keeping your geometry
uniformly spaced to prevent stretching in later stages of production
such as UV texturing and skinning.
Refine
the forehead:
- Continue
working on your file from the previous exercise, or load the file Low_Poly_Head04.max found under \tutorials\low_polygon_modeling.
-
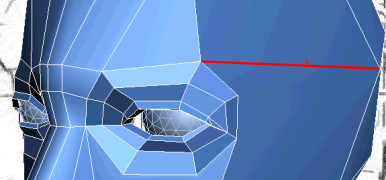
 Go into
Edge sub-object level, then select the edge linking the eye muscles
to the temporal bone on the side of the head.
Go into
Edge sub-object level, then select the edge linking the eye muscles
to the temporal bone on the side of the head.
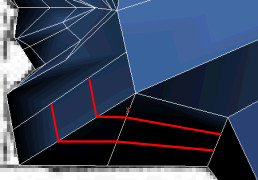
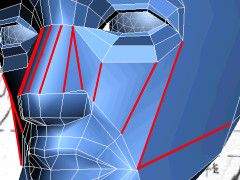
- Click
Remove on the Edit Edges rollout to delete it.
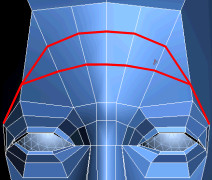
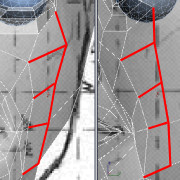
- Click
Cut and, in the Front viewport, draw a series of edges to define
the forehead.
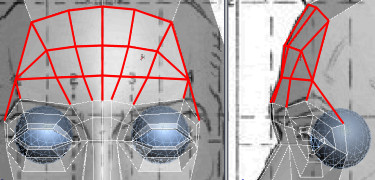
-
 Go into
Vertex sub-object level and adjust the new vertices in both the
Front and Right viewports to match the forehead as well as the skull
volume underneath.
Go into
Vertex sub-object level and adjust the new vertices in both the
Front and Right viewports to match the forehead as well as the skull
volume underneath.
Refine
the chin:
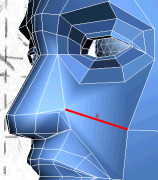
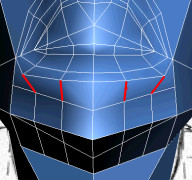
- Select
the cheek vertex as well as the one shaping the top of the nostril.
On the Edit Vertices rollout, click Connect.
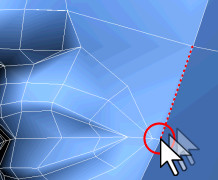
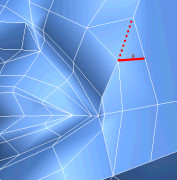
- Click
Target Weld and select the cheek vertex. Then, move your cursor
towards the one below it.
Notice the dotted line linking the selected
vertex to your cursor.
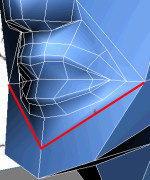
- Select
the vertex below the one you previously selected to complete the
welding operation.
This starts the mouth crease, which is crucial
to portray emotions.
- Click
Target Weld once more or right-click in the active viewport to exit
the Weld tool.
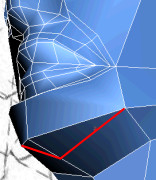
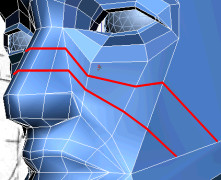
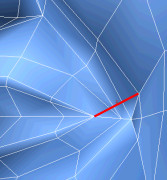
- Click
Cut and connect the mouth crease edge to the vertical chin edge.
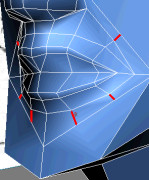
- Following
the same technique, link the outer mouth edge loop to the mouth
crease edge loop through the remaining vertices.
- Adjust
the vertices to match the circular edge flow originating from the
mouth.
- On
the Edit Geometry rollout, choose Edge from the Constraints drop-down.
- In
the Right viewport, pull back the vertex currently in the chin area
until it follows the curvature of the mouth crease. You need to
translate the vertex on both the X and Y axes using the Move transform
gizmo.
- Choose
None from the Constraints drop-down.
- Use
the Cut tool to connect that same vertex to the edge under the chin.
This completes another edge loop.
-
Go into
Edge sub-object level and select the vertical edges linking the
lower lip to the chin.
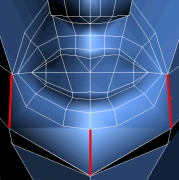
- Click
Connect to create a joining edge between them.
- In
the Right viewport, select the four edges defining the chin and
throat.
- On
the Edit Edges rollout, click the Connect Settings button. In the
Connect Edges dialog, set Segments to 2. Click OK.
-
Go back
into Vertex sub-object level and, using either the Cut or Connect
tool, connect the vertices between the mouth's lower edge loop and
the chin's upper edges.
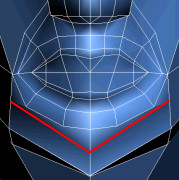
- Adjust
the new vertices to round up the chin while maintaining the circular
edge loops.
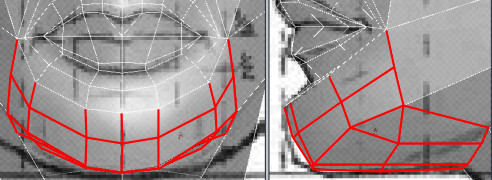
Refine
the cheeks:
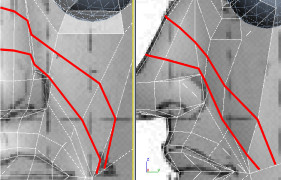
- Click
Cut and draw new edges to link the vertices from the mouth crease
to the eye's lower edge loop.
-
Go into
Edge sub-object level and select the edges covering the nose and
cheeks. Although they are not parallel, they are running in the
same direction.
- Click
the Connect Settings button. In the Connect Edges dialog, set Segments
to 2. Click OK.
Do not worry if the resulting edges do not run
smoothly across the face.
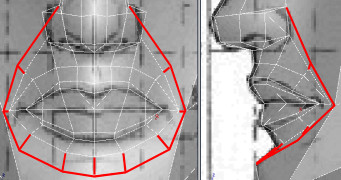
-
Go into
Vertex sub-object level and move the resulting vertices to recreate
the bump in the nose, build up some volume in the cheeks, and emphasize
the mouth crease.
- Use
either the Cut or Connect tool to complete the edge loops by linking
the remaining vertices together.
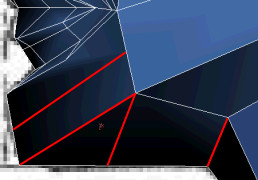
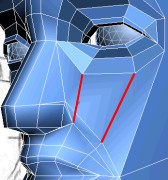
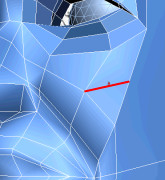
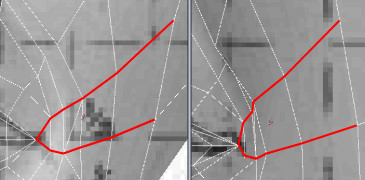
- Make
a cut to divide the outer cheek's polygon in half.
The cheek's last edge loop originates at the
corner of the eye and ends at the jaw line.
- Draw
two new edges to link the last cut to the jaw line.
-
Go into
Edge sub-object level and remove the obsolete edge. Then, replace
it with a new one to connect to the cut from the previous step.
-
Go back
into Vertex sub-object level and adjust the resulting vertices to
define the zygomatic bone.
Reconstruct
the mouth corner:
Now that you have established the major edge
loops around the mouth and cheeks, you will go back and change some
edges to clean up the mouth crease's edge loops.
- Click
Cut and make a straight cut from the corner of the mouth to the
mouth crease's outer edge loop.
- Click
Target Weld and merge two vertices located near the lips.
- Adjust
the respective vertices to align the edges so they match the other
neighboring loops.
- Select
the diagonal edge and click Remove on the Edit Edges rollout.
- Save
your file as My_Low_Poly_Head_Forehead_Chin_Cheeks.max