Autodesk 3ds Max Tutorials > Modeling Tutorials > Modeling a Low-Poly Character > Modeling a Low-Poly Head >
Creating the Nose
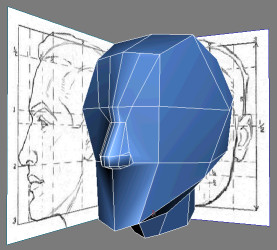
In this lesson, you start adding new divisions in the center of your mesh to shape up the nose and nostrils. As the central element in a character's face, it's important to properly establish the nose's proper edge flow that will eventually link to the forehead, eyes, and mouth.
Whenever possible, try to always use quads (four-sided polygons) and avoid polygons that have five or more sides. Maintaining quad topology results in cleaner geometry, as opposed to polygons of five or more sides, which produce unpredictable results when comes the time to subdivide, texture, or skin your model.
Define the nose:
 Go to
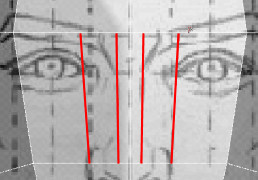
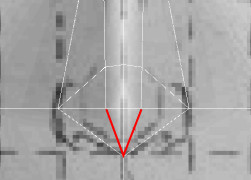
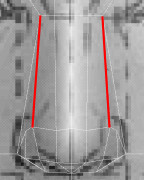
Edge sub-object level and, in the Front viewport, select the horizontal
edges at the eyebrow and nose levels.
Go to
Edge sub-object level and, in the Front viewport, select the horizontal
edges at the eyebrow and nose levels.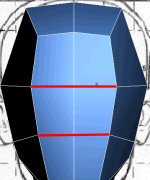
These will be useful later on.

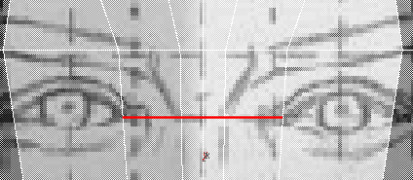
 Go to
the Vertex sub-object level and adjust the new vertices in both
Front and Side viewports to roughly follow the nose shape.
Go to
the Vertex sub-object level and adjust the new vertices in both
Front and Side viewports to roughly follow the nose shape.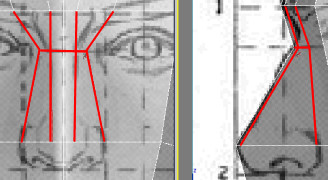

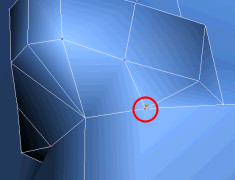
Define the outer nostrils:
Go to
the Edge sub-object level and select the three edges that roughly
define the outer nostril.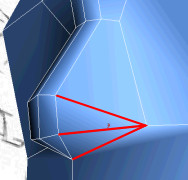

Go to
Vertex sub-object level and click Target Weld on the Edit Vertices
rollout to enable the Weld tool.Notice the dotted line from the selected vertex, which indicates the welding order.
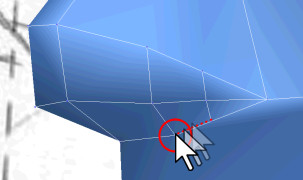
This welds both vertices together.
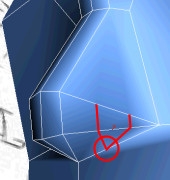
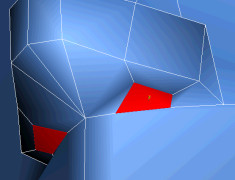
Go to
Edge sub-object level and then click Insert Vertex on the Edit Edges
rollout.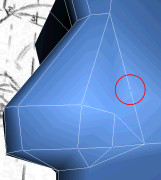
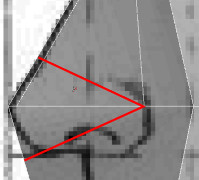
Go back
to the Vertex sub-object level and connect the three neighboring
vertices that define the outer nostril.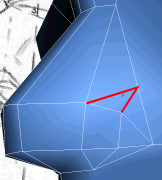

Taking it Further — Refine Nostril Channels
Use the tools and techniques learned in this lesson to create the nostrils. For example, you could chamfer the main nostril vertex into a polygon, and then extrude that polygon using a negative value to shape the nostril cavity.
|
Select the main nostril vertex. |
|
Chamfer it |
|
Extrude the resulting polygon. |
As an alternative, you can also use a texture or vertex coloring to simulate the nostrils.