The plane is starting to look like a P-38, but it's missing the central gondola, the pilot cockpit. You will create the gondola using the same techniques you learned when you shaped the sponson. To ensure that the gondola is symmetrical, you'll use the Symmetry modifier.
Load a start file:
Create the gondola:
 Go to the Create panel,
and on the Object Type rollout, click to turn on Cylinder.
Go to the Create panel,
and on the Object Type rollout, click to turn on Cylinder.If you're continuing from the previous lesson, make sure AutoGrid is turned off.
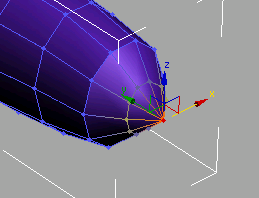
Watch in the Top viewport as you drag the height of the cylinder, since the Front viewport will not show any difference.
 If necessary,
move the gondola object in the Top viewport so the top lines up
with the trailing edge of the wing.
If necessary,
move the gondola object in the Top viewport so the top lines up
with the trailing edge of the wing.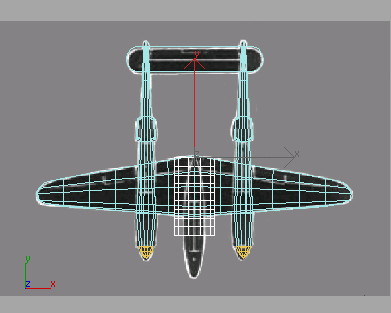
Line up the cylinder with the trailing edge of the wing.
 On the Modify panel, adjust
the height of the cylinder so it is even with the end of the sponsons,
as illustrated below.
On the Modify panel, adjust
the height of the cylinder so it is even with the end of the sponsons,
as illustrated below.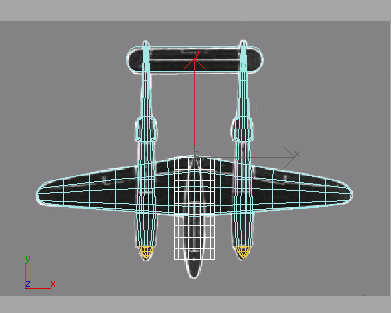
Start with a cylinder.
Shape the gondola:
 Go to the Display panel,
and hide everything but the gondola by clicking Hide Unselected
in the Hide rollout. Go to the Modify panel.
In the modifier stack, right-click Cylinder and choose Convert To:
Editable Poly.
Go to the Display panel,
and hide everything but the gondola by clicking Hide Unselected
in the Hide rollout. Go to the Modify panel.
In the modifier stack, right-click Cylinder and choose Convert To:
Editable Poly.Now you can reposition the vertices over the background images.
 On the Selection rollout,
click Vertex.
On the Selection rollout,
click Vertex.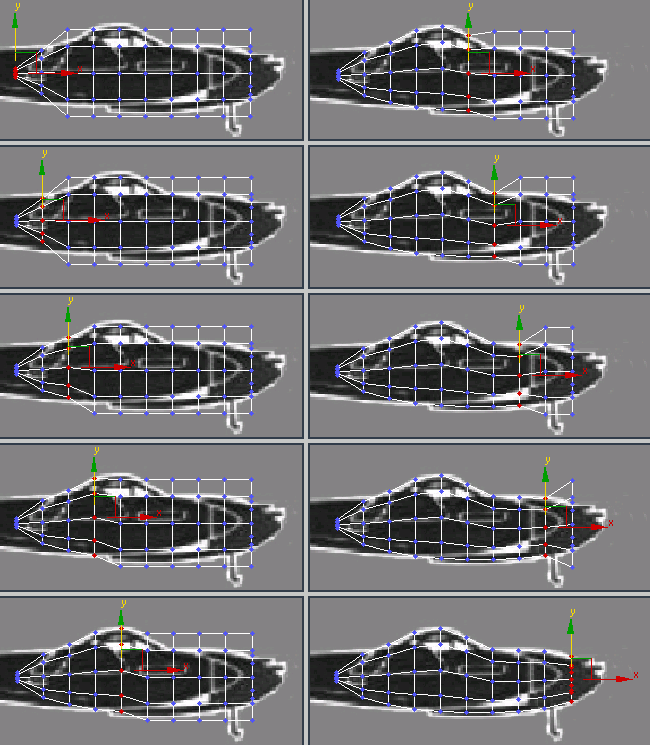
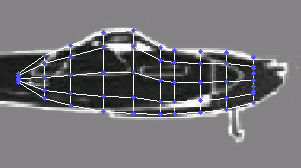
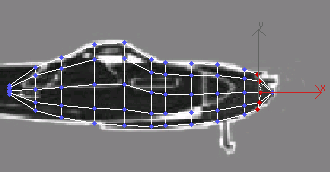
Scale and move the vertices to match the background.
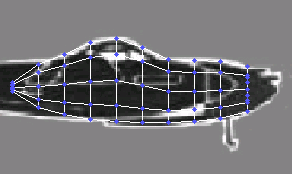
Placement of vertices from Left viewport.
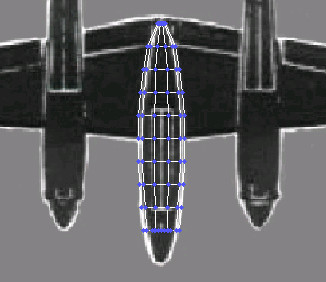
Vertex scaling and placement from the Top viewport.
The 4th, 5th and 6th columns of vertices are moved and scaled.
You might also have to select the gondola and wing and move them up.
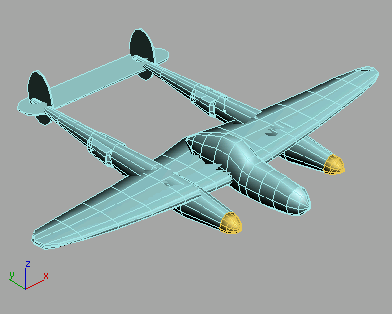
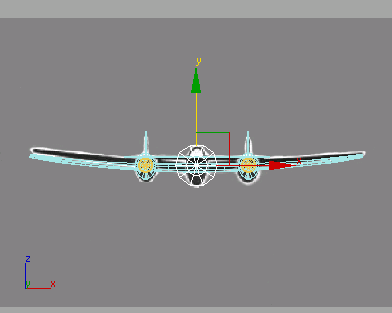
P-38 with gondola
You can create the canopy using a couple of editable poly tools. You'll cut and chamfer to create this detail of the cockpit.
Add the canopy:
 On the Selection rollout,
click Edge, then turn on Ignore Backfacing.
On the Selection rollout,
click Edge, then turn on Ignore Backfacing.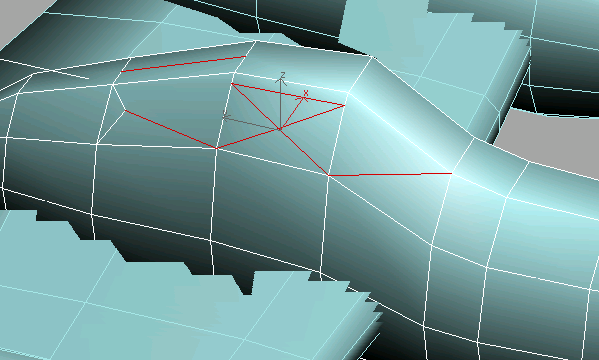
Cut these new red edges to form one side of the cockpit.
 Arc
Rotate the view and make the same cuts on the other side of the
cockpit.
Arc
Rotate the view and make the same cuts on the other side of the
cockpit.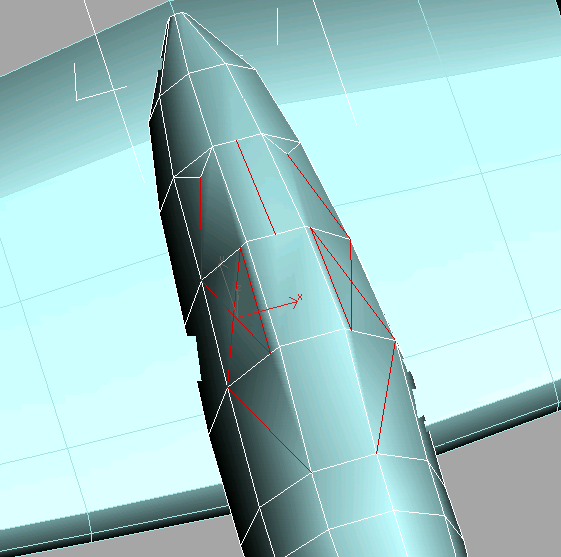
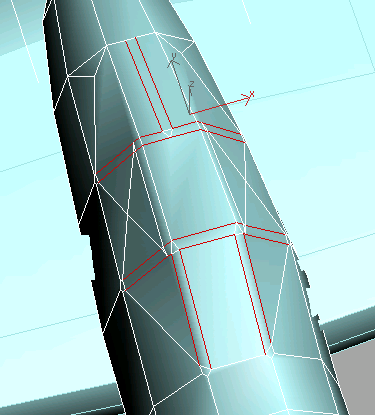
All these edges should be cut.
Now, you can chamfer edges to create the metal frame of the canopy.

Select these red edges.
Chamfer edges to create the metal canopy frame.
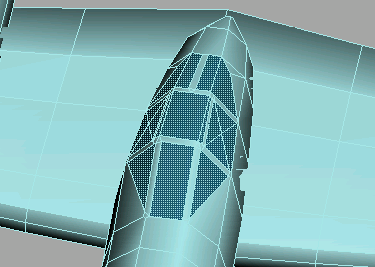
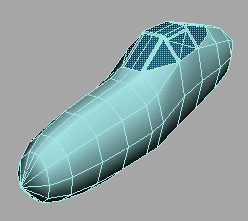
P-38 gondola with completed canopy.
Make sure the gondola is symmetrical:
The Symmetry modifier has been added to 3ds Max specifically for the purpose of building symmetrical models such as airplanes, boats and characters.
In the previous section, you cut a lot of edges to make up the canopy frame and glass. Some of those new edges may not be the same on either side of the gondola. Using the Symmetry modifier will ensure that the gondola is symmetrical.
You can continue from the previous section of open p38_lightning.max.
 Open
the Modify panel and turn on Element mode and select the gondola.
Open
the Modify panel and turn on Element mode and select the gondola.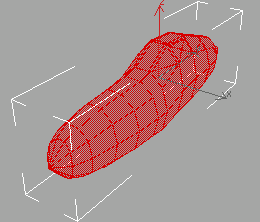
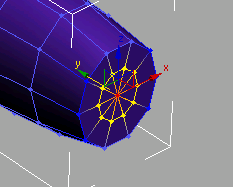
The selected element in red.
The gizmo appears, but it's not in the right orientation.
 Click
the Select and Rotate button from the toolbar and enter 90 in
the Z coordinate field below the time bar.
Click
the Select and Rotate button from the toolbar and enter 90 in
the Z coordinate field below the time bar.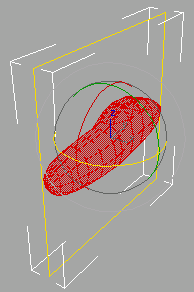
The slice gizmo is rotated correctly.
If necessary,
move the gizmo left or right so it's centered on the gondola. Turn
on Polygon mode and in the Top viewport drag a selection window
around the right side of the gondola.
Turn
on Polygon mode and in the Top viewport drag a selection window
around the right side of the gondola. In the
Selection rollout, make sure Ignore Backfacing is turned off and
maximize the Top viewport when dragging the selection window.
In the
Selection rollout, make sure Ignore Backfacing is turned off and
maximize the Top viewport when dragging the selection window.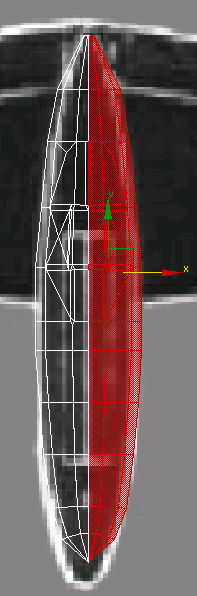
Half the gondola is selected.
 Turn
off Polygon mode and choose Symmetry from the Modifier List.
Turn
off Polygon mode and choose Symmetry from the Modifier List.The Mirror gizmo appears at the gondola's pivot point.
The new half is created and it is automatically welded.
The whole gondola
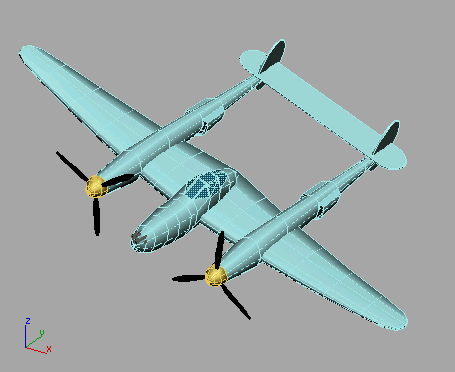
Propellers and machine guns added


