


Autodesk 3ds Max Tutorials > Materials and Mapping Tutorials > Introduction to Materials and Mapping >
Creating Multi/Sub-Object Materials
When you want to apply two or more materials to an object, you use a Multi/Sub-Object material. This is a material type can contain up to 1,000 different materials, each identified by a unique number called a material ID. By assigning different material IDs to discrete selections of faces, you control where each material will appear when the parent Multi/Sub-Object material is applied to the object.
In this exercise, you'll create the material automatically by dragging and dropping onto sub-object selections.
Create Multi/Sub-Object materials using drag and drop:
The viewport now displays all the geometry in wireframe.
The bottle alone is shaded. At the top of the Modify panel, the object name bottle with label is displayed in boldface to indicate that this is a group.
The grouping is temporarily suspended so you can manipulate the members of the group individually.
The label becomes shaded.
The label is hidden from view. Now you can work just with the bottle.
The name of the object is bottlewithcork.
Assign material IDs:
In order to assign material ID numbers to different parts of an object you must first make a sub-object selection of faces or polygons. Since the bottle is already an Editable Poly object, sub-object selection tools are available in the Modify panel.
 On the
Modify panel, access the Polygon sub-object level by clicking the
Polygon selection icon.
On the
Modify panel, access the Polygon sub-object level by clicking the
Polygon selection icon.The selected polygons turn red in the viewport.
If the selected polygons don’t turn red, right-click the Camera viewport label and choose Configure. In the Viewport Configuration dialog > Rendering Method tab > Rendering Options group, turn on Shade Selected Faces.
Everything except the cork is now selected for the glass.
The bottle turns bright green.
Turn
off Polygon selection.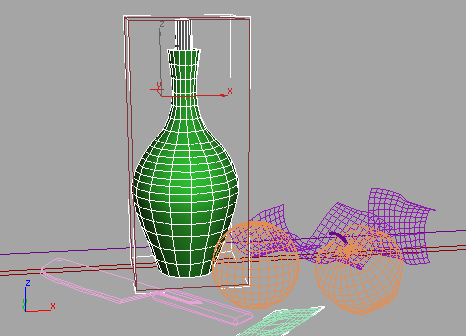
Add the new material to the Material Editor:
As a result of your placing different materials on different polygon sub-object selections, 3ds Max automatically created a new Multi/Sub-Object material in the scene. To work on this material, you'll need to load it into the Material Editor.
 Click
Pick Material From Object.
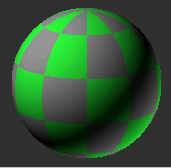
Click
Pick Material From Object.The Multi/Sub-Object material is transferred to the Material Editor. Both materials are displayed on the same sphere.
The Material Editor moves to the level of that material and displays its parameters. The sample sphere now shows only the single material.

 Click
the Go To Parent button.
Click
the Go To Parent button.