


Adding the Posts Using Hose Objects
You can build the posts using an extended primitive called a Hose object. This makes it simple to create nice looking posts.

Now you can adjust the hose parameters to modify its appearance.
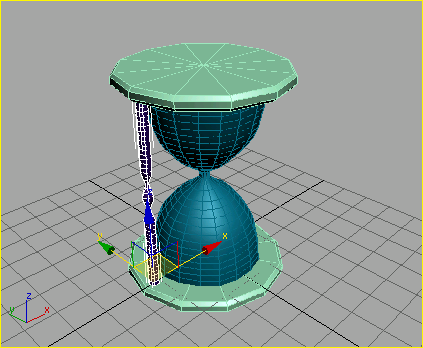
Hose object used to create a post
With the post created, you can now clone it using one of several ways. In this case you'll align the hose object's pivot point to match the pivot point of the chamfer cylinder. Then you'll use Shift+Rotate to create the other posts.
The pivot is now positioned as shown in the following illustration.

Align the hose pivot with the chamfer cylinder.
 On the
toolbar, turn on Select And Rotate. Hold down the Shift key and move your cursor over
the Transform gizmo for the post (displayed where the new pivot
is located). When the Z axis ring turns yellow, rotate the post.
As you move the mouse, watch the coordinate display until it reads
90 degrees, then release the mouse button.
On the
toolbar, turn on Select And Rotate. Hold down the Shift key and move your cursor over
the Transform gizmo for the post (displayed where the new pivot
is located). When the Z axis ring turns yellow, rotate the post.
As you move the mouse, watch the coordinate display until it reads
90 degrees, then release the mouse button.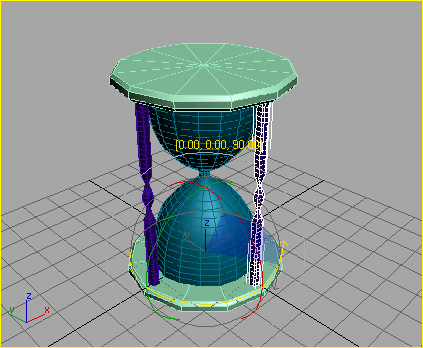
Rotate the hose 90 degrees.
Four posts are now displayed in the viewport.
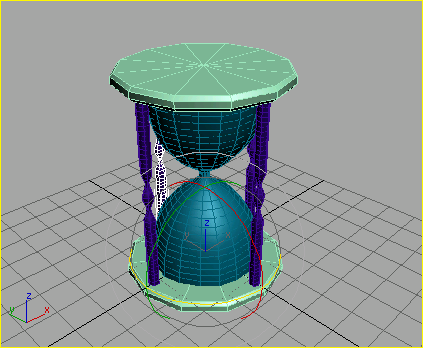
Clone using Shift+Rotate.
Now that you've built a basic hourglass, you'll add some materials to give it some realism. After making the glass chamber transparent, you'll create the sand contained within the chamber.