


Autodesk 3ds Max Tutorials > Character Animation Tutorials > Character Animation without Biped > Skinning >
Adding Realism with Secondary Motion
One of the principles of traditional animation is the use of secondary motion. The illusion of weight and realistic movement is greatly improved by having the extremities of an object continue moving after the central moving object stops. For example, a car slams on the brakes, comes to an abrupt stop, and the car antenna continues to wiggle.
In this topic, using the Flex modifier, you will animate secondary motion with the antennae on a beetle's head.
Add secondary motion with the Flex modifier:
First, you’ll animate the beetle's head so he looks in one direction and then another.
 Turn
on Auto Key.
Turn
on Auto Key.If you want to be precise, press F12 to open the Transform Type-In, and offset it by −70.0 degrees around Z.
Next, you'll adjust the interpolation on the last rotation key for a more abrupt motion.
Set up the beetle head for secondary animation:
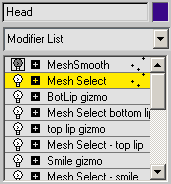
The Mesh Select modifier lets you use a soft selection for the Flex modifier, so the effect of the modifier on the mesh will taper off gradually.
 Choose
Vertex selection mode.
Choose
Vertex selection mode.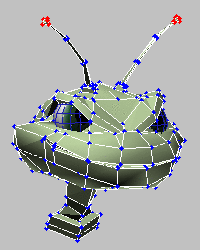
Choose the end vertices only.
The vertices change color showing the area of influence to be used by the Flex modifier.
Soft Selection adds the eyebrows
This adds a Flex modifier only to the selection of vertices, rather than to the whole head.
![]()
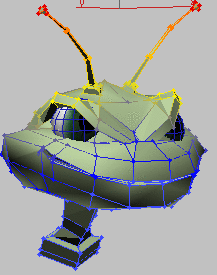
Move the Center of the Flex up to the forehead
The antennae have their own movement now. Watch the free secondary animation you’ve got in the last 70 frames of the animation. Imagine how much work that would be to keyframe by hand.
Experiment with the Flex modifier:
Different combinations of the three parameters can create different wiggles and wobbles. Also try lowering the Flex modifier's Center sub-object.
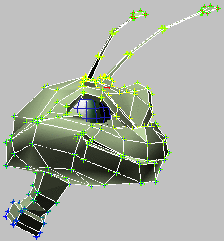
Flex modifier wobbles the antennae