


Autodesk 3ds Max Tutorials > Character Animation Tutorials > Character Animation without Biped > Skinning >
Working with the Angle Deformers
The Skin modifier's angle deformers control creases and wrinkles, as well as add muscle bulges and deformations. There are three kinds of angle deformers: Joint, Bulge, and Morph.
Angle deformers work by telling vertices how to behave when a certain angle is achieved between two adjacent bones. For example, you could use a bulge angle deformer to tell vertices in the upper arm to bulge when the elbow is bent greater than 90 degrees.
After the Skin modifier is applied, it is not uncommon for some joints to crease unrealistically when the character is animated. Angle deformers can correct these problems.
Set up the lesson:
Around frame 15, the inside of the elbow is compressed.
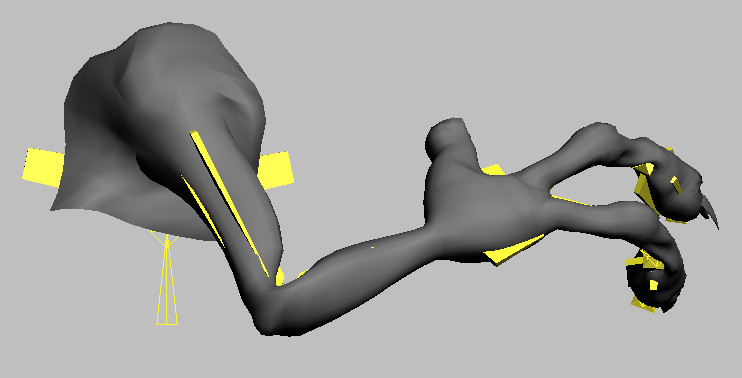
The arm flexes.
This unrealistic deformation can be corrected with a joint angle deformer. You'll also use a bulge angle deformer to add a slight bulge to the upper arm when the elbow is bent.
This bone's rotation will control the deformer.
Add a joint angle deformer:
The process to add an angle deformer consists of two steps. First, you select the bone envelope, and then select the vertices to be deformed. Once that is accomplished, you can add the gizmo for the deformer.
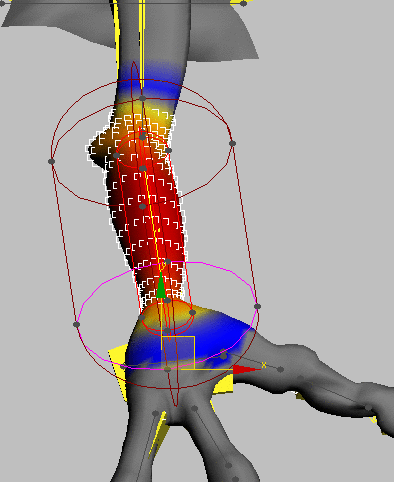
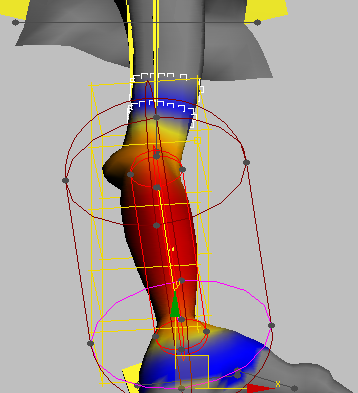
Lower-arm vertices selected
With the bone and vertices selected, now you can add an angle deformer gizmo.
 On the
Gizmos rollout, make sure Joint Angle Deformer is selected, then
click Add Gizmo.
On the
Gizmos rollout, make sure Joint Angle Deformer is selected, then
click Add Gizmo.The new gizmo appears in the viewport. This gizmo, called a lattice, is used to control the selected vertices.
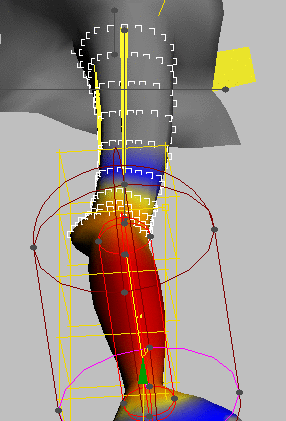
Deformation lattice displayed around selected vertices
Set the joint angle deformer:
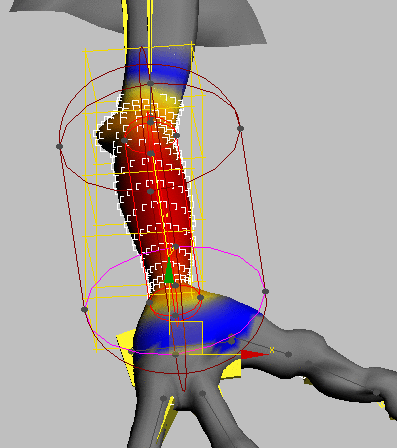
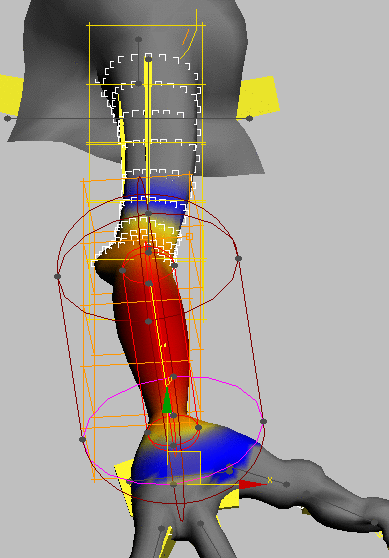
Flexed arm with deformation lattice
Angle deformers use the angle between bones to determine when the deformation will take place. Regular keyframes are not part of the deformation setup, so there is no reason to turn on Auto Key.
 Move
the lattice's control points to pull out the creased vertices on
the inside of the elbow.
Move
the lattice's control points to pull out the creased vertices on
the inside of the elbow.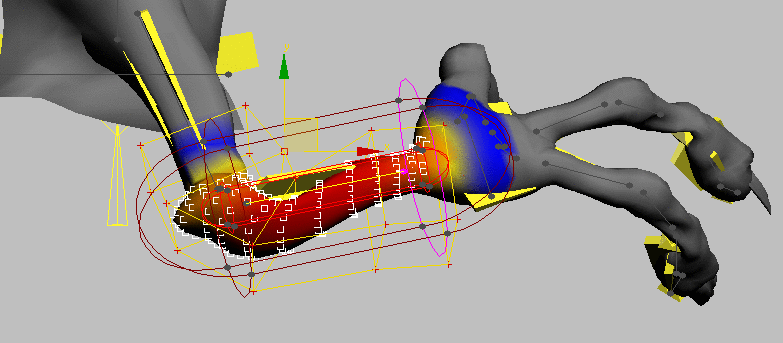
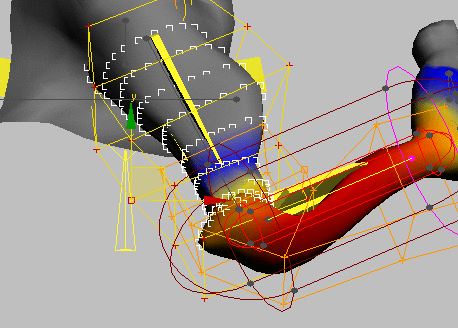
Elbow crease corrected
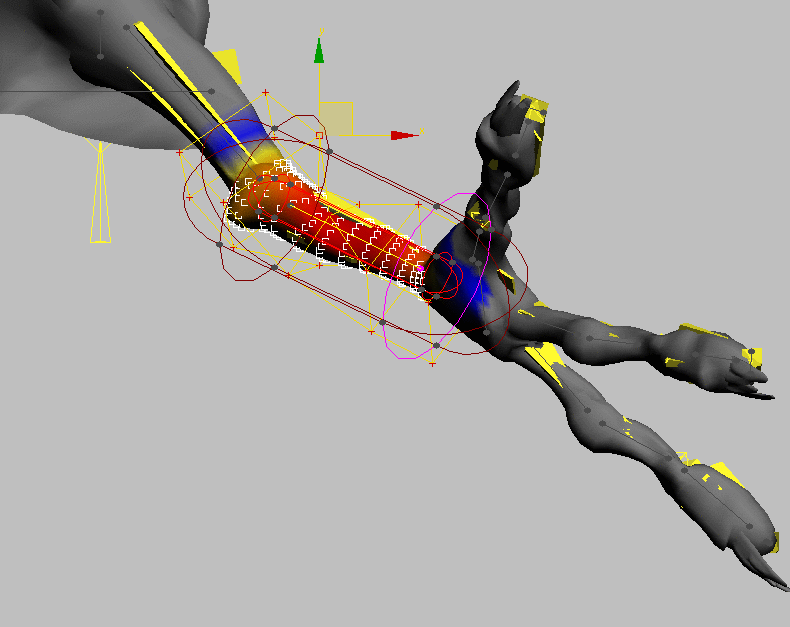
Outstretched arm with elbow corrected
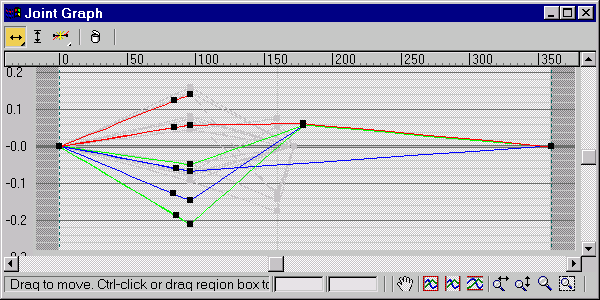
You can use this joint-angle graph to remove or change lattice edits. You can also adjust the easing by using the Bezier handles on the graph points, much as you do for key timing in the Curve Editor.
Next, you'll add a Bulge Deformer to make the biped grow as the arm bends
Add a bulge angle deformer:
Initial vertex selection
Loop button changes selection to loop around the arm.
The Loop and Grow buttons, along with Ring and Shrink, are vertex-selection tools. Ring is like Loop, but selects along the opposite UV axis. Shrink is the complement of Grow: it reduces the size of the selection.
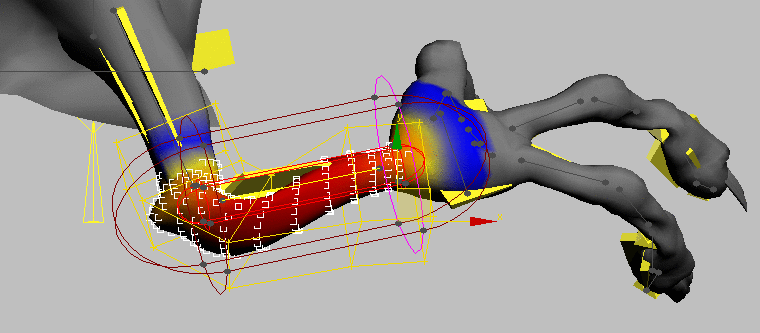
Grow used to select all upper-arm vertices
Once
you have the correct vertices selected, choose Bulge Angle Deformer
from the list on the Gizmos rollout, and click Add Gizmo.The new gizmo is displayed in the viewport.
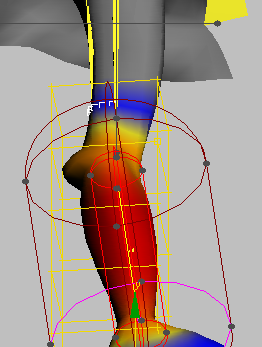
Bulge Angle lattice displayed over upper arm
Bulge Angle lattice used to create a bulging bicep