


Autodesk 3ds Max Tutorials > Character Animation Tutorials > Biped Beyond the Basics > Working with Motion-Capture Data >
Comparing Trajectories
In this lesson, you'll learn to use trajectories to visualize and manipulate motion capture data.
Set up this lesson:
This file was saved at the end of the last lesson.
Display and compare trajectories:
 On the
Motion Capture rollout, click Show Buffer Trajectory.
On the
Motion Capture rollout, click Show Buffer Trajectory.  In the
Biped rollout, open the expansion bar. In the Display group, click
Trajectories.
In the
Biped rollout, open the expansion bar. In the Display group, click
Trajectories.  In the
Display group, click Preferences.
In the
Display group, click Preferences.The Display Preferences dialog appears.
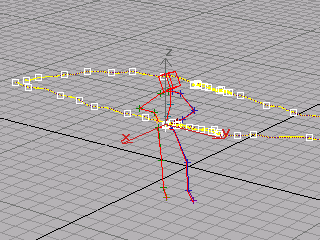
Now the trajectories display only 50 frames before and after the current frame. Notice that the trajectories between the buffered and filtered data are very close.
One is to filter the file normally, as you did in this lesson, and then paste the missing information using Paste From Buffer on the Motion Capture rollout.
You can also change Tolerance and Key Spacing parameters for less key reduction. Alternatively, you can import a motion capture file with no key reduction, and add a layer on the Layers rollout. This is an easy way to make changes to a file that contains keys at every frame.
Motion Capture calibration controls (the bottom row of buttons on the Motion Capture rollout) are active only if a raw motion capture file is imported with no key reduction. They are used primarily to calibrate marker (CSM) files, although they work with all raw motion capture data.
Marker files represent raw marker position data directly from a motion capture device, and typically require more work than the BVH or BIP motion capture files that ship with 3ds Max.
You can manage biped size and limb position relative to the markers with the two main calibration functions on the Motion Capture rollout: Talent Figure Mode and Adjust Talent Pose. The size and limb offsets are saved as FIG and CAL files, respectively. These files, as well as a marker name (MNM) file, can be loaded prior to importing a motion capture file to apply the size and limb offsets to marker files requiring the same adjustment.