Using Props


Props are objects that a biped might be carrying or swinging, such as a sword, spear, or “lightsaber”. They are parametric objects that are included as part of the biped skeleton, so that if you have motion capture data with prop information, there is a place for that information to reside. You can have up to three props saved with the biped.

Props have two parameters for Position Space and Rotation Space that can be keyframed. This makes it easy to have the prop follow the biped's hand, or to switch the prop from one hand to another.

Add a prop to an animated biped:

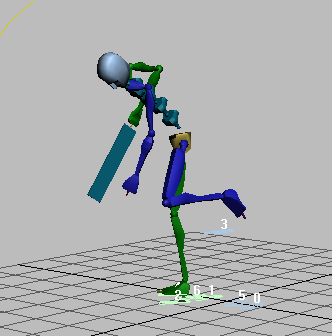
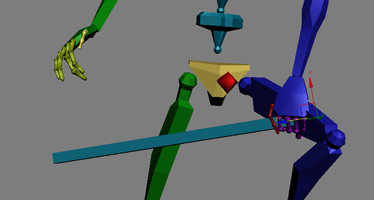
This procedure starts with a biped sawing a board. You'll create a prop to take the place of the saw.
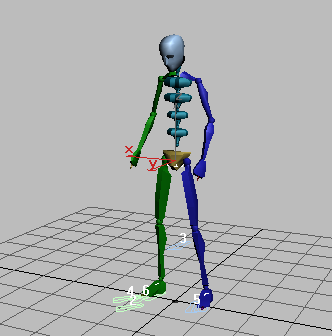
  1. Open saw_wood_start.max.

  2. Play the animation. The biped rests one knee on the invisible board, and saws it with an invisible saw.

  3. Select any part of the biped and open the Motion panel.
  4. On the Biped rollout, click Figure Mode.

    In the Perspective viewport, the biped shifts to a different position.

  5. To create a prop, open the Structure Rollout and turn on Props 1.

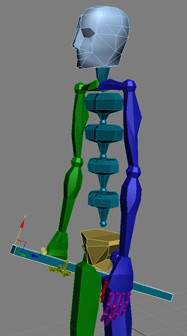
    The prop appears at the biped's right hand.

    To align and position the prop to the hand, you'll leave Figure mode and set a key for the prop.

  6. Turn off Figure Mode, and then select the prop in the viewport.
  7. Move the time slider to frame 0.
  8. In the Perspective viewport, rotate the prop approximately 152 degrees around the Y-axis.

    The rotation is displayed in yellow in the viewport, and in the Coordinate Display below the viewport.
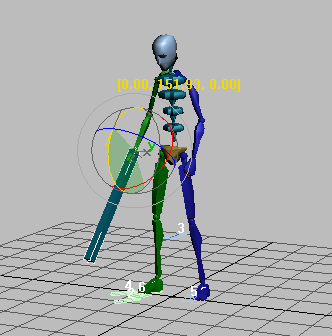
  9. On the Key Info rollout, click Set Key.
  10. Expand the Prop divider bar. In the Rotation Space drop-down list, choose Right Hand.

    This puts the prop in right-hand rotation space. As the right hand rotates, the prop will follow. Notice that you can't make changes here unless you have set a key.

  11. On the Main toolbar, click Select And Move, and then change the Reference Coordinate system to Local.
  12. In the Perspective viewport, move the prop along the Z-axis so it is slightly in front of the hand, then click Set Key again to keyframe the position of the prop.

  13. Play the animation. The prop follows the movement of the hand nicely.
  14. To make the prop more closely resemble a saw, turn on Figure mode and scale the prop so its proportions match those of a hand saw. Then turn off Figure mode and play the animation.

    If you like it, save your work to mysawingwood.max.

Animate props switching hands:

This procedure starts with a file of an animated biped. You'll add a prop, and then keyframe it to switch hands to follow the motion.

  1. Open samurai_start.max.
  2. Play the animation.

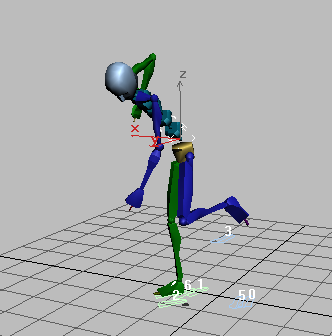
    The biped first holds his weapon in one hand and then swings it with the other.

    To create a prop you will go into Figure mode.

  3. In the viewport, select any part of the biped.
  4. Open the Motion panel, and on the Biped rollout, turn on Figure Mode.
  5. Open the Structure rollout and turn on Props 1.

    The prop appears in the viewport beside the biped’s right hand.

  6. Turn off Figure mode and play the animation.

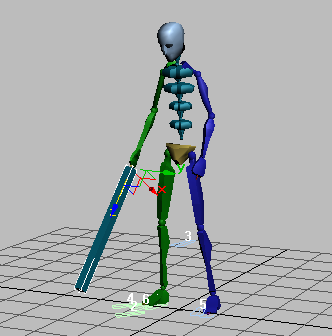
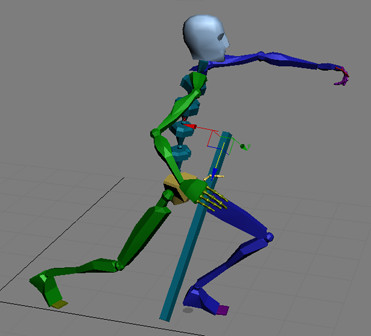
    The prop follows the movement of the pivot point of the right-hand wrist. To adjust the size of the prop, you can use the Scale transform.

  7. Turn on Figure mode and select the prop.
  8. On the Main toolbar, choose either Scale or Non-Uniform scale to change the size and proportions of the prop. Turn off Figure mode when you are through.
  9. Turn on Auto Key mode. Rotate the prop so it's perpendicular to the hand.

    Rotate and move the prop near the palm of the hand.

  10. On the Main toolbar, click Select and Move. Then in the Reference Coordinate drop-down list, choose Local. Move the prop on its local X and Y-axes so the prop is in contact with the palm of the hand. Make sure to leave enough room between the prop and the right thumb so the left hand can grab it as well.
  11. Make sure the prop is still selected, and then open the Key Info rollout.
  12. Expand the Props bar, and click Set Key so the Position Space and Rotation Space fields are accessible in the Props group.
  13. Using the drop-down list, change both Position Space and Rotation Space to Right Hand.
  14. Play the animation.

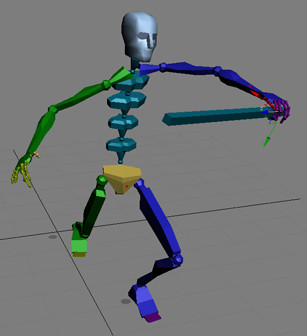
    The prop follows the movement of the right hand throughout the whole animation.

    Prop follows the right hand.

    Prop follows right hand for the entire animation.

    To make the biped switch hands, you can keyframe the Position and Rotation Space.

  15. Move to frame 74. The prop should still selected. In the Key Info rollout, click Set Key.

    This sets a key

  16. Move to frame 75, and click Set Key.

    This activates the Position and Rotation Space fields.

  17. Change Position Space and Rotation Space to Left Hand. Now play the animation.

    The prop follows the movement of the right hand until frame 75. It follows the movement of the left hand from 75to the end of the animation.

  18. Play the animation.

    The prop follows the movement of the hands correctly. The prop follows the right hand until frame 75, then switches and follows the left hand until the end of the animation.

    Prop follows the other hand.

  19. Depending on the length of the prop, you may find that it passes through the head or other body part. If this happens, you can keyframe the rotation of the hand so the prop avoids this intersection. You can also keyframe the prop independently of the hand, if needed.

    The prop may intersect the leg.

    Rotate the hand or the prop to correct.

  20. Save you work as mysamurai.max.

Next

Making the Biped Look at Objects