Animating a Freeform Walk Cycle

Animating with Freeform

Creating Animated Bones with Biped

Using Controllers with Biped
You can add controllers on top of Biped animations
to create a wide variety of effects. You can use scale controllers
to create stretchy legs or arms for cartoon animation, or create
the illusion of breathing by adding a scale controller on the spine
objects in the chest. You can add noise rotation controllers to
the spine to make a biped shake while he walks, or to create twitching
or random motion in the limbs or head.
Controllers can be added in the Motion panel,
Assign Controllers rollout, or by using the Workbench.
Although this lesson is performed with footsteps,
it could have been accomplished just as easily with a freeform animation.
Create
stretchy legs with controllers:
In this exercise, you will add a scale controller
to a biped's legs to stretch them during a portion of an animation.
- Open stretchyleg_start.max.
- Play
the animation.
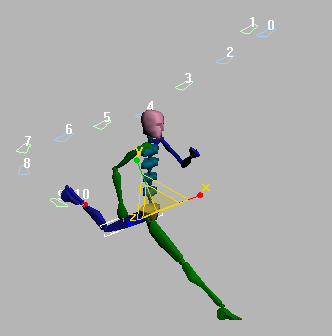
The biped walks for 10 paces, zooms to a lower
level, and then walks another five steps. You’ll add the scale controller,
then animate the biped so that its legs stretch during the period
of the downward leap.
- Move
the time slider to frame 162, then select the Bip01 L Thigh object,
the blue leg.
- On
the Motion panel, open the Assign Controller rollout.
- In
the controller list window, expand the Biped SubAnim entry.
Now you
can see the three list controllers.
-
 Click
the plus sign (+) next to BipScaleList to expand this controller.
Select the entry marked Available, then click the Assign
Controller button.
Click
the plus sign (+) next to BipScaleList to expand this controller.
Select the entry marked Available, then click the Assign
Controller button. The Assign Scale Controller dialog appears.
- Choose
Scale XYZ from the list, and click OK to close the dialog.
-
 On the 3ds Max Main
toolbar, click the Select And Scale button.
On the 3ds Max Main
toolbar, click the Select And Scale button. The Scale
gizmo is visible on the thigh in the viewport.
-
 Turn
on Auto Key.
Turn
on Auto Key.First, you will set a key to start the stretch.
You don’t want the stretch to start before frame 162. You want the
biped to have a normal leg (unstretched) from the start of the animation
up to this frame.
- Using
the Scale gizmo, stretch the leg very slightly
in the X-axis at this frame, so the final value in the Coordinate
rollout is 100 (no stretch).
- Move
to frame 164, and stretch the leg so the foot reaches the footstep.
- Move
to frame 167, and again stretch the leg in the X-axis, so the foot
stays on the footstep gizmo.
- Move
to frame 169. Here, you begin to shorten the leg stretch.
- Move
to frame 181 and stretch the leg back to normal. Adjust it visually
until the leg looks correct.
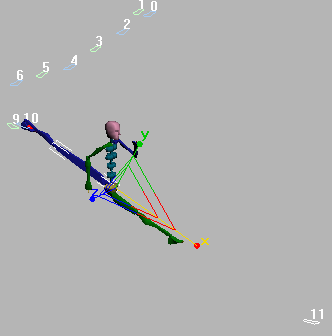
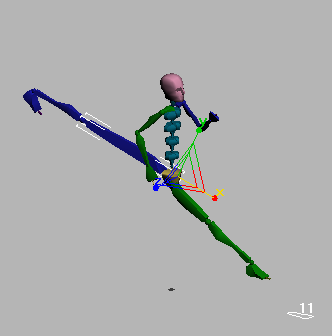
- Play
the animation. The biped’s back foot stays on the footstep and the
leg stretches out as the biped descends to the lower set of footsteps.
For extra
credit, add a scale controller to the green thigh, and stretch that
leg out, roughly between frames 161 and 171.
- Save
your work as mystretchy_leg.max, or open stretchyleg_final.max for
comparison.
Once you have controllers added to the biped
body parts you can animate their parameters, or animate their weights.
Here's an example that shows animation of parameters.
Animate
the weights of SubAnim controllers:
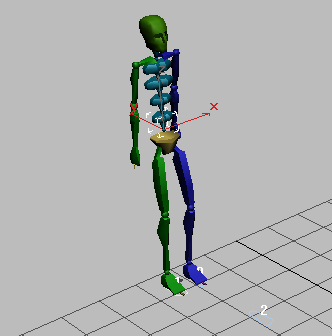
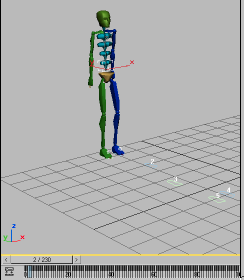
- Open shake_and_walk_start.max.
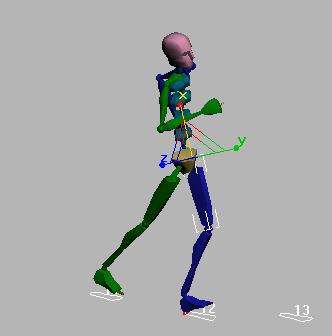
- Play
the animation.
The biped takes a few steps, then pauses for
a moment or two, then walks on.
- In
the Perspective Viewport, select Bip01 Spine,
the lowest spine object.
- On
the Motion panel, open the Assign Controller rollout.
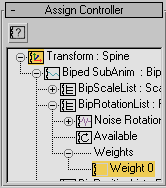
- In
the Assign Controller window, expand the Biped SubAnim so you can
see the list controllers.
- Expand
the BipRotationList, and highlight
the entry marked Available.
-
Click
the Assign Controller button.
The Assign
Rotation Controller dialog appears.
- Choose Noise
Rotation in the list, and click OK.
The Noise
Rotation Properties dialog is displayed. Don't close this dialog.
- Play
the animation in the viewport.
The biped
shakes drastically as it walks.
- In
the Properties floater, turn Fractal Noise off.
- As
the animation plays, change the Frequency in the Properties dialog,
using the spinner. Lower the value until the shake becomes slower and
more rhythmic. Probably a value of 0.2 or less
will be good to use, but you can choose whatever you like.
- As
the animation plays, change the X, Y and Z values. Set the three
values to 0, then change them individually,
one at a time.
To create a shimmy effect, set X Strength to
be 2, Y and Z Strength to 0.
- Close
the Noise Rotation Properties dialog.
In this example, the biped should shake only
while walking. The frames between 69 and 191 should not have any
shaking. To complete this effect, you will animate the weight of
the noise controller.
Animate
the weight of the noise controller:
- On
the Motion panel, expand the Weight entry of the Noise Rotation
controller you added to the spine object. Highlight Weight
0.
There is
a trick to accessing the weights.
-
 Open
the Keyframing Tools rollout and click the Manipulate SubAnims button.
Open
the Keyframing Tools rollout and click the Manipulate SubAnims button.The Motion
panel now displays additional rollouts for Position List, Scale
List, and Rotation List.
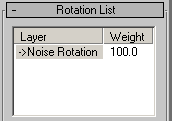
- Scroll
to the Rotation List and select the Layer->Noise Rotation.
Now you're
ready to animate the Weight field.
-
Turn
on Auto Key
- Move
the time slider to frame 70.
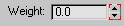
- Near
the bottom of the Rotation List rollout, right-click the Weight
field spinner. This sets it to zero.
TipRight-clicking
any spinner resets it to its lowest possible value.
- Move
the time slider to frame 69.
TipUse
the
<
and
>
keys
on the keyboard to move from frame to frame.
- Change
the Rotation List Weight field to 100.0.
The spinner
is outlined in red to show it is animated.
- Drag
the time slider back and forth from frame 0 to frame 100 to see
the animation. The biped shakes while walking and stops shaking during
the pause.
- Next,
you make the biped start shaking again at frame 191. At frame 190,
set a key with the Noise Rotation Weight set to 0,
and to100 at frame 191.
TipAt
frame 190, hold down the Shift key
while you right-click on the spinner. This will set a key without
having to change the value.
- In
the Keyframing rollout, turn off Manipulate SubAnims when you're
done.
- Play
the animation.
- Save
your file as myshake_and_walk.max, or open shake_and_walk_finished.max for
comparison.
If you are exporting to a game engine, or if
you want to use this animation with Layers or in the Motion Mixer,
you will need to collapse the list controller animation (see following
procedure). This will add the controllers animation keys to the
tracks of the Biped SubAnim.
Note3ds Max has different behaviors for controllers
and constraints. The controller animation will be
layered
onto
the existing keys in the Biped SubAnim track. If you have used a
constraint, however, it will
replace
the Biped Subanim
tracks.
Collapse
the list controller track:
- Continue
from before, or open shake_and_walk_finished.max.
- If
you open the file, select the Bip01 Spine object
in the viewport, open the Motion panel, and expand the Assign Controller
rollout.
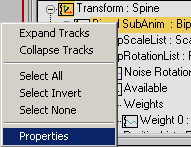
- In
the Assign Controller window, highlight Biped SubAnim and then right-click.
- Choose
Properties from the right-click menu.
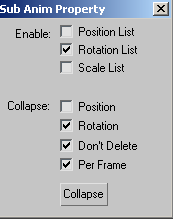
The SubAnim
Property dialog appears.
- In
the Enable options, turn off Position List and Scale List, so the Rotation
List is the only one active.
- In
the Collapse options, turn off Position, and turn on Rotation List,
Don't Delete, and Per Frame.
- To
collapse the rotation track, click the Collapse button at the bottom
of the SubAnim Property dialog.
Wait while
the calculations take place.
When the
collapse is completed, the dialog closes and the track bar fills
with keyframes.
- Save
your work as mycollapsed_shaking.max, or open shake_and_walk_collapsed.max for
comparison.
You can use the Workbench to reduce the keys
that you've created.