


Animating a Freeform Walk Cycle
While 3ds Max has a dedicated method (Footstep mode) for creating quick and easy walking animations, you can also create walk cycles with freeform animation.

In this lesson, you’ll use animated pivot points and IK blend keys to constrain the feet to the ground plane.
Set up the lesson:
 On the
Create panel, click the Systems button.
On the
Create panel, click the Systems button.Create a biped and load a FIG file:
 Click
the Biped button and create a biped in the Front viewport.
Click
the Biped button and create a biped in the Front viewport. Open
the Motion panel.
Open
the Motion panel.
 Turn
on Figure Mode and click Load File.
Turn
on Figure Mode and click Load File.The Open dialog is displayed.
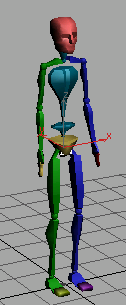
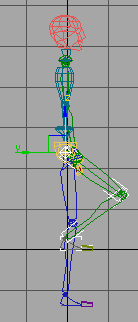
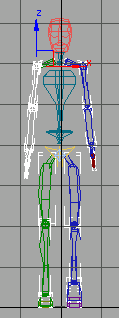
The biped takes on new structural elements stored in the FIG file. This simplified figure has one large toe on each foot and one large finger on each hand; its spine contains two segments instead of four.
 Turn
off Figure mode.
Turn
off Figure mode. Click
Zoom Extents All.
Click
Zoom Extents All.Set a key:

 Use
the display controls Field Of View and Pan to zoom in on the feet.
Use
the display controls Field Of View and Pan to zoom in on the feet.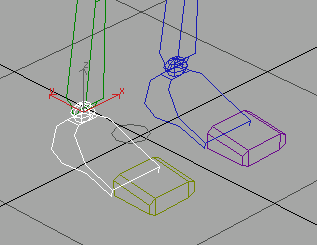
 On the
Motion panel, in the Key Info rollout, click Set Key.
On the
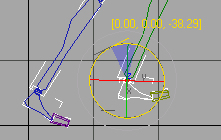
Motion panel, in the Key Info rollout, click Set Key.The foot is highlighted in white, and a key appears on the track bar at frame 0. You have just started a freeform animation.
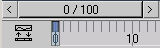
Track bar key at frame 0
Set different types of keys at frame zero:
There are two ways to set character animation keys in 3ds Max. You can use the standard method of keyframing, which involves turning on Auto Key and transforming objects. It is quick and easy, but if you forget that Auto Key is on, you can set keys unintentionally.
The second method uses the Set Key buttons on the Key Info rollout. These buttons set several parameters at once. This is the method you'll use in the steps that follow.
 On the
Track Selection rollout, click Body Vertical.
On the
Track Selection rollout, click Body Vertical.This selects the biped's center of mass, Bip01, and activates the Move tool in one step. You’ve set a key for the foot, but there is a problem. The foot can go through the ground plane. See for yourself in the next few steps.
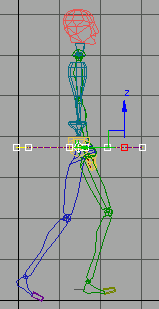
The biped moves down through the ground plane (as indicated by the grid in the Perspective viewport).
Set planted keys:
Now you’ll set a planted key. A planted key does three things: it sets IK Blend to 1, turns on Join To Previous IK Key, and also turns on Object Space. Together, these three settings ensure that the foot will not pass through the ground plane.
For more information about IK Keys, refer to the “Key Info Rollout” topic in the User Reference.
 On the
Key Info rollout, click Set Planted Key.
On the
Key Info rollout, click Set Planted Key.The red pivot point becomes more pronounced.
 On the
Track Selection rollout, click Body Vertical, and move the biped
down in the Left viewport.
On the
Track Selection rollout, click Body Vertical, and move the biped
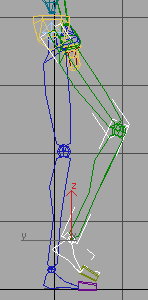
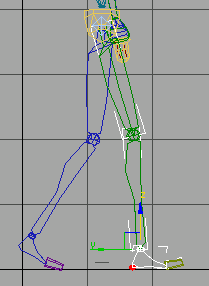
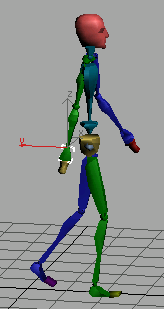
down in the Left viewport.The foot stays on the ground plane, and the knee bends to accommodate the vertical movement of the biped.
Planted foot stays on ground.
Now you’ve seen the effect of the planted key on the foot. You can use the same Set Key buttons on pivot points for the feet and hands. Next, you’ll replace the key at frame 0 with a new one, changing the pivot point.
Set pivot keys:
It still has the planted key from before.
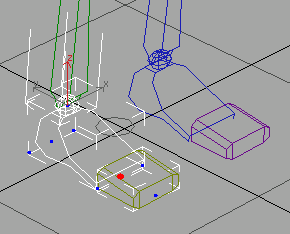
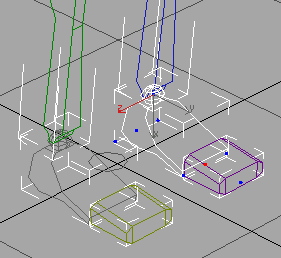
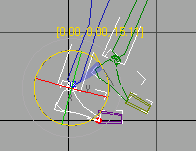
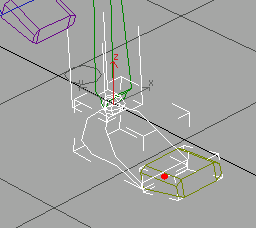
All pivot points for the foot are now visible as blue and red dots. The pivot at the ankle is red, showing that this is the currently active pivot point.
Wireframe mode lets you clearly see and select the pivot points.
The new pivot point is displayed in red.
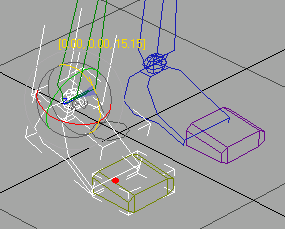
Advance
the time slider to frame 5, and click Set Key. Rotate
the foot up approximately –15 degrees about the local Z axis to
make the heel raise, and then click Set Planted Key.The heel lifts off the ground, the foot rotates on the ball, and the toes stay on the ground.
Now you can animate the pivot point to the toes, as the ball of the foot lifts off the ground.
Animate the pivot points:
Move
the time slider to frame 10 and then click Set Key.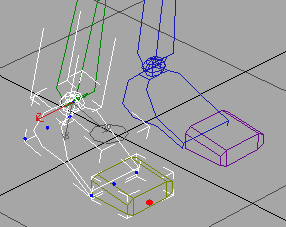
 Click
Set Sliding Key to set a key for the pivot.
Click
Set Sliding Key to set a key for the pivot.
Click
Set Sliding Key to keyframe the foot rotation.The sliding key does not join to the previous key, but has IK Blend set to 1, which keeps the foot above the ground plane. If you had set a planted key, the foot would jump to a different location as it attempted to join to the previous key.
Lift the foot off the ground:
When the foot lifts off the ground completely, you’ll set a free key.
By moving the foot, you are seeing an example of Biped’s IK system. You are creating rotations for the upper and lower leg links as you move the foot.
 On the
Key Info rollout, click Set Free Key to keyframe the lifted position
of the foot.
On the
Key Info rollout, click Set Free Key to keyframe the lifted position
of the foot.Lock down the opposite foot:
On the
Key Info rollout, click Set Key. Click
Set Planted Key to set a the initial key for the left foot at frame
0.
Click
Set Planted Key to set a the initial key for the left foot at frame
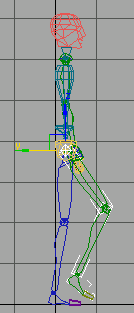
0.This key locks the foot down for any subsequent movement in upcoming frames. If you were to grab the center of mass and move it down, both legs would bend instead of moving below the ground plane.
The left foot with a new pivot point
Keyframe the center of mass:
 On the
Track Selection rollout, click Body Horizontal.
On the
Track Selection rollout, click Body Horizontal.Bip01 is automatically selected.
At frame
0, click Set Key for Bip01.This creates a start key for the center of mass.
The left leg bends automatically as the center of mass moves down.
On the
Key Info rollout, set a planted key for the ball of the foot.The heel is rotated off the ground.
Move
the time slider to frame 22 and click Set Key. On the
Key Info rollout, click Set Sliding Key, then turn off Select Pivot.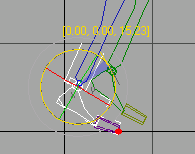
On the
Track Selection rollout, click Body Horizontal. Move the center
of mass forward again, and set a key.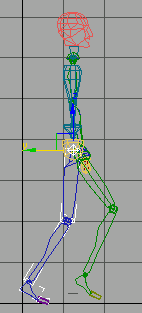
Keyframe the right heel hitting the ground:
At frame
22, select Bip01 R Foot and move it forward,
then set a sliding key.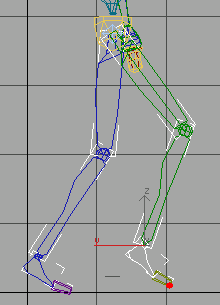

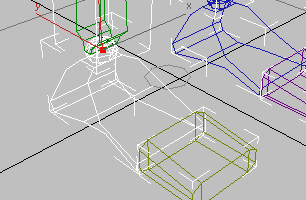
The pivot point moved to the heel
Notice that the foot moves away from the pivot point in the viewport.

Sliding Key lets foot move away from pivot
Set
a sliding key.The pivot point in the viewport moves to the heel of the foot.
The pivot moved to the ball of the right foot
 Click
Body Horizontal, move the center of mass so that it is over the
heel of the right foot and set a key.
Click
Body Horizontal, move the center of mass so that it is over the
heel of the right foot and set a key.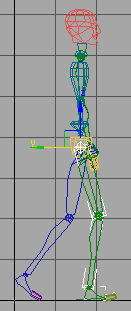
At frame
27, select Bip01 L Foot and set a free key.Continue the walk cycle:
At frame
27, click Body Vertical so you can move the center of mass. Lower
the body slightly, so the biped sinks a bit as the right foot flattens
onto the floor. Set a key for the center of mass.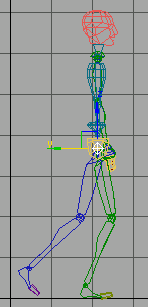
Move
and rotate Bip01 L Foot so the heel swings
above the ground. Set a free key.
Use this procedure throughout this exercise: Lock one foot by setting planted or sliding keys, move the center of mass, then move the other foot and set a key.
Complete the walk cycle:
Move
the time slider to frame 37 and click Body Horizontal. Move the
center of mass forward and set a key.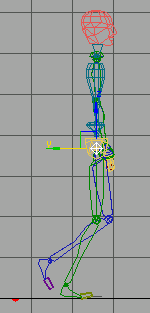
Select Bip01
L Foot and move it so the leg is extended in front of
the biped. Set a free key.
Now the foot looks better.
With
the left foot selected, click Select Pivot and select the pivot
at the heel. Set a planted key for the pivot. Set
a planted key for the left foot. Click
Body Horizontal and move the center of mass so the body moves forward. Set
a key for the center of mass. At frame
41, rotate the left toes (Bip01 L Toe0) so they are flat
on the ground. Set a planted key.Display trajectories:
Biped has its own trajectory display. You can use it to observe the movement of the center of mass in the walk cycle. You can also edit the keys on the trajectory directly in the viewport.
On the
Track selection rollout, click Body Horizontal. On the
Key Info rollout, turn on Trajectories.
On the
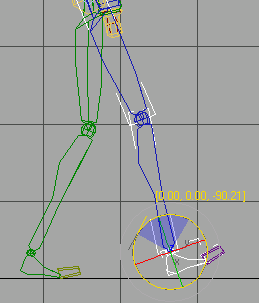
Key Info rollout, turn on Trajectories.A line appears on the viewports showing the COM's trajectory: the path it moves along during the animation.
 Choose
Select And Move on the main toolbar. At the top of the Motion panel,
turn on Sub-Object and then click any key on the trajectory.
Choose
Select And Move on the main toolbar. At the top of the Motion panel,
turn on Sub-Object and then click any key on the trajectory.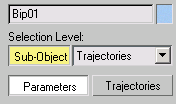
Edit keys in biped trajectory
Add arm swings:
The character is starting to look like it’s walking, but it’s still pretty stiff. Adding arm swings will put some life in the animation.
The arms swing opposite to the legs. When the right leg is forward, the left arm is forward. Arms bend at the elbow on the forward swing, and stretch out straight on the backward swing.
The right leg stretches out at frame 27, and you’ll keyframe the left arm to swing there.
 Turn
on Auto Key.
Turn
on Auto Key.Position the arm so there is a slight bend at the elbow. Since Auto Key is on, you have keyframed the arm by moving it.
 On the
Track Selection rollout, click Opposite.
On the
Track Selection rollout, click Opposite.The right hand is selected.
The left arm is forward and bent a little, while the right arm is back and straight.
The entire right arm is selected.
 On the
Motion panel, open the Copy/Paste rollout and click Copy Posture.
On the
Motion panel, open the Copy/Paste rollout and click Copy Posture. Click
Create Collection. Name the Collection walkcycle1.
Click
Create Collection. Name the Collection walkcycle1.
Click
Copy Posture. Name the Copied Posture RArm back. At frame
37, click Paste Posture Opposite.
At frame
37, click Paste Posture Opposite.The left arm swings behind the biped.
The entire left arm is selected.
On the
Copy/Paste rollout, activate the Perspective viewport and click
Copy Posture again. Name the posture LArm forward.
At frame
37, click Paste Posture Opposite.The right arm swings in front of the body.
Add sway to the shoulders and hips:
You’ve animated the character by moving its hands and feet and center of mass. But the spine, hips, and head are still stationary. You’ll add some rotations to the shoulders and hips to complete the walk cycle.
The left foot is locked at this frame with a planted key.
Be careful where you add the hip rotations. Don’t inadvertently disturb the work you’ve done on the feet so far.
As the legs extend and swing forward, the hips rotate slightly in the direction of the movement.
Rotate
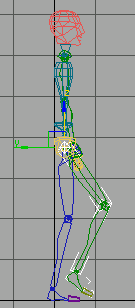
the pelvis about the Y-axis approximately –2 degrees and set a key.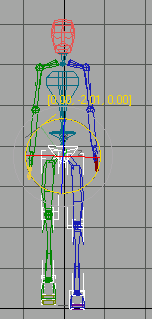
Rotation added to the hips from the Front view
The pelvis will not accept too much rotation. When you set the key, the pelvis corrects itself to account for the locked foot.
Move
the time slider back to frame 0. Rotate the pelvis back 2 degrees
about the Y axis and set a key. Rotate the pelvis back about –3
degrees about the X axis and set a key.
The procedure is the same for the spine. At frame 27, the arms swing out in one direction. At frame 37, they swing in the opposite direction.
The spine can freely rotate about all three axes. You can make adjustments on each one. Rotate about the Z axis for a more stooped walk. Increase rotation about the X axis to make the walk loose and floppy.
Instead of animating the spine, you can also animate the clavicles to raise or lower the shoulders.
Twist links mode:
The Bend Links rollout includes tools you can use for animation. You can use either the Bend Links or the Twist Links to animate the bending and/or twisting of the spine.
In the Structure Rollout change Spine Links to 5. You can have up to 10 spine links but you will use five to observe the effect.
 On the
Bend Links rollout turn on Twist Links Mode.
On the
Bend Links rollout turn on Twist Links Mode.The slight rotation of the first spine object results in a larger effect further up the hierarchy.
You have animated a simple walk cycle using freeform animation and IK constraints.
You can use the footstep method of animation to create a walk cycle automatically. To learn about this technique, see Creating a Distinctive Walk .