Simulation Accuracy

Introduction to reactor

Using Hand-Animated Rigid Bodies

Setting Up the Simulation
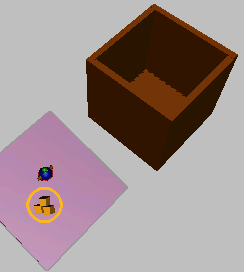
In this section you will create a toy box and
39 copies of your toy. Using the preview window, you will drop the
toy copies into your box, let them settle, and then pass their positions
back to 3ds Max. As you will see, the preview window acts as
an interactive modeling tool, allowing you to rearrange objects
physically and then use changes made in the preview window to update 3ds Max.
NoteYou can continue using your file or you
can open reactor_intro_9.max from
\tutorials\reactor\introduction
.
Create
the toy box:
- In
your scene (away from the other objects), create five boxes with
Length and Width=400.0, and Height=25.0.
- Arrange
the boxes to form a larger, hollow box.
- In
the Left viewport, rotate the sloping box 20 degrees counterclockwise
to flatten it out somewhat. With the sloping box selected, increase
both its Length and Width parameters to 600, and move
it downward 240 units.
- Select
and right-click the box used as the base of the toy box, and in
the Transform quadrant of the quad menu, choose Convert To > Convert
To Editable Mesh.
- In
the Edit Geometry rollout of the Modify panel, click Attach List.
- In
the Attach List dialog, select the other four boxes, which make
up the sides of the toy box, and click Attach.
You now
have a single mesh representing the toy box.
-
 Open
the Rigid Body Properties dialog and set the Simulation Geometry
property to Concave Mesh.
Open
the Rigid Body Properties dialog and set the Simulation Geometry
property to Concave Mesh.
Update
your scene from the preview window:
-
 On the
toolbar, click Select and Move.
On the
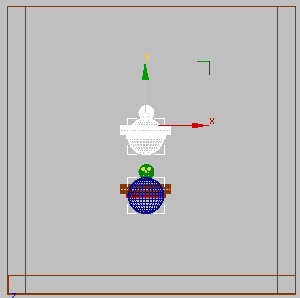
toolbar, click Select and Move. - Move
the toy inside the box.
NoteMake sure that the toy is not touching the
box.
- In
a side viewport, Shift+Move the toy,
and position the first copy above the original.
NoteMake sure that the copy is not touching
the original toy.
- In
the Clone Options dialog, set Number Of Copies=39 and
click OK.
- Select
the RB Collection helper object and in the Modify panel > RB
Collection Properties rollout, click Add.
- Select
all of the new toy objects and the toy box and click Select to add
them to the rigid body collection.
-
 Click
Preview Animation and let the toys fall into the box and settle.
Click
Preview Animation and let the toys fall into the box and settle.
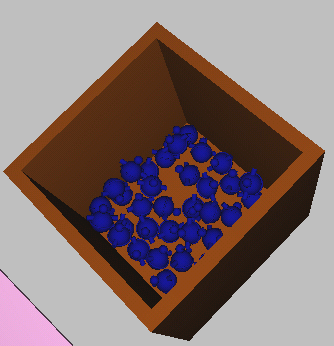
- When
the toys have settled in the box, from the Preview Window menu bar
choose MAX menu > Update MAX.
- Close
the preview window and click in one of the viewports to update the
display. The toys will have been updated so that they have the positions
and rotations you updated in the preview window.