Geometry Types

Introduction to reactor

Building Up a Rigid Body

Geometry Simulation
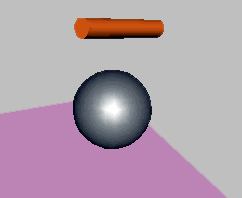
In this lesson, you'll continue making a toy.
The existing sphere acts as the toy's body. The next step is to
create a cylinder to act as the toy's arms. You'll also create a
duplicate of this cylinder and reduce its tessellation. You'll use
this simplified version, which is easier and faster to simulate,
as the simulation geometry for the first, more complex cylinder.
This technique is known as using proxy geometry.
NoteIf you were to make 20 copies of the first
cylinder and add them to your simulation, they would all use the
simplified, duplicate cylinder as their simulation geometry. This
means you'd need only one instance of the cylinder geometry for
the physical simulation, thus reducing memory usage and increasing
simulation speed.
NoteContinue using your scene from the previous
lesson, or open reactor_intro_4.max from
\tutorials\reactor
.
Create
a simplified version of an object for simulation:
- Create
a cylinder in the Left viewport, and position it above your sphere.
Make sure
that the cylinder and sphere don't touch each other.
- On
the Modify panel, set the following values for the cylinder: Radius=6.0, Height=70.0,
and make sure Sides is set to 18 (the default).
- With
the cylinder still selected, choose Edit > Clone. On the Clone
Options dialog, choose Copy and click OK.
You'll
use this copy of the cylinder as the proxy geometry.
- On
the Modify panel, reduce the number of sides of the new cylinder
to 12 and then move it away from
the other objects.
- Select
the original cylinder and open the Rigid Body Properties dialog
 .
. - Set
the cylinder's Mass value to 10.0.
- Set
the cylinder's Simulation Geometry property to Proxy Convex Hull.
This means
that the cylinder will use the convex hull created from another
object’s geometry as its physical representation.
The Proxy
button at the bottom of the rollout becomes available.
- On
the Simulation Geometry rollout, click the Proxy button, and then
select the cloned cylinder in one of the viewports.
The button
now displays the name of your chosen proxy object.
TipYou can now hide your proxy cylinder to
keep it out of the way by selecting it, right-clicking and choosing
Hide Selection from the Display quadrant of the quad menu.
- Select
the RBCollection helper object in your scene, and add the original
cylinder to it.
-
 On the
reactor toolbar, click Preview Animation and then play the animation.
On the
reactor toolbar, click Preview Animation and then play the animation.The cylinder
doesn't roll as smoothly as its display would suggest.
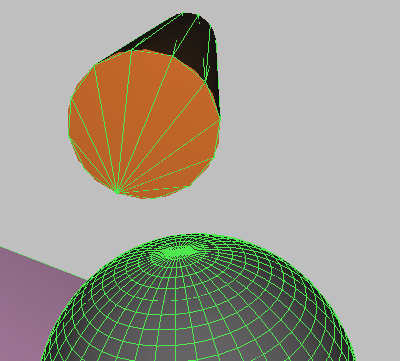
- In
the preview window, choose Display > Sim Edges to display edges
for the objects’ simulation geometries.
The cylinder's
simulation geometry is coarser than its display body.