Now that you have a valid scene for simulation, you can try simulating it. reactor provides two methods for simulating animation:
Continue using your scene from the previous lesson, or open reactor_intro_2.max from tutorials\reactor\introduction.
Examine your scene in the preview window:
 On the
reactor toolbar, click Preview Animation.
On the
reactor toolbar, click Preview Animation.This opens your scene in a preview window. By default, your scene is initially displayed from the Perspective view. You can use the left mouse button to rotate the camera, the middle button to pan, and the scroll wheel to zoom.
You can use your right mouse button to drag the sphere around the scene. However, you cannot move the box, because it has no mass.
Create physically-based keyframes:
Next, you will create keyframes for the objects’ interaction. A sphere falling onto a level surface isn't very interesting, so first you will tilt the box so the sphere will roll along its surface.
 In the
Left viewport, select the box and rotate it clockwise about 30 degrees,
being careful not to let it touch the sphere.
In the
Left viewport, select the box and rotate it clockwise about 30 degrees,
being careful not to let it touch the sphere.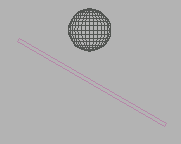
 On the
reactor toolbar, click Create Animation. A Reactor dialog appears,
asking you to confirm the choice. Click OK to continue.
On the
reactor toolbar, click Create Animation. A Reactor dialog appears,
asking you to confirm the choice. Click OK to continue.This creates a simulation and runs it for the length of time between the Start Frame and End Frame values set on the track bar. The default values for these are 0 and 100, respectively; you will change these values later in the tutorial.
reactor creates keyframes for the positions and orientations of your rigid bodies for each of those 100 frames.
 Click
Play Animation to watch the animation in the viewport. You should
see your sphere falling onto the box and rolling down over the edge
of it.
Click
Play Animation to watch the animation in the viewport. You should
see your sphere falling onto the box and rolling down over the edge
of it. The sphere's keys on the track bar go away.


