Creating 3D Materials: Another Approach to Wood

Materials for Interior Scenes

Material Combinations: Using Blend to Create a Floor Material

Using an Architectural Material on the Wall
The Architectural Material in 3ds Max provides heightened
realism when used with photometric lights and radiosity, because
its settings are based on physical properties.
The Architectural material lets you choose from
a series of templates of preset parameters for the material. These
templates approximate the general characteristics of the kind of
materials you're creating, such as masonry, glass, or painted surfaces,
for example.
NoteThe Architectural material is not meant
to be used with standard 3ds Max lights or with the Light Tracer.
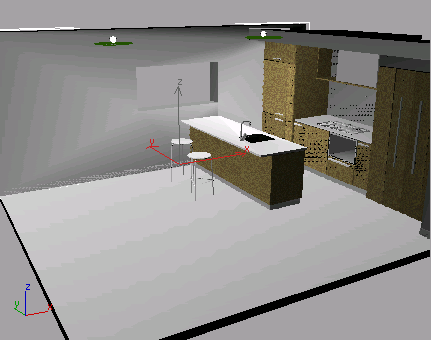
In this lesson, you'll explore the Architectural
material and its application to a scene. You'll be using the material
to create a texture for the wall of the kitchen.
Set
up the scene:
- Continue
from the previous lesson, or choose File menu > Open and browse
to the \tutorials\designviz
folder.
Open kitchen_with_wood.max.
-
 If the
geometry is not visible in the viewport, click the Zoom Extents
All button twice to correct the display.
If the
geometry is not visible in the viewport, click the Zoom Extents
All button twice to correct the display.
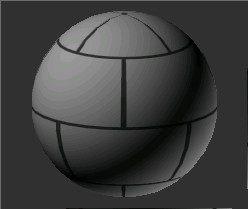
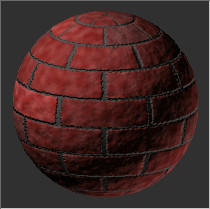
The next material you'll create for this kitchen
is a brick material for the wall.
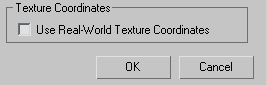
Setting
Texture Coordinates Preferences:
- From
the Customize menu, choose Preferences.
- In
the General tab, under the Texture Coordinates group, make sure
the Use Real-World Texture Coordinates option is turned off.
- Click
OK to exit the Preferences dialog.
Creating
a brick material for the wall:
-
 On the toolbar, click the Material
Editor button.
On the toolbar, click the Material
Editor button. - In
the Material Editor, click an unused sample slot to make it active.
- Click
the Standard button to open the Material/Map Browser and choose
Architectural. Click OK.
- In
the Templates rollout, open the Templates list and choose some of
the different material presets and watch the Physical Qualities rollout.
You'll see how the material presets fill in the physical characteristics
for Shininess, Luminance, and so forth.
- Choose Masonry before
you continue.
- In
the Physical Qualities rollout, click the Diffuse Map button.
It currently says None.
- Choose Tiles from
the list of map types and click OK.
- From
the Standard Controls rollout, open the Preset Type list and choose Running
Bond.
- Open
the Advanced Controls rollout and click the Texture map button in
the Tiles Setup group.
The Material/Map Browser reopens.
- Choose
Noise and click OK.
The Material Editor shows you the Noise Parameters.
- In
the Noise Parameters rollout, set the Noise Type to Fractal and the
Size to 10.
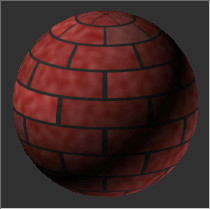
- Click
the Color #1 swatch and set a deep red color in the Color Selector.
Some good settings are Red: 112, Green: 5,
and Blue: 0.
- Click
the Color #2 swatch and set a lighter red color in the Color Selector: 180,
Green: 106, and Blue: 106.
Close the Color Selector dialog.
-
 Click
the Go To Parent button.
Click
the Go To Parent button. - In
the Tiles Setup group of the Advanced Controls rollout, set the
Horiz. Count to 6.0, Vert. Count to 14.0,
and Color Variance to 0.63.
- In
the Grout Setup group, click the Texture swatch to re-open the Color
Selector.
- Set
the Value setting to 90, then close the dialog.
TipIf you know a color needs to be black, white
or any shade of gray in between, the Red, Green and Blue values
must be the same. Adjusting the Value setting automatically assigns
the same value to Red, Green and Blue.
- Set
the Rough value to 5.0 to give the mortar joints
a little irregularity.
-
Click
the Go To Parent button.
This puts you at the top level of your material.
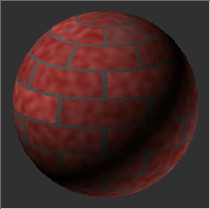
To make the material more realistic, you're
now going to add a bump map.
Adding
realism with a bump map:
- Open
the Special Effects rollout and make sure the size of the Materials
Editor dialog lets you see both the Physical Qualities and Special Effects
rollouts.
- In
the Physical Qualities rollout, click the Diffuse Map button and
drag it down onto the Bump map button.
The Instance (Copy) Map dialog is displayed.
- Choose
Copy and click OK.
You're using Copy for this example because you
want to make unique settings for the bump map. If you chose Instance,
any change you make to the bump map would propagate to the diffuse map.
- Click
the Bump map button to begin working on the bump map for the bricks.
- Click
the Noise map on the Tiles Setup group in the Advanced Controls
rollout.
- In
the Noise Parameters rollout, leave the Noise Type set to Fractal
and set the Size to 15.0.
- Click
the Color #1 swatch to open the Color Selector, and drag the Whiteness
slider all that way to the bottom to give you a solid white.
- Click
the Color #2 swatch and set the Red value to 126 and Green
and Blue values to 0. Close the Color Selector.
TipTo quickly set spinner values to zero, right-click
the spinner arrows.
-
Click
the Go To Parent button.
- Click
the Texture map button in the Grout Setup group.
The Material/Map Browser is displayed.
- Click
the Tiles map and click OK.
- In
the Standard Controls rollout, set the Preset Type to Running
Bond.
You want to duplicate most of the Tiles map
settings you used for the Diffuse map. These settings will ensure
that the grout lines for the Bump map align properly with the Diffuse
map.
- In
the Advanced Controls rollout, in the Tiles Setup group, set the
Horiz. Count to 6.0 and Vert. Count to 14.0.
- Click
the Texture swatch for the Tiles Setup and set it to black.
Dark colors are embossed when used with a Bump map.
- In
the Grout Setup group, click the Texture swatch and set it to white.
Lighter colors, on a Bump map, are recessed.
These will form the depressions along the mortar joints.
- Close
the Color Selector and enter a Rough value of 5.0 for the
Grout Setup.
-
Click
the Go To Parent button twice to get back to the top level of your
material.
- In
the Special Effects rollout, set the Bump amount to 50.0,
then rename the material MyRedBricks.
Now your material is done and ready to apply
to the wall.
Assigning
texture coordinates:
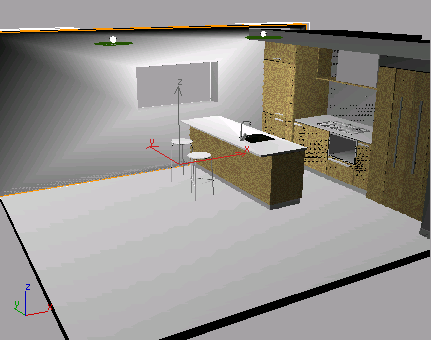
- Activate
the Camera01 viewport and select the wall object named VC
Wall.
Before you can apply the brick material to the
wall, the wall needs texture coordinates.
Without texture coordinates, the texture map
will not show up and you will receive a Missing Map Coordinates
message when you render the scene.
-
 Open
the Modify panel and click the down arrow of the Modifier List.
Open
the Modify panel and click the down arrow of the Modifier List. - Scroll
down the list and choose MapScaler from the Object Space Modifiers
grouping.
Applying
the bricks to the wall:
- In
the Material Editor, click your brick material and drag it onto the
wall.
-
 In the
Material Editor, click the Show Map In Viewport button.
In the
Material Editor, click the Show Map In Viewport button.
The scale of the texture is way too small. The
default scale of the MapScaler modifier is 1”.
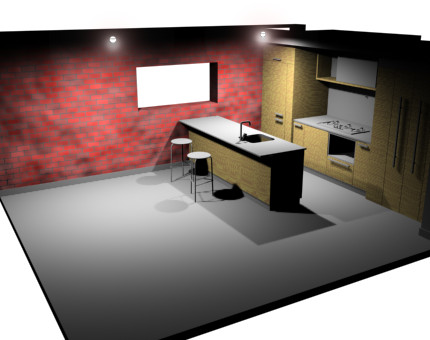
- In
the Parameters rollout, set the Scale to 2'6”.
The bricks are more proportional now.
NoteIf
the bricks appear crooked, right-click the Camera01 viewport label
and turn on Texture Correction if 3ds Max is configured to use
the Software display driver. Next you deal with the brick size.
- Save
the scene as mykitchen_brick.max.
-
 Click Quick Render.