


Creating 3D Materials: Another Approach to Wood
In an earlier lesson, you created a wood material using a bitmap. In this lesson, you create a wood effect using the built-in Wood material. This is an example of a 3D material. 3D materials, also known as procedural materials, are generated by the software. This lets you adjust their settings interactively.
Another advantage of 3D materials is the way they exist in three dimensions. If you slice an object with 3D Wood applied, you see the interior grain, as you would if you sawed into a real piece of wood.
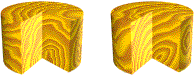
3D materials pervade an object. “Cutting” an object with a 3D wood material (for example, by using a Boolean operation) reveals interior grain.
Set up the scene:
If you see the File Load: Units Mismatch dialog , choose the option Adopt The File's Unit Scale. This will change your system unit, so be sure to reset your system unit after completing this tutorial .
If you do not adopt the file's unit scale, the material you create will be out of proportion and some of the settings you make will show poor results.
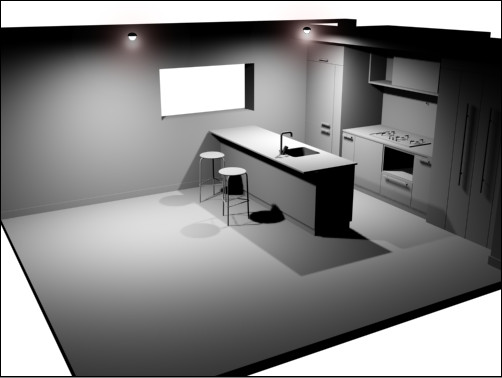
This scene is a model of a kitchen. At present, it has a clean, industrial look.
You will add textures to make some surfaces wood, giving the kitchen a warmer look. (In the exercises that follow, you will also create a brick material for the wall and add a tile material to the floor.)
Creating a wood material:
 On the toolbar, click Material Editor.
Reminder: Unused sample slots have no angle brackets in their corners. Used sample slots have angled corners.
The map button is the gray square to the right of the diffuse color swatch.
The Material/Map Browser dialog is displayed.
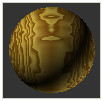
A wood-grain material appears in the sample slot.
Adjusting the colors and settings:
The default colors for this material are darker than you would probably want to use in a kitchen design. You will change them to lighter shades of the same hue.
The red, green, blue (RGB) spinners update to show 214, 194, 114.
The red, green, blue (RGB) spinners update to show 169, 136, 89.
This gives the grain a “noisier” or “busier” appearance.
Applying the material to the scene:
This selection set consists of the portions of the kitchen that will have wood.

 In the
Material Editor, click Assign Material To Selection, then click
to turn on Show Map In Viewport.
In the
Material Editor, click Assign Material To Selection, then click
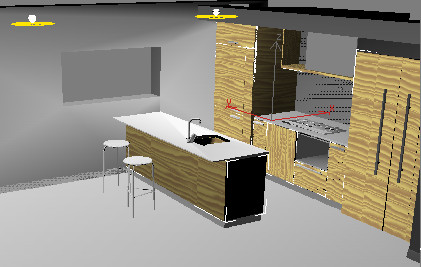
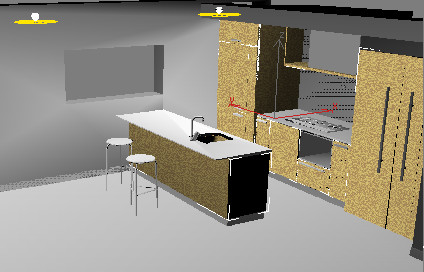
to turn on Show Map In Viewport.The wood grain appears on objects in the scene.
Rendering to view the wood effect:
Viewport display of 3D materials is usually only a rough approximation. To see the full effect, you need to render the scene.
 On the main toolbar, click Quick
Render.
On the main toolbar, click Quick
Render.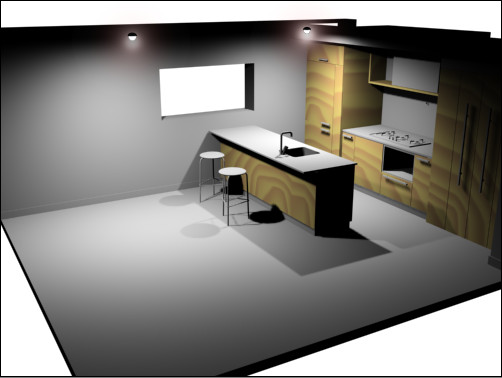
In the rendering, you can see that the wood grain is much too large. This wood has come from a very big tree! To make the material more realistic, you can adjust the material.
Adjusting the size of the wood grain:
With the grain a tenth of its former size, the preview in the viewport looks very busy.
As a rule of thumb for scenes of this scale, if the grain is too “busy” and indistinct in viewports, it is probably about the right size for the renderer.
Click Quick Render.The rendered scene looks much more convincing. However, the grain appears to be end-on, which isn’t right.
Adjusting the direction of the wood grain:
The Angle values for X, Y, and Z are the third column of spinners.
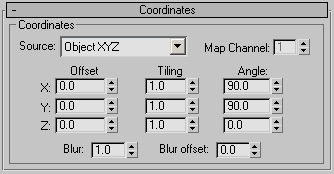
Click Quick Render.Changing the grain angle doesn’t have much effect on the viewport preview, but it greatly improves the rendered scene.

Saving your work:
Next, you'll learn about the Architectural material.