


Applying Multiple Materials to One Object
The result of this lesson may appear to be similar to that in Materials of One Color: Applying Standard Materials . This lesson, however, shows how to combine the leather and wood parts of the chairs into a single mesh, while retaining the material assignments.
The trick to having multiple materials assigned to a single object is to use a multi/sub-object material. A multi/sub-object material is simply a container for other materials. As its name implies, it works at the sub-object level, assigning different sub-materials to different sub-objects of the model. (A variety of object types have sub-object levels, especially the surface models: editable mesh, editable poly, editable patch, and NURBS.)
Assigning sub-materials is a two-part process:
You can do these steps in either order.

Figure mapped using a multi/sub-object material
Lower right: Different sub-objects have different material IDs.
Upper right: Multi/sub-object rollout maps the IDs to different sub-materials.
Set up the scene:
You can use a prepared file, or the file you worked on before. Do one of the following:
If you see the File Load: Units Mismatch dialog , choose the option Adopt The File's Unit Scale. This will change your system unit, so be sure to reset your system unit after completing this tutorial .
To reset your system unit, go to the Customize menu and choose Units Setup > System Unit Setup > System Unit Scale > Inches.
 If the
geometry is not visible in the viewport, click the Zoom Extents
All button twice to correct the display.
If the
geometry is not visible in the viewport, click the Zoom Extents
All button twice to correct the display.
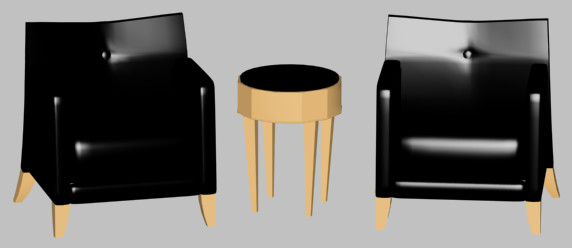
The chairs have materials assigned, but Leather Parts and Wood Parts are still two separate mesh objects.
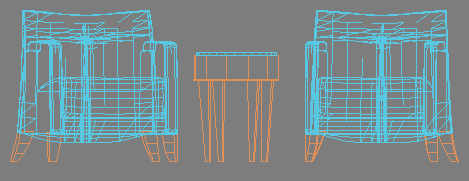
Wireframe views show that the leather and wooden parts of the chairs are two separate meshes.
Plan and assign material ID's:
When you work with sub-object materials, the first thing to do is to plan how to map the material ID numbers. The values on the geometry must match the values in the material, and vice versa. This is not a task for the 3D software, but for a design document, even if it’s only a scrap of paper.
For this model, the wood parts will retain the default material ID of 1, and the leather parts will have a new material ID of 2.
 Select the Leather Parts mesh.
 Go to
the Modify panel. The modifier stack display is the window below
the object name and the drop-down Modifier List. This is where you
choose a sub-object level. Click the plus icon next to the name
Editable Mesh to see the mesh’s sub-object levels.
Go to
the Modify panel. The modifier stack display is the window below
the object name and the drop-down Modifier List. This is where you
choose a sub-object level. Click the plus icon next to the name
Editable Mesh to see the mesh’s sub-object levels.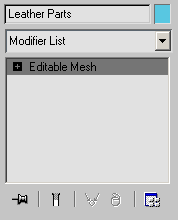
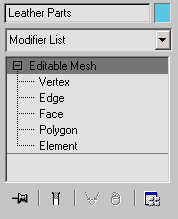
Top: After clicking the plus icon, the stack shows sub-object levels.
Bottom: The sub-object levels in the stack display.
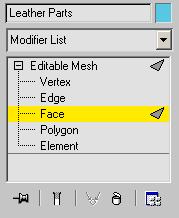
The stack with the Face sub-object level selected.
This selects all the faces in the Leather Parts object. By default, sub-object selections display in red.
On the
Modify panel, go to the Surface Properties rollout. (This is the
last rollout on the Modify panel.) In the Material group, increase
the Set ID value from 1 to 2.Combine the two meshes:
In a viewport, select the Wood
Parts mesh.The wood parts have material ID 1, so it makes sense to make them the basis of the combined mesh.
Go to
the Modify panel. On the Edit Geometry rollout, click to turn on
Attach. Then, in a viewport, click the Leather Parts mesh to attach
it.An Attach Options dialog is displayed.
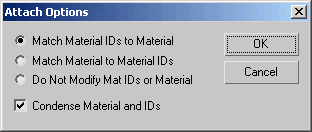
This option leaves the material IDs on faces unchanged.
Create the multi/sub-object material:
 On the toolbar, click Material Editor.
The Material/Map Browser is displayed.
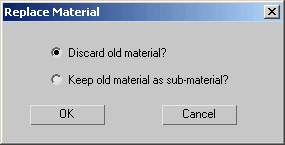
A Replace Material dialog is displayed.
The Multi/Sub-Object Basic Parameters rollout is displayed in the Material Editor.
The new sub-material corresponds to Material ID 2.

Controls in the Multi/Sub-Object Basic Parameters rollout after dragging the Black Leather material to the second sub-material’s button.
This sub-material corresponds to Material ID 1.

Sample sphere for the multi/sub-object material
Assign the material to the mesh:
The multi/sub-object material is now complete. The last step is to assign it to the model.
In a viewport, click to
select the Chair Group model. In the
Material Editor, click Assign Material To Selection.
In the
Material Editor, click Assign Material To Selection.The appearance of the model is unchanged, but it now consists of a single editable mesh, so you can use it with the Substitute modifier.
Save your work: