


Autodesk 3ds Max Tutorials > Materials and Mapping Tutorials > Introduction to Materials and Mapping >
Creating a Skin Material
Human skin is difficult to simulate in computer graphics because it reflects light from a short distance beneath the surface, rather than directly at the surface. In this lesson, you'll learn how to use the Shellac material to create a material that closely resembles skin.
The files for this lesson can be found in the tutorials/intro_to_materials folder.
Set up the lesson:
Create the skin material:
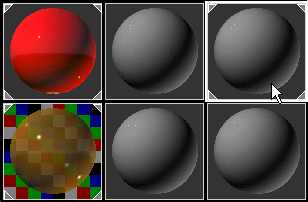
 Open
the Material Editor, then click the third sample slot on the top
row.
Open
the Material Editor, then click the third sample slot on the top
row.This material is already applied to the head.
Shellac is a special material that superimposes one material over another so that you can see through the upper material to the lower one. This capability is well suited to simulating human skin.
Choose a map for the base skin material:
 Click
the Show Map In Viewport button to turn it on.
Click
the Show Map In Viewport button to turn it on.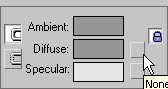

Adjust the shading for the base skin material:
 Click
Go To Parent, and change the Material’s shading type to Oren-Nayar-Blinn.
Click
Go To Parent, and change the Material’s shading type to Oren-Nayar-Blinn.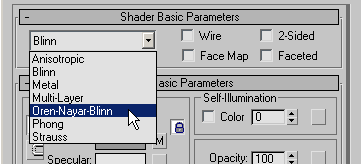
Apply bump mapping for the skin texture:
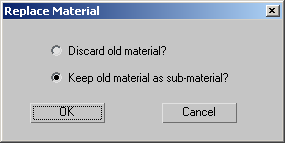
On the Copy (Instance) Map dialog, choose Copy (if necessary), then click OK.
Set the tiling for bump mapping:
At the default tiling setting, the bump map is a bit coarse; increasing the Tiling values gives the bumpiness a finer grain.

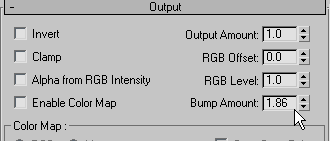
Adjust the amount of bump mapping:
Click
Go to Parent.
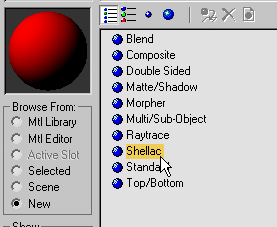
Set up the Shellac material:
Click
Go To Parent again, and in the Shellac Basic Parameters rollout,
click the Shellac Material button.
Set the tiling for the Shellac material map:
Adjust the specular highlights for the Shellac material:
Click
Go To Parent, then click the Specular color swatch.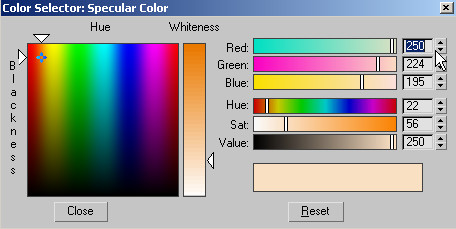

Click
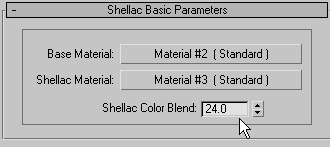
Go To Parent, and set Shellac Color Blend to 24.This gives the Shellac Material component a small but significant role in the look of the composite material.
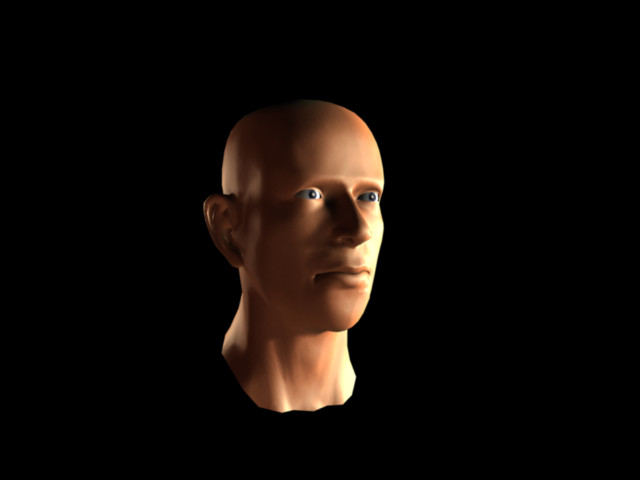
You've created a realistic-looking skin material. Try changing the parameters and components and re-rendering to see how they affect the material. In particular, try changing the Shellac Color Blend setting to blend different amounts of the Shellac Material component into the overall material.
3ds Max offers a wealth of options for applying textures to objects. You use the Material Editor for creating and modifying materials, applying maps, and even adjusting mapping. Once a material is ready, you can apply it to an object by dragging and dropping it from the Material Editor to the object in the viewport. The Material Editor provides a number of different shaders for achieving such effects as metal and translucency. The UVW Map modifier lets you determine how materials and maps wrap around an object. One of the most useful material types is Multi/Sub-Object, which lets you easily combine different materials on a single object. Another way is to use a map such as Checker, which gives you the option to apply two different maps in place of the black and white checks. You can add modeling detail to your objects with displacement mapping. The Shellac material is useful for simulating human skin, as well as other materials.
This tutorial provided a starting point for learning about materials, but the ultimate possibilities with 3ds Max materials are limited only by your imagination. The time you spend practicing and experimenting with the procedures you learned here will be rewarded by a greater proficiency with the available tools, and the ability to get the effects you seek with ease and speed.