


Creating Character Families
In this lesson, you'll develop a crowd scene containing two families of panda bears roaming around their environment. In this first lesson, you'll set up one biped for each member of the Black and Brown families, and scale them accordingly to create a father, mother, and a child panda.
When creating a biped crowd scene, you will need a number of characters. You can easily create a number of similar characters from one character. The resulting crowd members can be slightly smaller or larger than one another, or have different clothing, skin or hair color.
You’ll save each character separately under its own file with a different biped and mesh name, and create families by merging each one into a scene with other characters.
Set up the lesson:
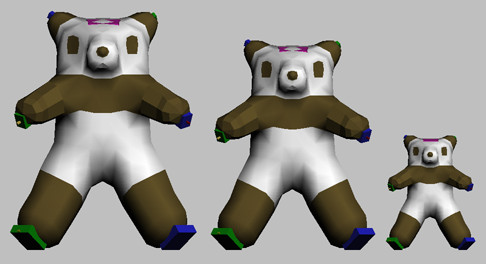
This file contains a lone black-and-white panda. From this panda you will create a series of six pandas, each with different biped and skin names. Some pandas will be black and white, others will be brown and white.
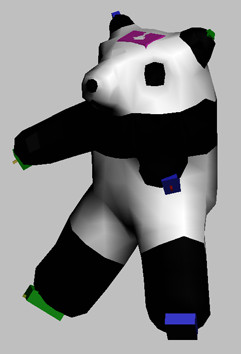
The panda biped is named Black_Papa_Biped, while the panda mesh is named Black_Papa_Skin.
To create more characters for the crowd scene, you will save different versions of the black papa bear.
Scale to create a new character:
 Select
any part of the biped hierarchy (not the skin) and go to the Motion
panel.
Select
any part of the biped hierarchy (not the skin) and go to the Motion
panel. Turn
on Figure Mode.
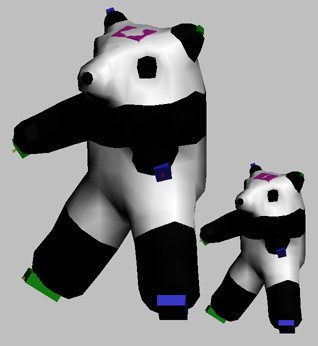
Turn
on Figure Mode.The skin changes size along with the biped. This creates a slightly smaller version of the bear, to represent the mama bear.
Turn
off Figure Mode.Reposition the scaled character:
Now you'll need to move the mama bear away from its original location to prevent the bears from coming in on top of one another when they are merged later on.
 In the
Track Selection rollout, click Body Horizontal.
In the
Track Selection rollout, click Body Horizontal. Turn
on Auto Key and make sure that you're at frame zero.
Turn
on Auto Key and make sure that you're at frame zero. Turn
off Auto Key.
Turn
off Auto Key.Change and save the baby bear:
Select
any part of the biped and turn on Figure Mode. Turn
off Figure Mode. Turn
on Auto Key and click Body Horizontal. While at frame zero, move
the baby bear to the right of its original location. Turn off Auto
Key.Merge the family members to one file:
If the mama bear comes in on top of the baby bear, use the method described in earlier procedures to move them apart.
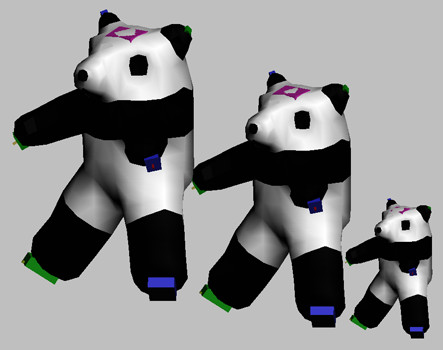
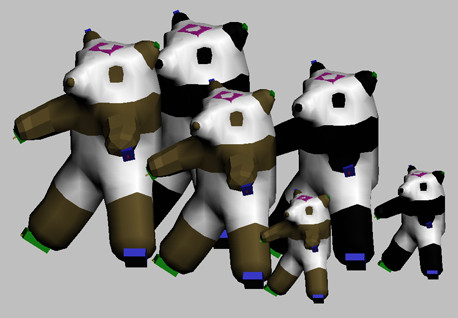
You have just created a family of black-and-white bears.
Create a family of brown bears:
 Open
the Material Editor.
Open
the Material Editor.The multi/sub-object material Black Panda has two sub-materials, Black and White. You will change the black material to a brown material to create brown-and-white pandas.
The color changes on all the pandas. Now you have a family of brown-and-white pandas.
 Click
Go to Parent on the Material Editor toolbar, and change the multi/sub-object
material name to Brown Panda. Turn
on Auto Key. For each biped, click Body Horizontal, and move the
bears forward from their original locations. Turn off Auto Key.
Click
Go to Parent on the Material Editor toolbar, and change the multi/sub-object
material name to Brown Panda. Turn
on Auto Key. For each biped, click Body Horizontal, and move the
bears forward from their original locations. Turn off Auto Key.This will prevent the black bears from merging in on top of the brown bears in the next procedure.
Merge all the bears:
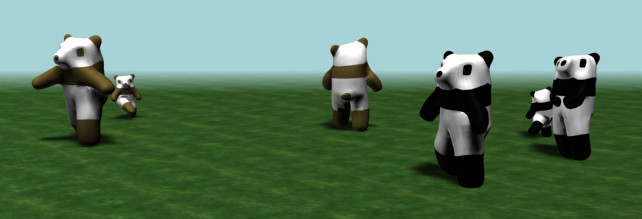
If necessary, move the bears apart.
These two families of bears will be used to set up a biped crowd simulation in the lessons that follow. The family will be easier to work with if the meshes are hidden.
You can find a finished version of this lesson in the file tut_families.max.
With this technique of creating character families, the key is to name each biped, skin and material differently. When you merge the characters together in a scene, there will be no difficulties with duplicate object names or materials, and you’ll know the names of each character’s biped and skin.