Adding Clips to the Motion Flow Graph
In this tutorial, you'll become familiar with the Motion Flow Graph and how to add clips, .bip files, that will control your bipeds.
Create a biped:
 On the
Create panel, click Systems.
On the
Create panel, click Systems.The Biped button turns gold.
A biped appears in the viewports.

Default biped
Add clips to the Motion Flow graph:
 Select
any part of the biped and open the Motion panel.
Select
any part of the biped and open the Motion panel.A biped must be selected for Biped controls to display on the Motion panel.
 On the
Biped rollout, turn on Motion Flow Mode.
On the
Biped rollout, turn on Motion Flow Mode.The Motion Flow rollout displays.
 On the
Motion Flow rollout, click Show Graph.
On the
Motion Flow rollout, click Show Graph.
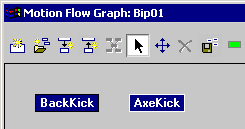
Motion Flow Graph
 On the
Motion Flow Graph toolbar, click Create Multiple Clips.
On the
Motion Flow Graph toolbar, click Create Multiple Clips.The Open dialog displays so you can specify the location of your motion files.
The two motion files appear in the Motion Flow Graph window.