3ds Max has a number of special facilities for working with multiple delegates and crowds, as you'll see in this lesson. You'll also explore several new behaviors.
This lesson builds on the knowledge gained in the previous one. If you haven't completed the Getting Started with Crowds lesson, please complete it before undertaking this one.
Set up the lesson:

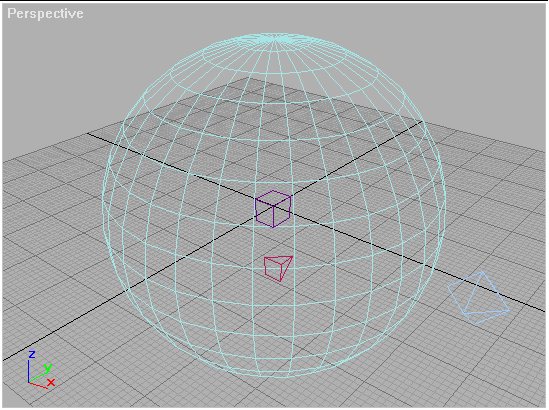
You can open a MAX file that already has these objects. Open crowd_basics01.max from the tutorials\character_animation\crowd_basics directory in your 3ds Max path.
Clone the delegate:
You'll use the Scatter Objects tools to create several clones of the delegate, position them about the large sphere's surface, and aim them at the box.
 In the
Setup rollout, click the Scatter button to open the Scatter Objects
dialog.
In the
Setup rollout, click the Scatter button to open the Scatter Objects
dialog.This creates nine copies of the delegate (10 delegates in all). You can't see them yet because they're all coincident with the original delegate.
Even though you're using a sphere to distribute the delegate clones, you're not choosing Inside Sphere. That's because you're going to position the clones on the surface of the sphere, rather than throughout its volume.
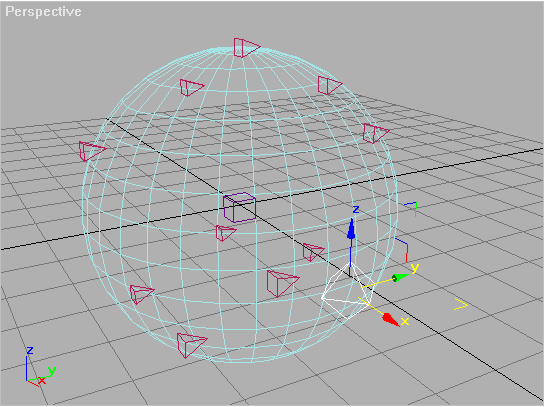
The software distributes the delegate clones randomly on the sphere surface.

Delegates are scattered about the sphere surface.
Reorient the delegates:
The delegate clones are positioned at random locations across the large sphere's surface. They're all pointing in the same direction. In the next steps, you'll reorient them so they're all pointed at the small box.
This makes the button available.
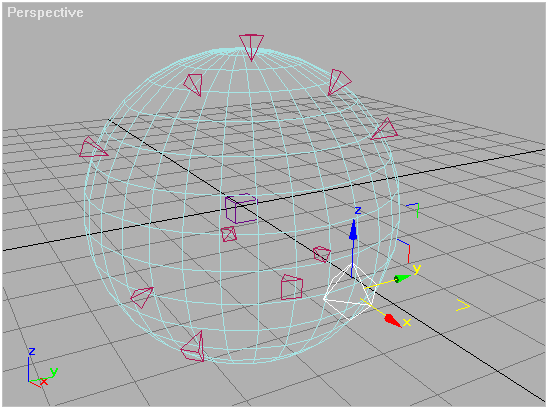
The delegate clones are all now pointing at the box.

Delegates are pointed at the box.
You'll use this setup in the fourth lesson.
Next you'll use two behaviors, Seek and Repel, to make half the delegates move toward the small box and the other half move away from it.
Add behaviors:
The box's name appears on the button, indicating that it's the object that will be sought by any delegate to which the behavior is applied.
 On the
Setup rollout, click Behavior Assignments.
On the
Setup rollout, click Behavior Assignments.You could assign the Seek behavior one delegate at a time, but that's not necessary. Crowd lets you group delegates into teams and assign a behavior to the entire team.
This adds a team with the default name Team0. You can rename it by clicking its name at the top of the group box.
Next, you'll specify which delegates are to be members of Seek Team.
The delegate names appear on the Seek Team roster.
Create a behavior with the Behavior Assignments And Teams dialog:
You'll create a Repel behavior using the Behavior Assignments and Teams dialog.
The behavior is added to the Behaviors list. You still need to use the command panel to modify the behavior. The dialog stays open as you do this.
The Repel Behavior rollout replaces the Seek Behavior rollout.
This applies the Repel behavior at any distance, not just within a specific radius.
Half the delegates move toward the box and the other half move away, but they all stay on their own plane. You can make them move in three dimensions.
If you tried the third suggestion at the end of the previous lesson, you might have an idea of how to fix this: Turn off the delegates' Constrain To XY Plane switches. But there's no need to do so one delegate at a time.
Move the delegates in three dimensions:
 On the
Setup rollout, click Multiple Delegate Editing.
On the
Setup rollout, click Multiple Delegate Editing.The Edit Multiple Delegates dialog appears. You can use this dialog to apply changes to several delegates simultaneously.
This adds all delegates in the scene to the Delegates To Edit list.
This ensures that the changed setting takes effect when you exit the dialog.
This closes the dialog and applies your change to all specified delegates.
This time, the delegates move in three dimensions. Half of them move directly toward the box, and the other half turn and move directly away. The seeking delegates continue to seek the box after they reach it, continually circling it.