Creating the Building

Building an Architectural Model from a Concept Sketch

Adding Glass and Columns

Creating the Main Building
In
the next few steps you will use a combination of 2D Booleans and
3D Booleans to create the foundation.
Set
up the lesson:
To start from this point, do one of the following:
- Continue
from the previous step, or open your saved file, myrotunda.max.
- If
you want to begin the tutorial at this point, open rotunda.max from the \tutorials\arch directory.
You will have to reassign the viewport background as you did the previous lessons.
Create
the foundation:
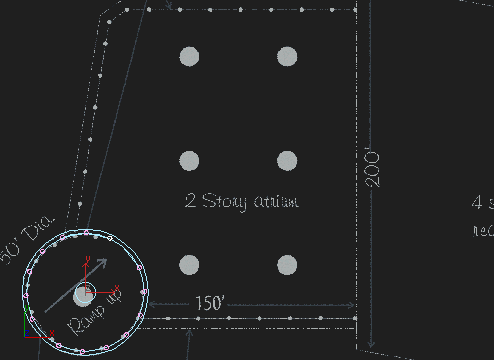
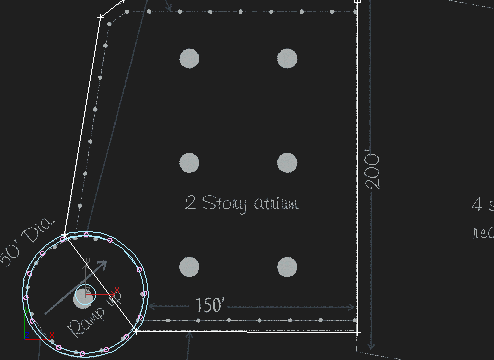
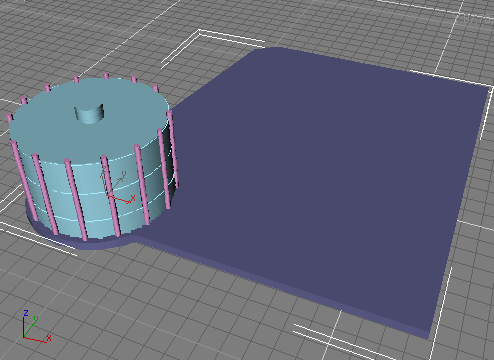
In this procedure you will use 2D Booleans to
create a shape and then extrude it to make the foundation.
- Right-click
in the Top viewport to make it active.
-
 In the
navigation controls, click Zoom. Zoom out of the Top viewport.
In the
navigation controls, click Zoom. Zoom out of the Top viewport. -
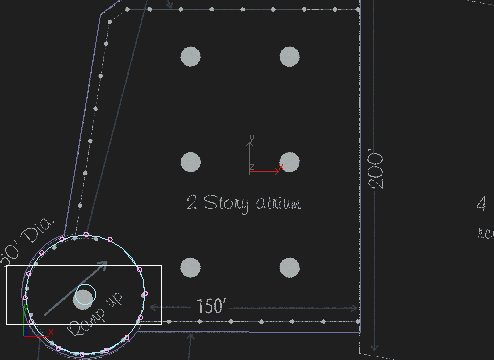
 In the
navigation controls, click Pan. Pan until you see the entire two-story
atrium.
In the
navigation controls, click Pan. Pan until you see the entire two-story
atrium.
-
 In the
Create panel > Shapes > Splines > Object Type rollout,
click Line.
In the
Create panel > Shapes > Splines > Object Type rollout,
click Line. - Create
a line following the outline of the foundation, as shown in the
following illustration. Click at each point, and to end, click the starting
point. When you're prompted, Close Spline?, click Yes.
- In
the Rendering rollout, turn on the Enable In Renderer and Enable
In Viewport check boxes.
- In
the Create panel > Name And Color rollout, enter Foundation.
-
 In the
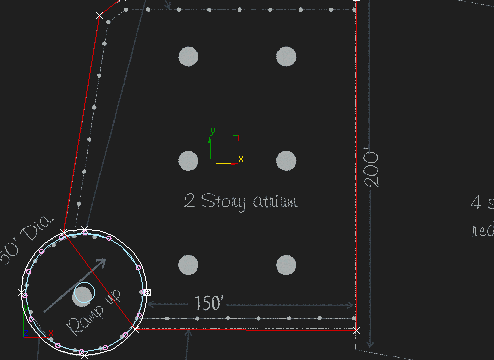
Modify panel > Geometry rollout, click Attach.
In the
Modify panel > Geometry rollout, click Attach. - Press H, select Circle02 from the list, and
then click Pick.
- In
the Geometry rollout, click Attach to deactivate it.
-
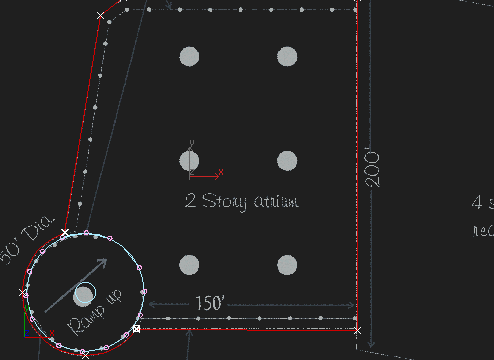
 In the
Modify panel > Selection rollout, click the Spline button.
In the
Modify panel > Selection rollout, click the Spline button. - In
the Top viewport, select the Foundation spline.
-
 In the
Modify panel > Geometry rollout, click Boolean.
In the
Modify panel > Geometry rollout, click Boolean. By default, Boolean is set to Union. This lets
you combine shapes, eliminating overlapping geometry.
- In
the Top viewport, click the attached Circle02 object.
The Union operation results in a single spline.
- In
the Modify panel > Selection rollout, click the Spline button to
exit the sub-object level.
This also turns off Boolean.
- Apply
an Extrude modifier.
- In
the Modify panel > Parameters rollout, set Amount to 1.8m.
Create
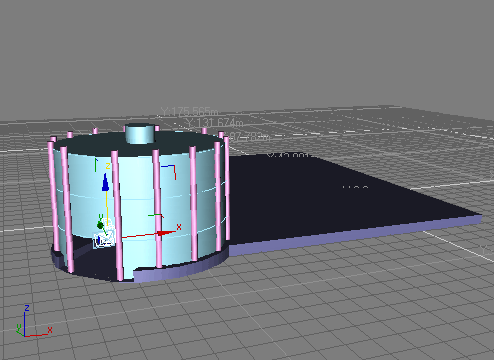
the entrance ramp:
You'll now create a second box and use Boolean
to subtract its shape from the foundation, producing an entrance
ramp for the rotunda.
- In
the Create panel > Geometry > Standard Primitives > Object Type
rollout, click Box.
- In
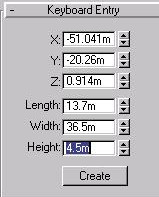
the Create panel > Keyboard Entry rollout, set the X axis to -51.041m,
the Y axis to -20.26m, and the Z axis to 0.914m.
Set the Length to 13.7m, Width to 36.5m,
and the Height to 4.5m, and then click Create.
Using keyboard entry lets you create an object
of an exact size at a specific location.
-
 On the
toolbar, click Select And Rotate.
On the
toolbar, click Select And Rotate. -
 Choose
Use Pivot Point Center from the Use Center flyout.
Choose
Use Pivot Point Center from the Use Center flyout. - In
the status bar > coordinate display > Y field, enter −4.0.
In the Z field, enter 45.0.
-
 On the
toolbar, click Select and Move.
On the
toolbar, click Select and Move. - On
the status bar, set the Coordinate Display Z field to 1.0.
- Press H and select Foundation from
the list.
- On
the Create panel, click the drop-down list and choose Compound Objects.
On the Object Type rollout, click Boolean.
- In
the Create panel > Pick Boolean rollout, click Pick Operand B.
- In
the Top viewport, click the box you just created.
- Right-click
anywhere in the Top viewport to exit Boolean.
This creates a sloped ramp for the entrance.
Save
your work:
- On
the menu bar, choose File > Save As. Name the file mybuilding_nowalls.max.