


Applying the Physique Modifier
After the biped is posed to match the character mesh, you apply the Physique modifier to the character mesh and associate it with the biped. The Physique modifier makes it possible to control the mesh with the biped's motion.
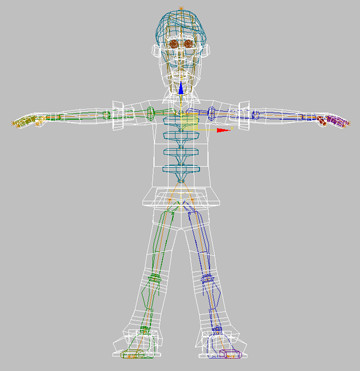
The Physique modifier makes the biped act as a skeleton under a mesh “skin”. Physique assigns each vertex in the mesh to one or more bones in the biped. When the biped bones are animated, appropriate vertices in the mesh will move along with each biped part.
The process of applying and adjusting Physique is called skinning.
Set up for this lesson:

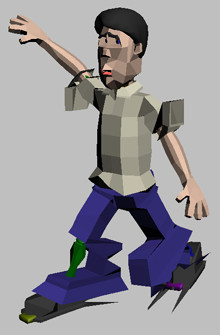
This scene contains the character Wilson and a completely posed biped.
You'll apply the Physique modifier to Wilson's head and body, but not his eyes or hair. You'll deal with those objects in a different fashion later on.
In general, the skinning process is easiest when models are as low-poly as possible. Both Wilson's head and body have been smoothed with the MeshSmooth modifier. If you were applying Physique to just one of these objects, you could simply apply it below the MeshSmooth modifier on the modifier stack. Because you'll be applying it to two objects at the same time, you'll need to remove MeshSmooth from both objects and reapply it later.
 Open
the Modify panel.
Open
the Modify panel. Highlight
the MeshSmooth modifier on the modifier stack, and click Remove
Modifier From The Stack.
Highlight
the MeshSmooth modifier on the modifier stack, and click Remove
Modifier From The Stack.Turn on Figure mode:
 Open
the Motion panel.
Open
the Motion panel. If Figure
mode isn't already on, turn it on.
If Figure
mode isn't already on, turn it on.Apply Physique:
You apply Physique as you would any modifier in 3ds Max.
On the
Modify panel, choose the Physique modifier from the Modifier List
to apply it to the selection.The Physique modifier appears on the stack in italics to indicate that it is instanced (applied to more than one object at a time).
Attach the biped and mesh:
 On the
Physique rollout, click Attach To Node.
On the
Physique rollout, click Attach To Node.The Physique Initialization dialog appears.
An orange skeleton line appears throughout the mesh. If Physique has been properly applied, the line should extend up through the head, down through all the fingers and through to the ends of the toes
If the orange skeleton line does not go to the ends of the head, fingers, and toes, this means you picked an object other than the center of mass after clicking Attach To Node. If this happens, click Attach To Node and repeat the last few steps until the orange skeleton line appears correctly.
Create a test animation:
Physique assigns vertices to specific biped bones based on the size of each bone and its proximity to vertices. With careful posing of the biped, the default assignments can be quite accurate, but some adjustment is always needed.
The fastest way to check vertex assignments is to make a simple animation with the biped and watch how the mesh responds. You'll hide the mesh while animating the biped to minimize the distraction.
Select
any part of the biped and go to the Motion panel. Turn
off Figure mode.
Turn
off Figure mode.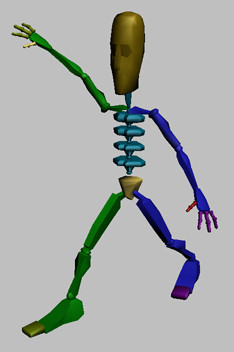
Check the default vertex assignment:
A few difficulties are immediately apparent:
You will fix these problems by adjusting envelopes in the next lesson.
You'll find a finished version of this lesson in the file physique_wilson_complete.max.