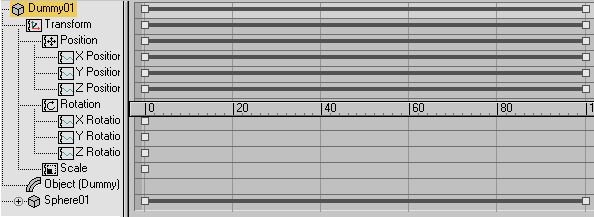
Track View also has a mode called Dope Sheet, which lets you work with keys and ranges. In this lesson, you'll use the range function to make your animation go faster. You'll also use the Time tools to reverse your animation.
Speed up the animation:
The bouncing ball doesn't have enough pep. To speed up the animation, you'll use Edit Ranges in Dope Sheet mode.
 On the
Keys: Dope Sheet toolbar, click Edit Ranges. By default, the Keys:
Dope Sheet toolbar is on the top left.
On the
Keys: Dope Sheet toolbar, click Edit Ranges. By default, the Keys:
Dope Sheet toolbar is on the top left.The Keys window now displays the ranges for the animation.
Before making changes to the dummy, you want to make sure you also are making changes to the bouncing ball as well. Since the bouncing ball is the child of the dummy, you'll use the Modify Child Keys button.
 On the
Display: Dope Sheet toolbar, click Modify Child Keys to turn it
on.
On the
Display: Dope Sheet toolbar, click Modify Child Keys to turn it
on.Now the changes you make to the dummy range will also be applied to the bouncing ball.

Range bars used to speed up the animation
This compresses the animation for the dummy and the bouncing ball so it happens within 100 frames.
The animation plays faster. The ball continues bouncing at the end of the animation. There are several different ways you could correct this. You could try to use an ease curve to stop the animation, or create keys from the out-of-range curve, and then delete the keys. Or you can set the active time segment to 100 frames.
 Click
the Time Configuration button beneath the animation playback controls.
Click
the Time Configuration button beneath the animation playback controls.Reverse time:
You can reverse the animation by using the Time tools available in Dope Sheet mode. It's easy to do.
 On the
Keys Dope Sheet toolbar, click Edit Keys.
On the
Keys Dope Sheet toolbar, click Edit Keys.The range bars are replaced with keys.
When working with Time commands, you first select the time, then make changes to it.
The time is displayed as a light yellow band in the Dummy track.

Time displayed as light yellow band
The animation plays backwards. The ball bounces from right to left instead of left to right, and the last bounce now happens on the letter F instead of the double L in ball.