


Controlling In-Betweens
To make the ball bounce more convincingly, you'll change the interpolation on the key at frame 15.
You'll use the tangency handles available in the Curve Editor. The tangency of the curve will determine the position in space of the in-between frames. Ghosting will let you see where the in-betweens are being positioned.
Using ghosting to visualize in-betweens:
The ghosting feature shows object positions before the current keyframe in an aqua color.
The viewport displays the ghosting.
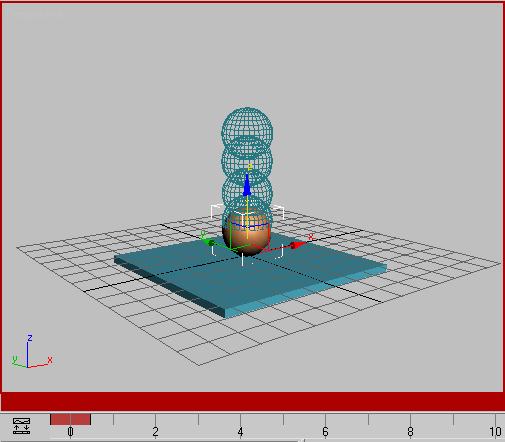
Ghosting shows the object positions on previous keyframes.
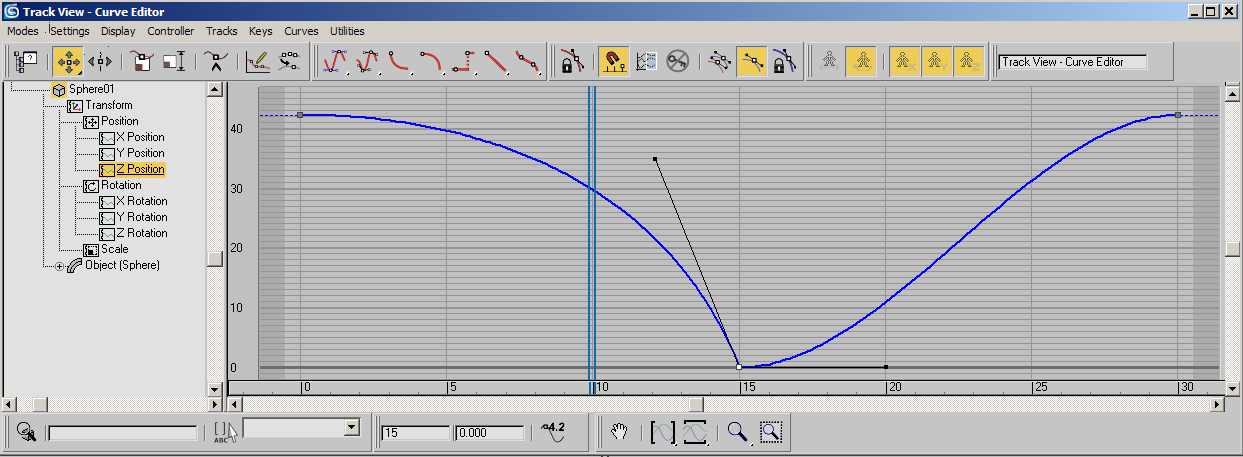
The Function Curve Editor is displayed across the top two viewports.
The Curve Editor is composed of two windows, a Controller window on the left that shows the names of tracks, and a Keys window on the right that shows keys and curves.
There are a lot of possible configurations in the Curve Editor, so you may encounter variations from the standard.
Now the only curve displayed in the Keys window is the one you want to work on.

Function curve for bouncing ball Z position
As you move back and forth the animation plays in the viewport.
If you look carefully you'll see a dark dot on the curve at frame 15.
The selected key turns white on the curve.
To manipulate the curve you need to change the tangency type so you have access to tangency handles.
 On the
Track View toolbar, click Set Tangents To Custom.
On the
Track View toolbar, click Set Tangents To Custom.If you look carefully you'll see a pair of black tangency handles have appeared on the curve.
Using the Shift key lets you manipulate the left handle independently from the right.
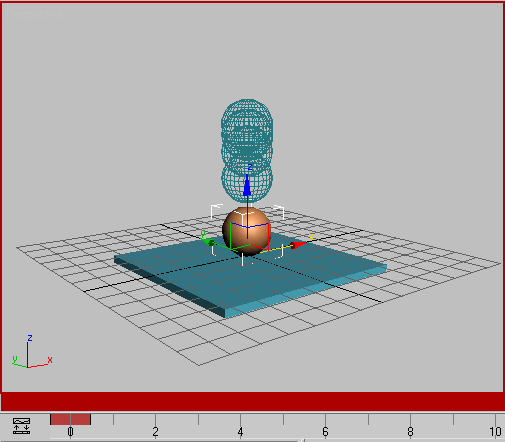
The curve now looks like this:
Shift key allows for manipulation of individual handles.
You'll change one more setting to make this tool more useful.
Using Interactive Update:
Interactive update and ghosting

By manipulating this handle you can get different effects. The upward movement of the ball as it bounces off the table will determine the perception of the weight of the ball. The ball will appear to be bouncy, like a tennis ball, if the two handles are similar. The ball will appear to hang in space if enough of the in-betweens are drawn close to the topmost position.
 Turn
off Views > Show Ghosting and then play the animation. Concentrate
on the movement of the ball. Adjust the curve handles some more
while the animation plays. Observe the effect.
Turn
off Views > Show Ghosting and then play the animation. Concentrate
on the movement of the ball. Adjust the curve handles some more
while the animation plays. Observe the effect.The ball leaves the table as quickly as it hit it, then begins to slow down as it rises.
The ball has bounce now. It looks like there is gravity at work here.
When you see something you like in the viewport, it's a reminder that you should save your work. It's easy to forget while you're being creative.
You've made the ball bounce once. In the next section you'll learn to repeat the bouncing of the ball using Out-of-Range types in Track View.