This lesson shows a number of different methods for using the Channel Info utility.
Reduce a mesh object's memory footprint:
When working as a 3D artist on a game-development project, you might receive models to work on that have already been mapped, but it's difficult to tell what the mapping is. In addition, the mapping might have been applied inefficiently, so that it takes up more memory than necessary in the model's data structure. This lesson shows you how to use Channel Info to adjust a model's mapping, thus recovering the unused memory, which can then be used by other game assets.

This simulates a situation you might encounter as a 3D artist working for a commercial game developer: You receive a mesh object to work on that already has mapping applied, but you don't have direct access to the tool (modifier) originally used for applying mapping, and you need to minimize the object's memory footprint for embedding into the game.
 Turn
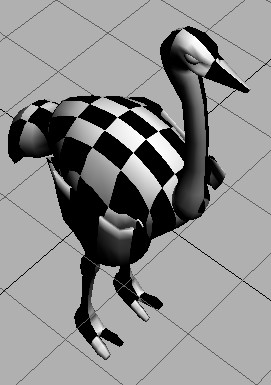
on Show Map In Viewport, and apply the map to the ostrich model.
Turn
on Show Map In Viewport, and apply the map to the ostrich model.The map appears on the model, mapped in a planar manner parallel to the world grid.
 Go to
the Utilities panel, click the More button, then double-click Channel
Info to open the utility. On the Utility panel, click the Channel
Info button.
Go to
the Utilities panel, click the More button, then double-click Channel
Info to open the utility. On the Utility panel, click the Channel
Info button.The Map Channel Info dialog opens:
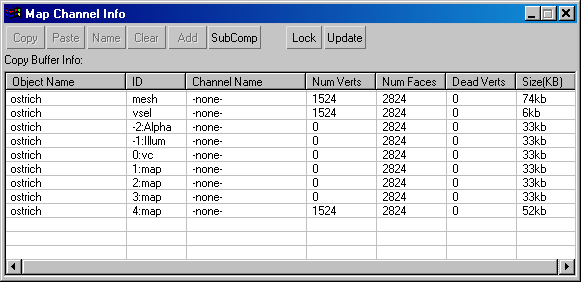
The dialog lists all pertinent channel information for the object. This is described in detail in the Interface section.
The last channel, whose ID is “4:map,” represents the mapping you applied with the UVW Map modifier. It's preceded by three empty map channels, each of which contributes about 33 kilobytes to the object's memory footprint. These were created because the software requires consecutive numbering of map channels, but the memory isn't being used for anything.
You'll use the Channel Info tools to remove the empty channels, thus freeing up the unused memory. But first you'll copy the mapping to the first available mapping channel, because you can delete channels only starting with the last one.
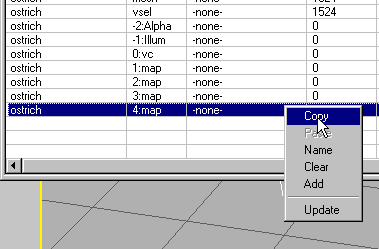
This places the texture mapping created by the UVW Map modifier into the copy buffer. The status line on the dialog, beneath the row of buttons, reads “Copy Buffer Info: Node: ostrich Map Channel 4”.

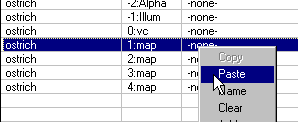
The Channel Name dialog appears, giving you the opportunity to name the pasted channel.
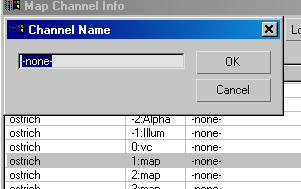
Map channel 1 now also contains the planar mapping originally applied to channel 4. You can now delete the remaining map channels, but first you'll demonstrate that the planar mapping is indeed applied to channel 1.
At map channels 3 and 2, no map appears on the ostrich model, because those channels don't contain any mapping values. But at map channel 1, the checker texture reappears on the object.
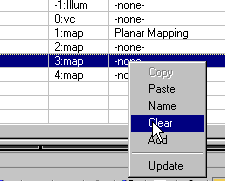
The channel remains, and still uses 33 kilobytes of memory. This demonstrates that you can't delete intermediate channels.
The channel disappears.
Only map channel 1 remains. You've deleted the others, thus reducing the object's total memory footprint by approximately 99 kilobytes (the memory consumed by the three unused map channels).
 On the
Modify panel, look at the object's modifier stack. It contains a
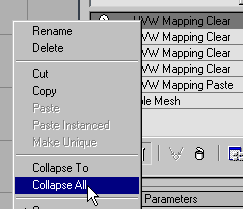
UVW Mapping Paste and four UVW Mapping Clear modifiers; the Channel
Info utility uses these modifiers to help do its work. To get rid
of these, simply collapse the stack.
Enable vertex sub-object selections to survive topology changes and object type changes:
Because Channel Info provides access to the channel that stores the current vertex selection, and lets you copy that information to other channels, you can store the vertex selection. Once you've done so, the vertex selection will survive topology changes, such as adding mesh resolution and even changing the object type.
It's important to remember, however, that the vertex-selection channel has only one component, while map channels have three. Thus, you need to copy the vertex-selection channel to a subcomponent of a map channel.
The following task also demonstrates usage of the Select By Channel modifier in conjunction with Channel Info.
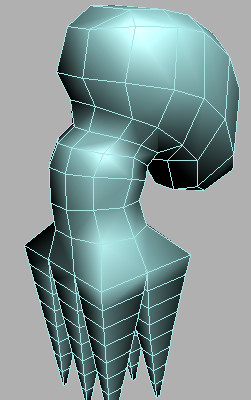
This octopus is at an early stage of modeling. You'll use it to learn how to retain sub-object selections after subdividing the mesh.
You can use the extra map channel to store the vertex-selection data, thus retaining any information already in the original map channel.

 On the
Modify panel, go to the Vertex sub-object level of the Editable
Poly base object.
 From
the Region Selection flyout on the toolbar, choose Lasso Selection
Region and, in the Left viewport, select all the vertices in the
octopus head. Drag out an approximate region selection; you needn't
be particularly careful about not selecting non-head vertices for
this exercise.
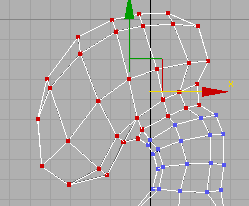
Next, you'll determine whether this selection can survive a topology change on its own. You can use a special feature of Editable Poly to automatically convert the vertex selection to a polygon selection.
 On the
Selection rollout, Ctrl+click
the Polygon button to go to that sub-object level while simultaneously
selecting the polygons used by the existing vertex selection.
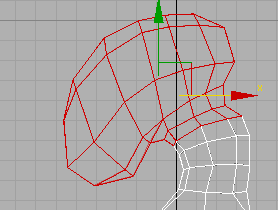
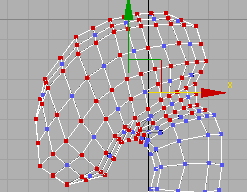
The vertices you selected before are interspersed with the new, unselected vertices that were created by tessellating the mesh. The vertex selection did not survive the topology change. That is, not all of the head vertices are still selected.
The software restores the original vertex selection.
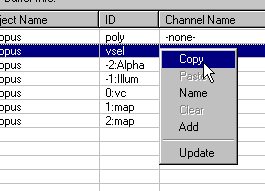
“vsel” is short for vertex selection. This channel stores the current selection set of vertices.
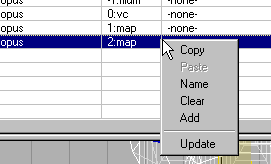
The Paste command is unavailable, because map channels each have three components, but the vertex-selection channel has only one. You can't copy and paste between a one-component channel and a three-component channel. Fortunately, Channel Info gives you optional access to individual components of three-component channels.
All three-component channels expand into their subcomponents. vsel is the only one-component channel.
The software adds a UVW Mapping Paste modifier to the object's stack.
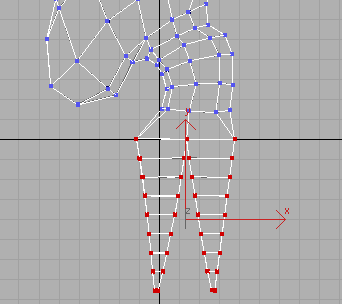
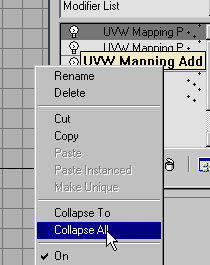
All of the additional modifiers are deleted, and the pasted data is “baked” into the object mesh.
The mesh resolution increases significantly.
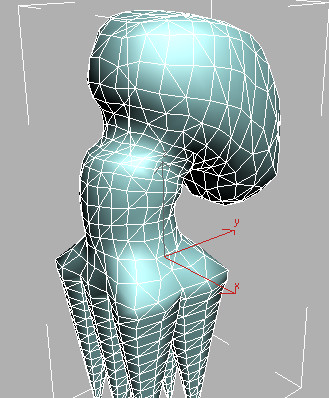
This modifier lets you select channels that you named in Channel Info.
The entries are the same as the vertex selections you copied and pasted to the map channel subcomponents.
The corresponding stored vertex selection appears on the object, including all new vertices created by the tessellation. Note that the software automatically creates a soft selection for any vertices that the tessellation created between the original selected and unselected vertices; that is, on the border of the selection.
You could get the same results by copying the stored channels back to the vsel channel in the Map Channel Info dialog, but Select By Channel makes it easier to access the various stored selections. You can pass the selection in the active selection channel up the stack to further modifiers.
Normally, if you change an object's geometry type, it's possible to lose a sub-object selection. But with Channel Info, stored selections remain intact, as you'll see in the final part of this lesson.
The channels are empty, because Channel Info doesn't support stored vertex selections in patch objects. But, as you'll see in a moment, the stored mesh-vertex selections are still available.
The vertex selections remain intact. If you performed the same series of conversions, starting with an editable mesh with a vertex selection, the selection would be permanently lost after the first conversion.
The next procedure follows on from this one. If you'd like to try it later, save this file first.
Apply texture blending with the Vertex Color map:
In 3ds Max, the Vertex Color map works in conjunction with Channel Info to provide access to the different named channels. This lesson shows how to use the capabilities of the Vertex Color map along with stored vertex selections to blend textures on an object's surface.
If you haven't done the previous procedure, please complete it before attempting this one.
You'll create a composite material and use opacity to specify which sub-material should appear where.
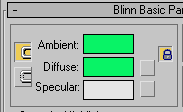
The Composite material uses opacity to determine how the different materials overlay the base mesh, so that's where you apply a Vertex Color map. You'll use Vertex Color because it provides access to the named, stored channels.
The drop-down list shows the vertex-selection channels you pasted and named.
This is just so the renderer doesn't complain about missing map coordinates when you render.
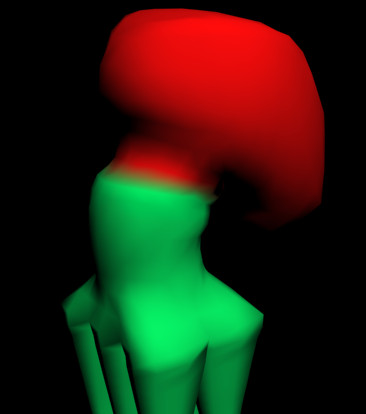
A slight amount of blending between the colored areas is the result of the soft-selected vertices created by the tessellation.
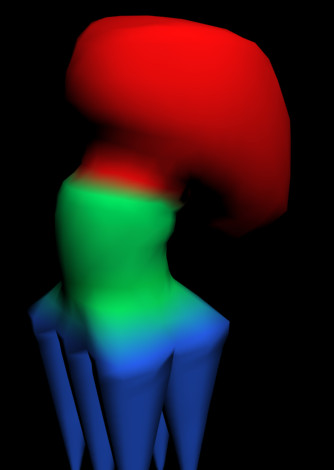
You now have an RGB octopus.
You can find the completed scene file in octopus_final.max.
This is a very powerful method of using any mapping channel to combine different materials on an object's surface.
Enable a morph object to survive a topology change:
Sometimes, after you set up a morphing animation with the Morpher modifier, you need to change the object geometry. For example, the client or technical director might request that you add a facial feature such as wart, which requires you to increase mesh resolution.
Normally, if you change the topology of the base morph object, the morphing animation is completely lost because the base object's topology then differs from that of the targets. To recover, you must re-create the morph targets using the new topology, which can be a lot of work.
Instead, you can reuse the original morphing animation via the Channel Info's Copy and Paste functions, thus saving a great deal of time and effort.
You can use your own scene, or load the included scene file octopus_morph.max. The remainder of the lesson assumes you're using this scene, which contains a low-polygon octopus moving its head and legs using three morph targets.
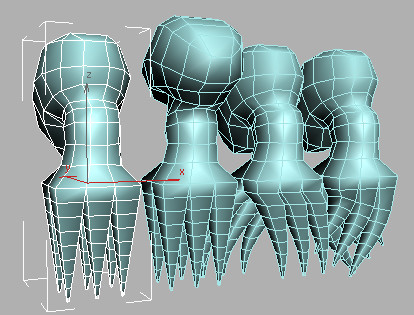
The leftmost object, the one animated with the Morpher modifier, moves its head and legs. This is also referred to as the base object. The remaining objects are morph targets; the base object uses these poses for the different phases of its animation. All four objects have the same geometry; this is a requirement for morphing animation.
Before starting, you'll demonstrate how changing the object geometry loses the morphing animation.
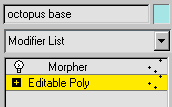
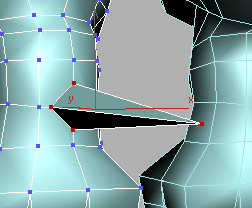
The animation is lost. This happened because the base object's geometric structure, or topology, is now different from that of the morph targets.
The morphing animation is restored.
To begin, you'll use Channel Info to copy each of the morph targets' mesh channels to different channels in the base object.
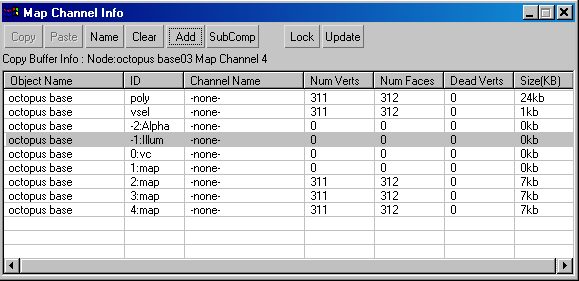
You can store the mesh data in existing channels such as Alpha, Illum, and vc, or add new channels to hold it. In this lesson, you'll do the latter.
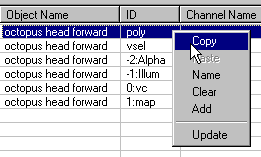
The poly channel contains the object's mesh data.
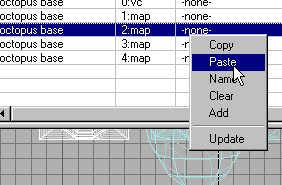
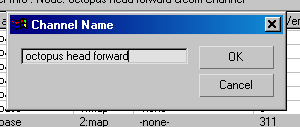

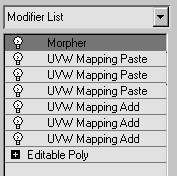
The added/pasted channels are combined into the base object; only it and the Morpher modifier remain.
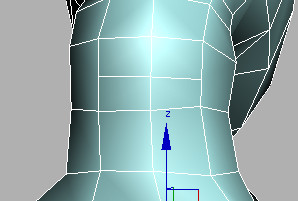
Because of its modified topology, the base object no longer morphs into the target shapes.
Each of these copies has the same topology as the modified base object, and contains all of the original morph targets' shapes in its mapping channels.
The first morph target regains its head-forward pose.
Lastly, you'll set the Morpher modifier to use the new targets.
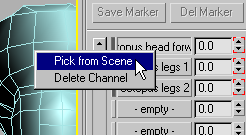
The new target name replaces the old one on the button.
The morphing animation is restored intact with the modified topology.
You can find the end result of this lesson in the file octopus_morph_final.max.
With its ability to store different kinds of information in mapping channels for later retrieval, the Channel Info utility can play a role in helping you master a variety of tasks in 3ds Max. You can use it to: