Texturing the Chessboard

Introduction to Materials and Mapping

Adding Stars to the Sky

Using Displacement Mapping with Surface Properties
In
this lesson, you make a moon with a detailed surface using displacement
mapping combined with Surface properties.
- Bitmaps
for this lesson can be found in the tutorials/intro_to_materials folder.
Create
a moon:
- Reset 3ds Max.
- In
the Perspective viewport, create a sphere that fills the viewport.
- On
the Create panel, set the Radius to 100. Name the
sphere Earth’s Moon.
-
 Click
Zoom Extents All to zoom out in all four viewports.
Click
Zoom Extents All to zoom out in all four viewports.
Set
up lights and cameras:
- Activate
the Perspective viewport, if necessary, then press Ctrl+C. This creates a Target camera,
matches the camera to the Perspective viewport, and switches the
viewport to the camera view.
-
Click
Zoom Extents All. In the Top viewport, you see the camera is facing
the moon at about a 45 degree angle.
NoteYour
sphere might be a different color than the one shown here.
-
 On the
Create panel, open the Lights sub-panel and click Omni.
On the
Create panel, open the Lights sub-panel and click Omni. - In
the Top viewport, create an omni light by clicking at the bottom
of the viewport. Name this light main light.
- On
the Modify panel, turn on Shadows and set Multiplier to 1.2.
- In
the Top viewport, create another omni light by clicking near the
top left of the viewport. Name this light fill light.
- On
the Modify panel, turn on Shadows and set Multiplier to 1.5.
Then change the color of the fill light to orange. This adds some
warmth to the image.
- Right-click
in the Camera viewport to activate it. Then press F9 to render the scene.
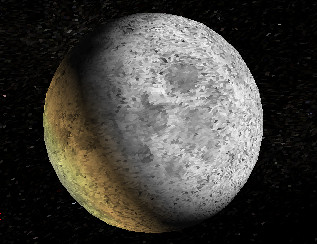
In the rendered image, the highlights on the
moon appear very bright, and the edges of the moon need more detail.
You will fix both problems using mapping.
Map
the moon:
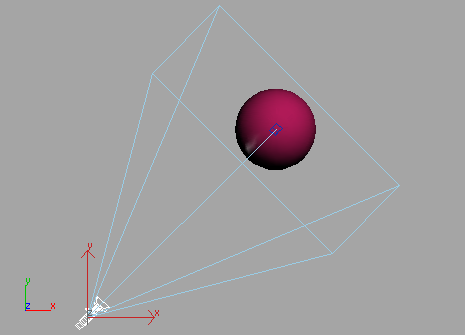
- Press M to open the Material Editor.
- Click
a material sample slot. Name the material Earth's Moon.
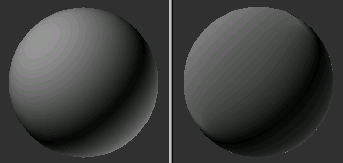
- Choose
the Oren-Nayar-Blinn shader from the drop-down list on the Shader
Basic Parameters rollout. The highlights of the material darken,
giving the sample sphere a softer look.
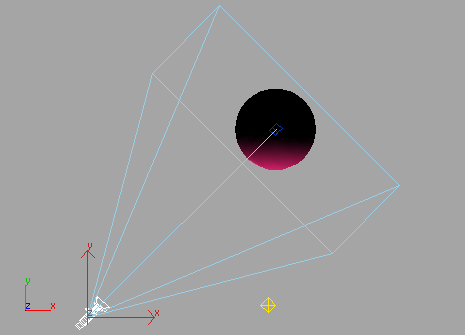
- Click
the Diffuse map button; it's the blank gray button to the right
of the Diffuse color swatch. In the Material/Map Browser, choose
Bitmap and click OK.
- Use
the Select Bitmap Image File dialog to open moon.jpg. The moon map appears
on the sample sphere.
-
 Click
Show Map In Viewport, then drag the material onto the sphere.
Click
Show Map In Viewport, then drag the material onto the sphere. - Press F9 to do a test render.
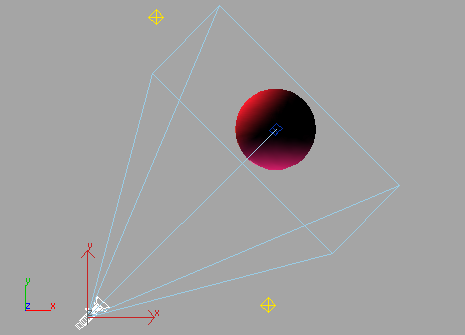
-
 In the
Material Editor, click Go To Parent.
In the
Material Editor, click Go To Parent. - Drag
from the Diffuse map button to the Diffuse Level map button, in
the Advanced Diffuse group. Choose Instance and click OK.
- Press F9 to see the result.
Displace
the surface with a map:
Displacement mapping uses an image or algorithm
to alter the geometry of an object. Unlike bump mapping, it actually
changes the mesh, so you can see the texture on the edges of an
object. Ordinarily this isn't visible until you render, although
you can see it in the viewports with the Disp Approx modifier. This
modifier is not covered in this tutorial.
- Open
the Maps rollout. Pull down the bottom edge of the Material Editor
so that you can see the entire rollout, if necessary.
- Drag
the moon.jpg map
from the Diffuse Level map component to the Displacement map component.
Choose Copy and click OK.
The button next to Displacement is now labeled
"Map#2 (Moon.jpg)."
- Set
Displacement amount to -20.
- Select
the sphere. Right-click the sphere and choose Convert To Editable
Poly.
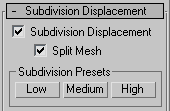
- On
the Modify panel, scroll down to the Subdivision Displacement rollout
and open it.
- In
the Subdivision Displacement rollout, turn on Subdivision Displacement
and click Low. This prevents the surface mesh from becoming too
complex.
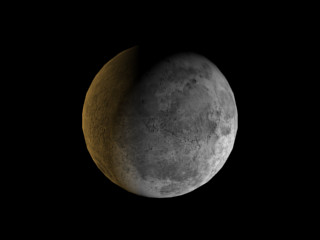
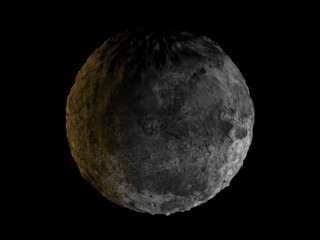
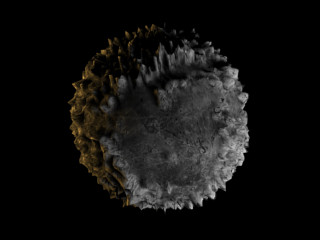
- Press F9 to render. The surface of the moon
appears bumpy.
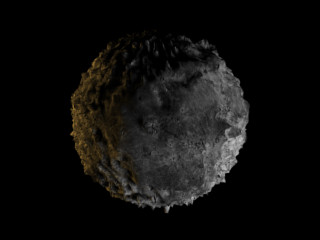
- On
Material Editor > Maps rollout, increase the Displacement amount
to –50.
- Press F9 to render. The surface of the moon
appears even bumpier.
Control
the areas of displacement:
This procedure shows you how to control the
surface displacement so that it accentuates the areas of moderate
displacement.
- On
the Maps rollout of the Material Editor, click the Displacement
map button labeled "Map#2 (moon.jpg)."
- On
the Bitmap Parameters rollout, click View Image. The close grayscale
values that you see in the map limit the amount of surface variation.
- Close
the viewer window and scroll down to the Output rollout.
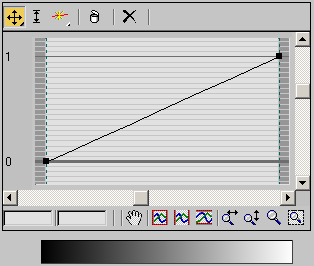
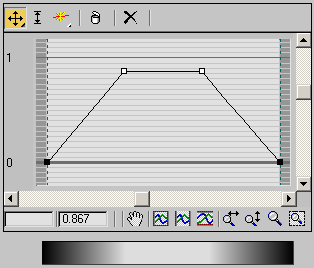
- Open
the Output rollout and turn on Enable Color Map. Scroll to the bottom
so you can see both the graph and the gradient bar.
- Drag
the point on the right downward so the line is horizontal.
The gradient bar and the sample slot turn black.
-
 Click
Add Point. Then click to add two points to the curve at about one-third
intervals along its length.
Click
Add Point. Then click to add two points to the curve at about one-third
intervals along its length. -
 Click
Move. Select the two points that you just created and move them
upward to form a trapezoidal graph.
Click
Move. Select the two points that you just created and move them
upward to form a trapezoidal graph.
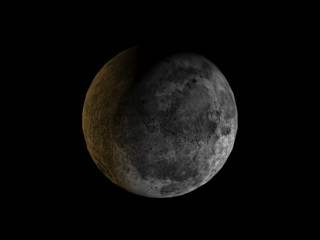
- Press F9. The bumpiness increases across
the middle values of the map.
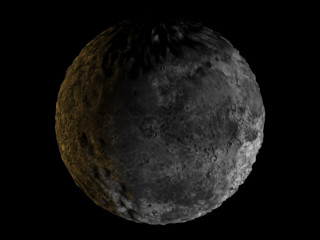
-
Click
Go to Parent. Change the Displacement to 20 and press F9. You now have a moon with craters.
- Save
your file as mymoon.max.