Assigning Materials to Objects

Introduction to Materials and Mapping

Understanding Ambient Color and Light

Creating Basic Materials
In
this lesson, you create variations on the Standard material type
by changing basic parameters such as color, glossiness, transparency,
and shader type.
- The
files for this lesson can be found in the tutorials/intro_to_materials folder.
Set
the diffuse and specular color:
The Blinn shader has basic settings for color,
glossiness, self-illumination and transparency.
- Open intro_materials2.max.
- Press M to open the Material Editor. If
necessary, set the display to 5 x 3 Sample Windows; press X repeatedly until the sample spheres
are largest.
- Scroll
down to the third row and click the center sample sphere; the material's
name includes the string “Default”.
- Rename
this material using the editable name field above the rollouts.
Call it myorange material.
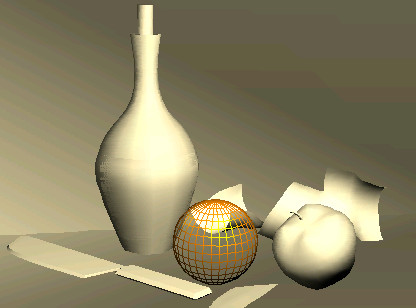
- From
the Material Editor, drag myorange material onto the Orange
object in the viewport. The orange in the viewport turns gray.
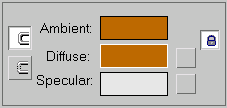
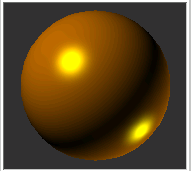
- On
the Blinn Basic Parameters rollout, click the Diffuse color swatch
to display the Color Selector. Change the Diffuse color to dark orange.
Then close the Color Selector.
Both the Diffuse color and Ambient color change
to dark orange, because the colors are locked together. In the viewport,
the Orange object's color changes to dark orange.
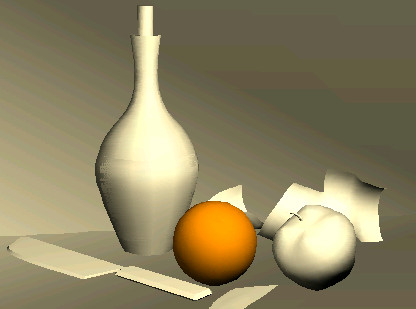
- In
the Specular Highlight group, experiment with the Specular Level
parameter by dragging the spinner up and down while observing the sample
sphere. Then set the Specular Level to 100.
A highlight appears on the orange. The highlight
gets stronger as you increase the Specular Level.
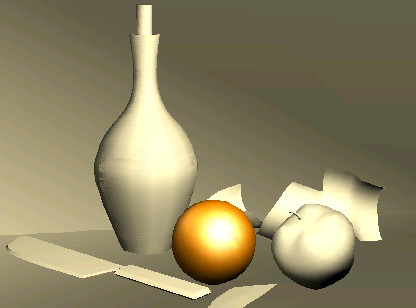
- Experiment
with the Glossiness parameter by dragging its spinner up and down
while observing the sample sphere. Then set the Glossiness to 40.
As Glossiness increases, the highlight gets
smaller and more focused. This is how you control the shininess
of an object.
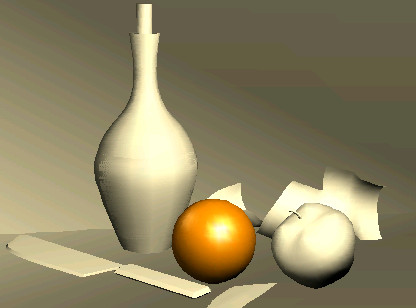
- Click
the Specular color swatch and change the Specular color to a bright
lemon yellow.
The highlight takes on a yellow tinge.
Use
wire and 2-sided:
You can use the Wire material option to make
an object render in wireframe.
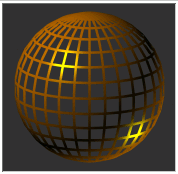
- On
the Shader Basic Parameters rollout, turn on Wire.
The surface of the orange displays in wireframe,
rather than as shaded faces.
- Open
the Extended Parameters rollout. In the Wire group, change the Size
to 2.5.
-
 Render
the scene. The orange renders with a thicker wire.
Render
the scene. The orange renders with a thicker wire.TipTo
depict an object turning to wireframe, animate the wire thickness.
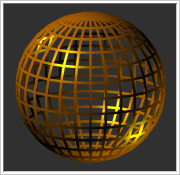
- In
the Shader Basic Parameters rollout, turn on 2-Sided. Now you can
see the object's back side through the front wires.
- Turn
off 2-Sided and Wire. The object turns solid again.
Add
self-illumination:
Self-illumination makes an object look as though
it's lit from within. Use Self-Illumination to save rendering overhead
when you want to create lights that do not need to illuminate surfaces,
such as running lights along the perimeter of a spaceship.
- On
the Blinn Basic Parameters rollout, set Self-Illumination of myorange
material material to 100 percent.
The dark areas of the orange brighten, making
the orange look incandescent.
NoteIf
you see a black color swatch instead of the spinner, turn off Color.
- Right-click
the Self-Illumination spinner to reset the value to 0.
- Save
your file as myorange.max.