


Looping Animation in Motion Flow Mode
By creating a script that repeatedly calls the same motion clip, you can create a loop cycle that lengthens the motion. This is a good way to lengthen a walk or run cycle. You will use layers to change the looped animation.
Set up the lesson:
 Open
the Motion panel.
Open
the Motion panel. Turn
on Motion Flow Mode.
Turn
on Motion Flow Mode. On the
Motion Flow rollout, click Show Graph.
On the
Motion Flow rollout, click Show Graph.The Motion Flow Graph displays.
 On the
Motion Flow Graph toolbar, click Create Multiple Clips.
On the
Motion Flow Graph toolbar, click Create Multiple Clips.The Open dialog displays.
The motion clip appears in the Motion Flow Graph window.
 On the
Motion Flow Graph toolbar, click Create All Transitions. A Biped
dialog asks if you want to create transitions from each clip to
itself. Click Yes.
On the
Motion Flow Graph toolbar, click Create All Transitions. A Biped
dialog asks if you want to create transitions from each clip to
itself. Click Yes.A transition is created pointing back at the selected clip.
 On the
Motion Flow Graph toolbar, turn on Select Clip/Transition, if necessary.
On the
Motion Flow Graph toolbar, turn on Select Clip/Transition, if necessary.The arrow turns white.
The Transition Optimization dialog displays.
Create a script:
 On the
Motion Flow rollout, in the Scripts group, turn on Define Script.
On the
Motion Flow rollout, in the Scripts group, turn on Define Script.You’ve created a script that calls for the clip to transition to itself four times.
The clip loops, extending the walk cycle.
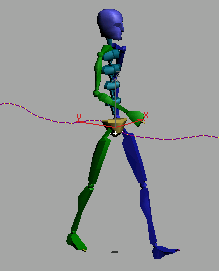
Walking biped with trajectory turned on.
Make the motion available in your scene outside of Motion Flow mode:
Click
the Define Script button on the Motion Flow rollout, in the Scripts
group, to turn off scripting mode. On the
Motion Flow rollout, in the Scripts group, click Create Unified
Motion. Then, in the Unify Options dialog, click OK to accept the
defaults.
On the
Motion Flow rollout, in the Scripts group, click Create Unified
Motion. Then, in the Unify Options dialog, click OK to accept the
defaults. On the
Biped rollout, turn off Motion Flow mode.
On the
Biped rollout, turn off Motion Flow mode.The walk cycle is available for editing outside of Motion Flow mode.
Add a layer and modify the walk cycle:
 On the
Layers rollout, click Create Layer.
On the
Layers rollout, click Create Layer.A new layer is created.
 Turn
on Auto Key.
Turn
on Auto Key. At frame
0, in the Front viewport, rotate both upper arms about the Y-axis
to move the arms away from the body.
At frame
0, in the Front viewport, rotate both upper arms about the Y-axis
to move the arms away from the body. Click
Play.
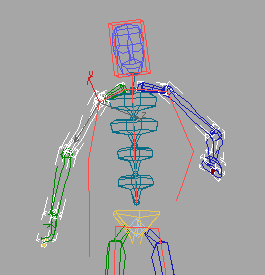
Click
Play.The walk loop now has the character swinging his arms farther from his body. The red stick figure represents the original motion.
 On the
Layers rollout, click Collapse.
On the
Layers rollout, click Collapse.The layer showing the arms away from the body is collapsed into the base animation.
Looping animations and layers lets you lengthen and modify animations.