It takes a lot of time to set up the rig for an arm or a leg, and it'd be nice to not have to do all that work twice. If you follow a few simple rules when creating the bones and IK structure for a character, you can set up the IK for one side (an arm or leg) and then mirror it, and have it work.
In this tutorial you will learn:
Set up the lesson:
This file contains a simple leg bones setup.
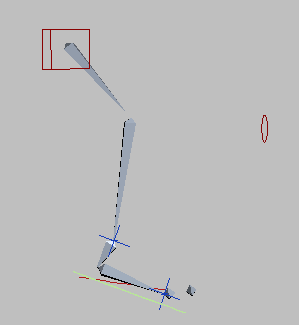
Simple leg setup
Check the parent space and hierarchy:
 On the
animation playback controls, click the Play button to play the animation.
On the
animation playback controls, click the Play button to play the animation.The leg assembly takes a short hop.
You will explore this IK setup a little before you mirror the IK.
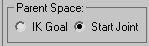
There are two simple rules to follow when mirroring a character rig with bones and IK. The first is that the IK chain's Parent Space has to be set to Start Joint, not IK Goal.
The second requirement is that the root of the IK chain must be linked to something that doesn't have IK on it. You can tell whether this is true by looking at the Motion panel.

In the Assign Controller rollout on the Motion panel, you can see the Transform Controller does not say IK.
Rule number two is satisfied. The root is parented (linked) to something that doesn't have IK.
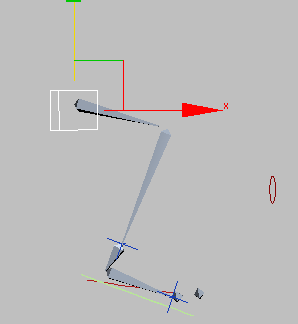
Move the dummy
You can see that the hip dummy is the parent of the thigh bone.
Mirror the leg assembly:
When you mirror, it's important that you select the parent of the root bone.
 On the
main toolbar, click the Mirror Selected Object button.
On the
main toolbar, click the Mirror Selected Object button.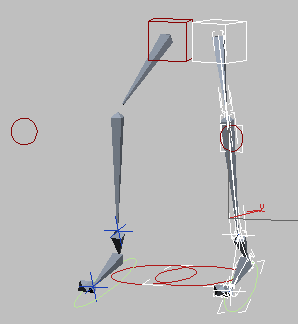
Mirrored IK
The bones are successfully mirrored, and the animation works.
You can find a completed version of this scene in the file tut_mirror_ik_finished.max.
In these lessons, you learned how to use the basic tools for creating a character rig. Now you can try out these tools on your own characters. You can also do the advanced rigging tutorials to learn more character rigging techniques.


