


Autodesk 3ds Max Tutorials > Character Animation Tutorials > Character Animation without Biped > Introduction to Character Rigging >
Creating a Bone Structure
This lesson gets you started with bones by showing how to create them for a simple character. Bones are special objects that are ideal for a character rig. Bones are automatically linked as you create them, and can be shaped to resemble an actual bone structure for a character's skeleton.
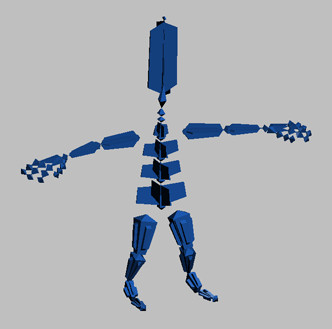
A series of linked bones is called a chain. Two or more chains linked or connected together forms a hierarchy of bones.
Bones appear in viewports as ordinary objects, but they have special properties. Essentially, a bone is a visual representation of a pivot point, a direction, and a length. The bone points from its pivot point (the start of the joint). Its length is defined by the distance between the bones, and it points in the direction of the next child on the chain.
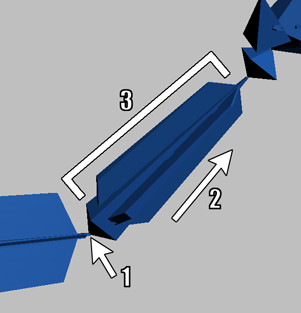
1. Pivot point
2. Direction
3. Length
It is possible to set up unusual relationships between bones, such as a bone that does not extend all the way to the next child on the chain. However, the most common uses for bones observe the properties described above.
You'll start this tutorial by creating bones for a simple character. You can find the files for this tutorial in the \tutorials\character_animation\intro_to_rigging folder.
Prepare the character:
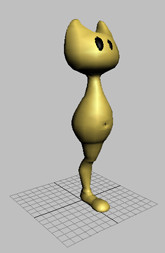
This file contains a simple character named Pluggo. The character has one leg, a torso and a head, but no arms.
The scene contains three objects: the character body, and two eyes.
When rigging a character, you can make the process easier by:
Create the leg and foot skeleton:
This is where you will work for now.
The Bone Tools dialog appears.
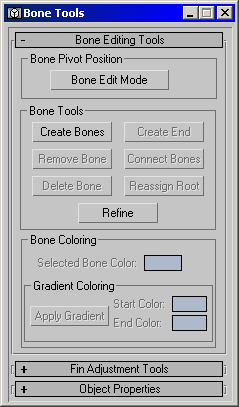
The Bone Tools floater provides functions for creating and editing bones.
When creating the bones, don't be too concerned about exact placement. You will get a chance to reposition the bones in the next procedure.
This creates a fifth, small bone at the end of the toes.
Next, you will name the bones. It is a common practice to name the bones according to the joints where they begin, such as hip, knee and ankle.
Adjust the bone positions:
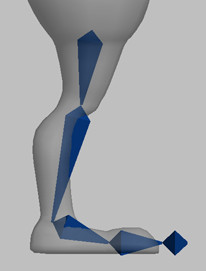
When placing bones for a character, it is more important to have the joints (pivot points) at the correct locations than it is to have the bones going through the mesh. For this character, the calf bows backward slightly, which makes it impossible to place the calf bone so it passes through the leg. You will simply position the bones so the pivots are in the right locations.
Also, positioning the bones with a slightly bent knee will help with a later procedure where you set up IK controls for the leg.
In Bone Edit mode, you can change the lengths of bones and their positions relative to one another. This mode can be used both before and after assigning an IK chain to the bone structure.
Notice that adjusting a bone visually alters the length of the bone before it. However, it is actually adjusting the pivot placement of the selected bone.
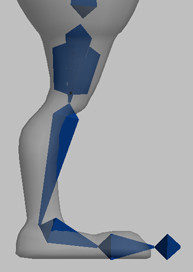
Create the spine bones:
With a character rig, it is usually desirable to keep each limb as a separate linked chain. In other words, you would have a chain for each arm and leg and another for the torso, but you would not link these chains to one another with Select and Link. Instead, you would use rigging controls to tie it all together.
The next step is to create a series of bones for the spine and head. It seems logical to begin creating the spine bones at the top of the hip bone. However, if you do so, the first spine bone will automatically link to the hip bone.
To get around this situation, you will create the spine bones away from the character's body, then move them into place.

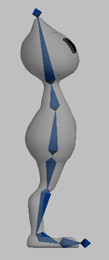
Create fins for the bones:
You can create fins, or extrusions, on the bones. Later, when you add controls and animate the character, your work will be easier if you can hide the mesh and work with the bones alone. Fins will cause the bones to approximate the volume of the character's body, which will help you effectively animate the bones without having to display the mesh.

Make a named selection set for the bones:
You can find a scene with the correct bone placement and names in the file tut_introrig_bones.max.
To learn more about creating and editing bones, see the Creating and Editing Character Bones tutorial.