


Autodesk 3ds Max Tutorials > Character Animation Tutorials > Biped Beyond the Basics > Animating a Multi-legged Character >
Animating a Quadruped
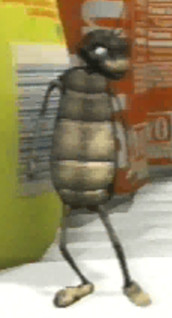
In this lesson, you'll animate a four-legged character, a beetle, that leaps on all fours, but can also walk upright on two legs. You’ll lock the hands and feet at certain keys so you can adjust the biped’s center of mass and spine to create the basic poses.
Set up the lesson:
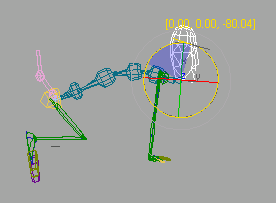
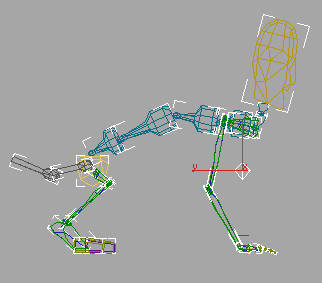
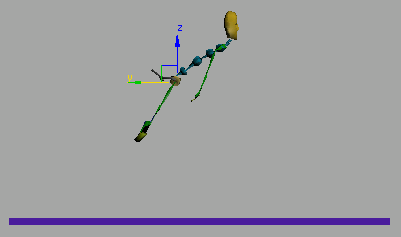
This is the biped used for the beetle.
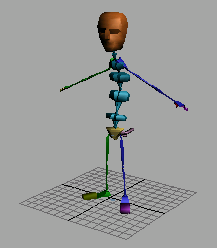
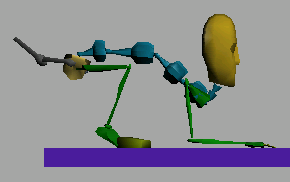
The beetle and its biped
The beetle walks upright through most of the animation, but in this shot, he’ll move on all fours. Because he's a two-legged character pretending to move like a horse, you won't change him to a horse pose in Figure mode. Instead, you'll use freeform animation to put him into his initial riding pose at frame 0.
Save a FIG file:
 Select
any part of the biped, then open the Motion panel.
Select
any part of the biped, then open the Motion panel. In the
Biped rollout, turn on Figure Mode.
In the
Biped rollout, turn on Figure Mode. Use
Save File to save a FIG file of the biped as mybeetle1.fig.
Use
Save File to save a FIG file of the biped as mybeetle1.fig.This preserves the beetle’s original pose.
 Turn
off Figure Mode.
Turn
off Figure Mode.The pose does not change, since the beetle isn’t animated in this file.
Rotate the legs to put the beetle on all fours:
 Turn
on Auto Key.
Turn
on Auto Key.You’ll use Auto Key instead of Set Key for the first pose.
 On the
Track Selection rollout, turn on Body Rotation.
On the
Track Selection rollout, turn on Body Rotation.This selects the center of mass (COM) and activates Rotate.

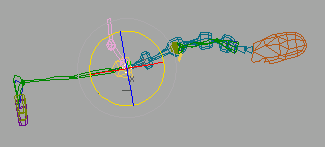
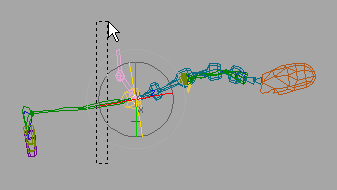
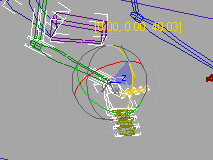
The COM (Bip01) rotated
The next steps rotate the arms and legs into position.
This selects both thighs in a single move.
Watch the Z Coordinate Display in the status bar.
This selects the calves.
Next, you’ll add a couple of rotations to the arms.
Rotate the arms to put the beetle on all fours:
 In the
Top viewport, select Bip01 R Clavicle. Then, in the
Track Selection rollout, click the Symmetrical button to select Bip01
L Clavicle.
In the
Top viewport, select Bip01 R Clavicle. Then, in the
Track Selection rollout, click the Symmetrical button to select Bip01
L Clavicle.Both clavicles are selected.
 In the
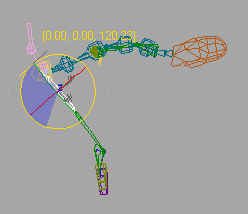
Top viewport, rotate the clavicles about the Y-axis, approximately −40 degrees.
In the
Top viewport, rotate the clavicles about the Y-axis, approximately −40 degrees.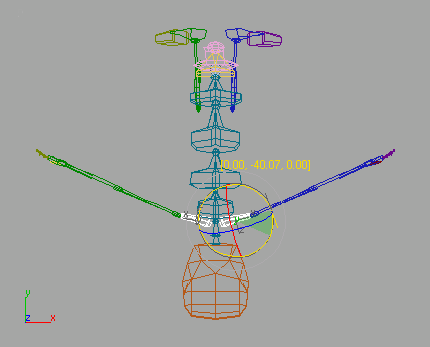
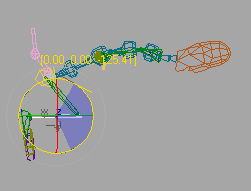
Rotate
the arms approximately –90 degrees about the X-axis,
so the palms are parallel to the ground.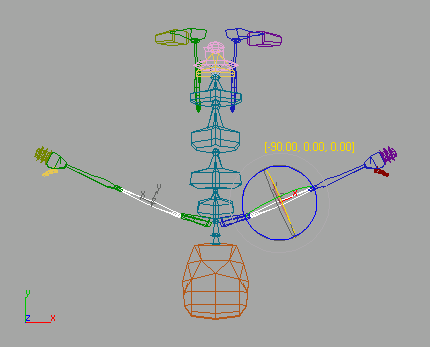
Rotate
the arms approximately −90 degrees about the Z-axis,
so the arms stretch out in front of the biped.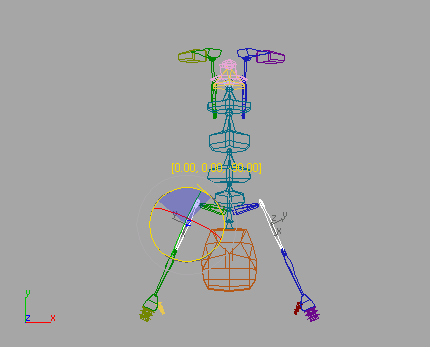
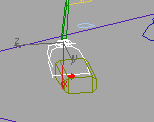
Left viewport view of arms rotated down
Arms moved away from the body
Head rotated up
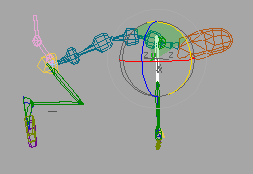
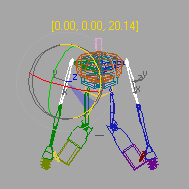
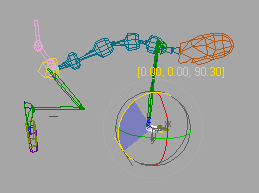
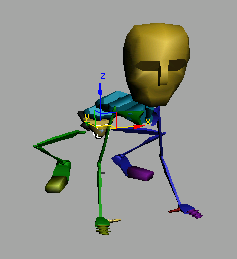
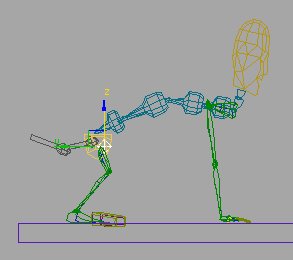
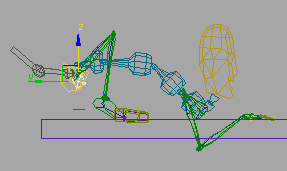
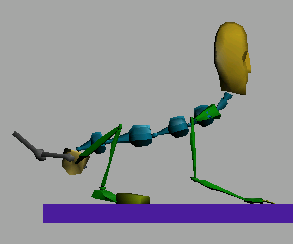
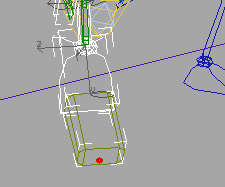
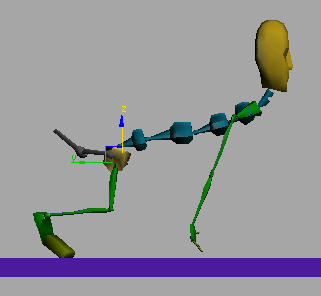
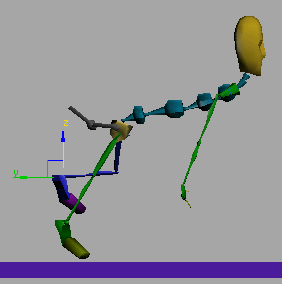
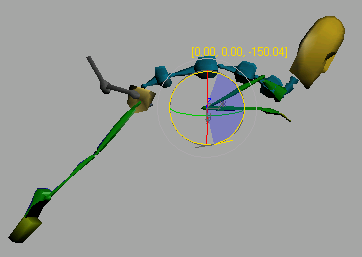
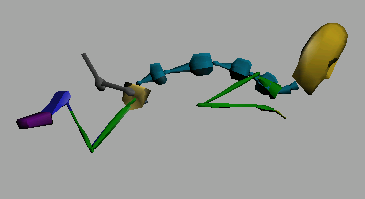
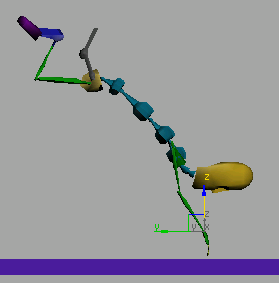
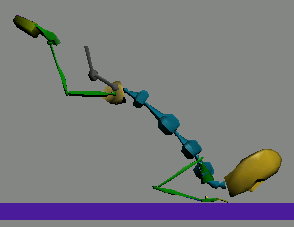
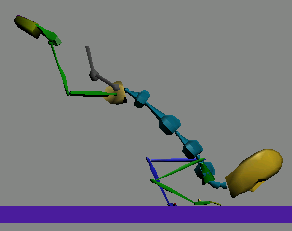
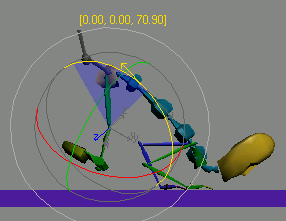
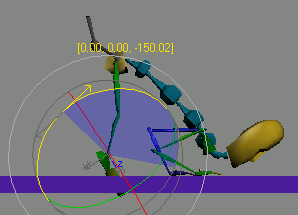
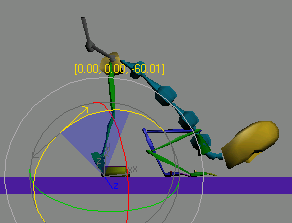
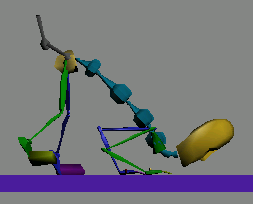
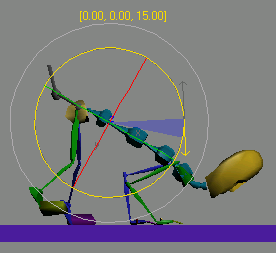
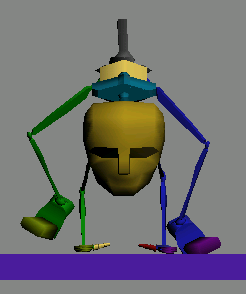
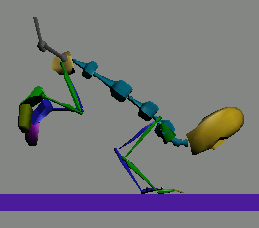
Make any additional adjustments to the legs, arms, spine, and so on, until your model resembles the one illustrated in the four views that follow.

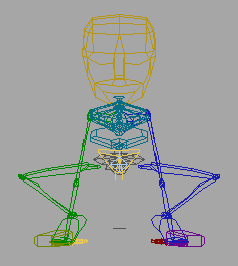
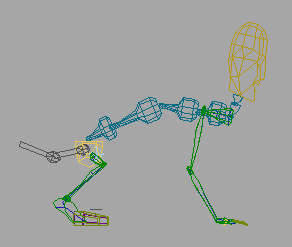
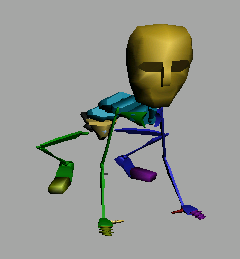
Four views of the beetle's final pose on all fours
If the beetle’s posture is incorrect, open cs4_tut_quad02.max to compare.
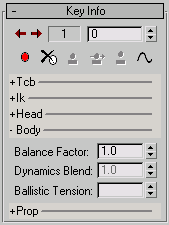
Change Dynamic Blend and Balance Factor:
For a beetle traveling on all fours, or before you begin any freeform animation, you need to turn off Balance Factor and Dynamics Blend. These settings add secondary motion to footstep animation, which assumes the biped is walking upright.
Select
any part of the biped, and open the Motion panel. In the
Track Selection rollout, click the Body Horizontal button.
In the
Track Selection rollout, click the Body Horizontal button.This automatically selects the center of mass, and activates Move.
In the Left viewport, the center of mass jumps from the pelvis to the area under the chest.
The center of mass jumps to the area under the throat.
Balance Factor=2.0
This ensures that the hips and spine balance around the pelvis area.
Balance Factor=0
 In the
Track Selection rollout, turn on Body Vertical.
In the
Track Selection rollout, turn on Body Vertical.Dynamic Blend controls the amount of gravity in an airborne period. Here, we are setting the value to 0 to eliminate gravity calculation and produce a more flattened motion.

For another tutorial that teaches about Balance Factor, see Creating the Illusion of Weight .
Add a ground plane:
In the lesson Animating a Freeform Walk Cycle , you set keys that locked the feet to the ground. Those keys locked the feet to the world, rather than to an object.
In this lesson, you’ll create a box, and then lock the beetle’s feet to the object, instead of locking them to the world.
 In the
Top viewport, zoom out so the biped is smaller.
In the
Top viewport, zoom out so the biped is smaller. In the
Create panel, choose Box.
In the
Create panel, choose Box.Change the size of the box to 500 units in length, 150 units in width, and –10 in height.
 Move
the box so the biped is at the top end of the box.
Move
the box so the biped is at the top end of the box.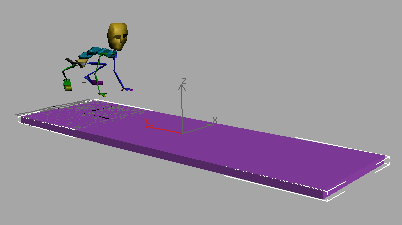
Biped at the end of the box
At this point, don't worry about the biped floating above the box. You'll remedy that next.
 On the
Motion panel, in the Track Selection rollout, turn on Body Vertical.
On the
Motion panel, in the Track Selection rollout, turn on Body Vertical.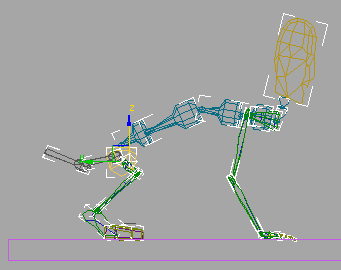
Biped positioned on box
Lock down the hands and feet:
This file is like the one you’ve been working on, but the feet have been rotated so the heels are flat on the ground.
 Turn
on Auto Key. Change
the Perspective viewport to Wireframe. Zoom in so you can see the
hands and feet.
Turn
on Auto Key. Change
the Perspective viewport to Wireframe. Zoom in so you can see the
hands and feet.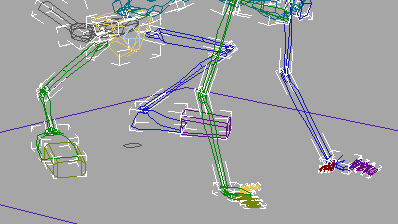
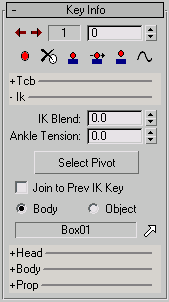
 On the
Motion panel, in the Key Info rollout, click Set Key.
On the
Motion panel, in the Key Info rollout, click Set Key.The pivot point is on the ball of the foot. You can leave it there.
 In the
Key Info rollout, expand the IK bar. Click the Select IK Object
arrow button, and then click the box in the front viewport.
In the
Key Info rollout, expand the IK bar. Click the Select IK Object
arrow button, and then click the box in the front viewport.The name Box01 is displayed in the field next to the arrow button.
 In the
Key Info rollout, click Set Sliding Key.
In the
Key Info rollout, click Set Sliding Key. In the
Track Selection rollout, click the Opposite button.
In the
Track Selection rollout, click the Opposite button. The Bip01 L Foot is selected.
In the
Key Info rollout, click Set Key.This sets a key for the left foot.
Click
the Select IK Object arrow, and click the box again. Click
Set Sliding Key again.The feet are now locked to the box.
The hands and feet act the same. Both are locked and do not pass through the box.
 Turn
off Auto Key. Check
the finished result. In the Track Selection rollout, click Body
Vertical, and move the center of mass up and down.
Turn
off Auto Key. Check
the finished result. In the Track Selection rollout, click Body
Vertical, and move the center of mass up and down.The knees and elbows bend with the movement. The feet and hands don’t go through the box as the biped is moved down.
Knees and elbows bend without going through the box.
Add anticipation:
Before a character jumps, you need to prepare for the jump. To show anticipation, a character moves in the opposite direction from the jump, and holds the pose, as if to tell the audience that something is about to happen.
Turn
on Auto Key. Move the time slider to frame 10. In the
Track Selection rollout, click Body Rotation.
In the
Track Selection rollout, click Body Rotation.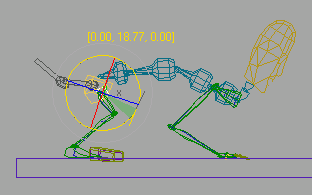
Click
Body Horizontal. Move the center of mass back so the elbows lower
almost to the ground.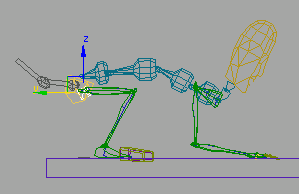
Select
the head. Rotate the head so it’s looking up.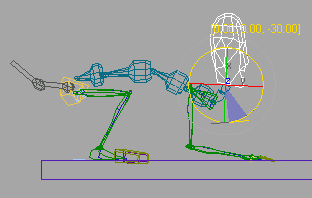
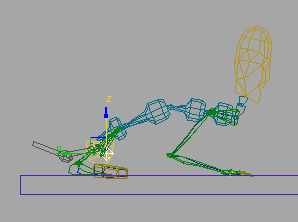
Pose at frame 10.
Continue the motion:
You’ll continue the motion at frame 20. You’ll adjust the timing after you get all the poses in place.
In the
Track Selection rollout, click Body Vertical.Don't worry about the elbows moving through the box. You'll fix that in the next few steps.
Rotate
the spine links about –15 degrees around the Z-axis.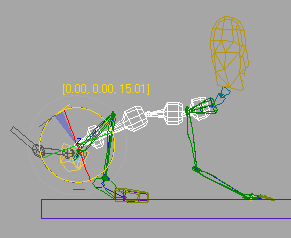
Pose at frame 20.
Next, you’ll animate the pivot points and rotate the feet so they roll from the heel to the toe. You’ll rotate the hands so they rock from wrist to palm to fingertips.
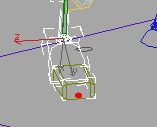
Rotate the feet to prepare to leap:
The foot is selected, and the pivot (large red dot) is displayed at the ball of the foot.
In the
Key Info rollout, click Set Sliding Key. Rotate
the foot, so the heel is raised (about –25 degrees
around the Z-axis. In the
Key Info rollout, expand the IK bar. Set Ankle Tension to 1,
and then click Set Planted Key.
In the
Key Info rollout, expand the IK bar. Set Ankle Tension to 1,
and then click Set Planted Key.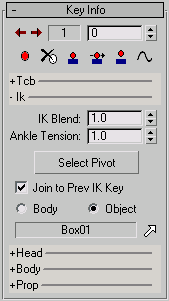
Selecting the pivot automatically sets a key for it. You don’t have to choose Set Planted Key again.
The foot now rotates off the toe.
In the
Track Selection rollout, click the Opposite button. Repeat the previous
steps for the left foot.Rotate the hands to prepare to leap:
Select Bip01
R Hand, and click Set Planted Key.The right hand is selected, and the pivot is displayed and locked at frame 23.
Rotate
the hand approximately –40 degrees about the Z-axis so
the heel of the palm is raised.Unlike the toes. the fingers rotate downward. You’ll have to rotate the fingers to correct this.
Since Auto Key is still on, you don’t have to set keys for the fingers after you rotate them.
Press Page Up to select the right hand
again. Move the time slider to frame 27, and click Set Sliding Key. Turn
on Select Pivot. Select the pivot in the front and center of the
fingers.
Turn
on Select Pivot. Select the pivot in the front and center of the
fingers.
Rotate
the hand approximately 40 degrees about the Z axis.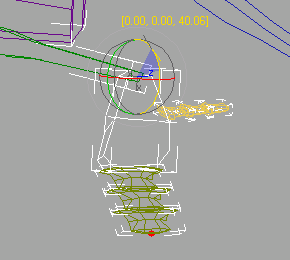
The hand rolls up, with only the fingertips touching the ground.
On the
Track Selection rollout, click the Opposite button. Repeat the previous
steps for the left hand.Move the body to prepare to leap:
After both feet and hands are adjusted, the body needs to be moved in preparation for the leap.
On the
Track Selection rollout, click Body Vertical.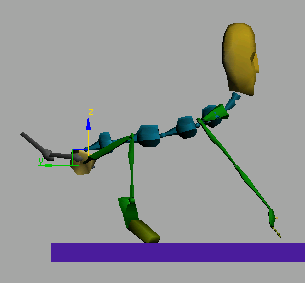
On the
Track Selection rollout, click Body Horizontal.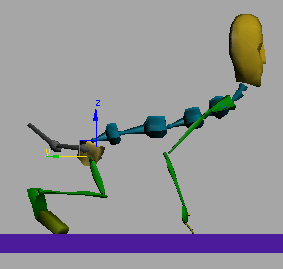
Pushing-off pose.
Position the legs for flight:
When the beetle sails through the air, you’ll use free keys on the hands and feet. No IK Blend is needed.
With
Move or Rotate active on the main toolbar, select a hand or foot.  On the
Key Info rollout, click Set Free Key. Repeat these steps to set
a free key for each remaining foot and hand.
On the
Key Info rollout, click Set Free Key. Repeat these steps to set
a free key for each remaining foot and hand.If you open the IK expansion bar, you'll see that the IK Blend is set to 0 at frame 40 for the extremities.
In the
Left viewport, use Body Horizontal and Body Vertical to move the
center of mass up and to the right.The hands and feet are now off the box and the biped is in the air.
Click
the Opposite button. and extend the left leg in the same way.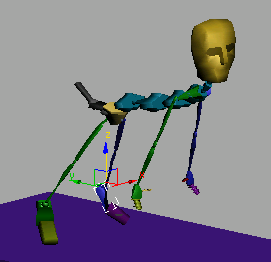
The knees are no longer bent.
With
the left foot still selected, click the Symmetrical button to select
both feet, then rotate them downward and backward.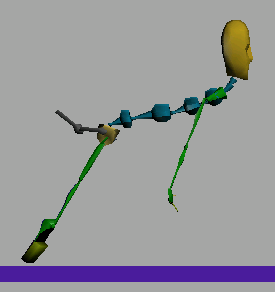
The legs and feet are fully extended.
Position the arms and torso for flight:
Now that the legs are positioned, you'll work on the arms.
Select
both of the hands, and rotate them downward and backward. Press H and select Bip01 R Finger1 and Bip01
L Finger1. Rotate them down and back.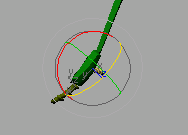

Final pose of the biped springing into the air.
Pose the upper body to reach the apex:
The character is airborne. As he reaches the apex of his jump, you’ll rotate the spine to hunch him over, tuck his elbows back, and bend his knees.
Open
the Motion panel if it's not already open. In the
Track Selection rollout, use Body Horizontal and Body Vertical to
move the biped up and over to the height of his jump.Zoom out in the Left viewport so you can see the entire box. This will let you gauge how high the biped should go so it has room to land.
Center of mass moved to apex of the jump.
Select Bip01
Spine and rotate it so the biped bends forward.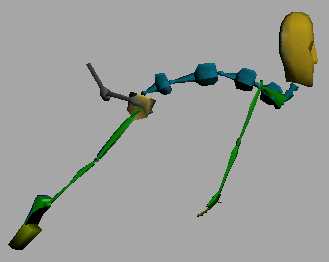
Rotate
the head forward so the biped looks like he's spotting where he
will land.You might also want to rotate the neck links to create a more fluid bend between the spine and head.
Select
the right upper arm, Bip01 R UpperArm. Click the Symmetrical
button so both upper arms are selected. Rotate
the arms back so they are closer to the biped's chest (approximately 40 degrees about
the Z-axis).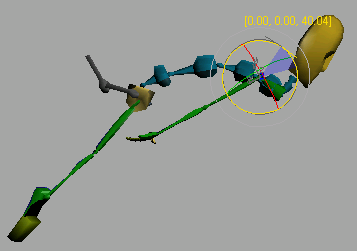
Pose the lower body to reach the apex:
Now that the upper body is set, continue to the lower body.
Select
the right calf, Bip01 R Calf. Click the Symmetrical
button so both calves are selected. Rotate
the calves so the feet kick back.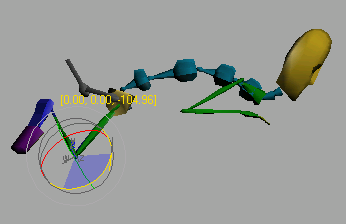
Final pose of the biped at its maximum height
Pose the upper body for the descent:
You’ll continue by choreographing the biped’s descent to the ground.
In the
Track Selection rollout, use Body Horizontal and Body Vertical to
move the biped down and further to the right.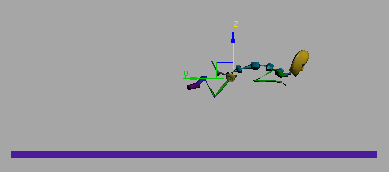
Click
Body Rotation. Rotate the biped downward until the biped‘s shoulders
are pointing at the ground.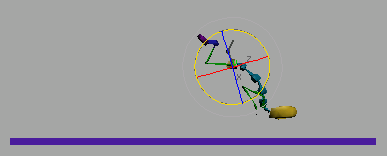
Select
only Bip01 Spine2 and rotate about
the Z axis until the biped’s back straightens.You can position the limbs using forward rotations, or with inverse kinematics moves (as you just did with the hands).
Arms extended to touch the ground.
Pose the lower body for the descent:
In preparation for landing, the legs should curl down to meet the ground after the hands make initial contact.
Select Bip01
R Thigh. Then click the Symmetrical button so both thighs
are selected. Rotate
the thighs approximately 90 degrees about the Z axis.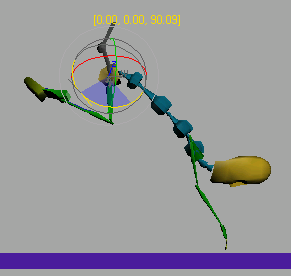
Rotate
the calves in toward the thighs (about –25 degrees
around the Z-axis).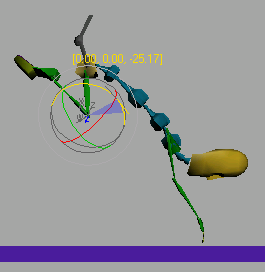
Rotate
the feet in toward the calves (about 115 degrees
around the Z axis).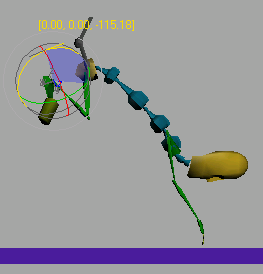
If you
want to fine tune the character, rotate the toes, tail, neck, and
head to match the illustration.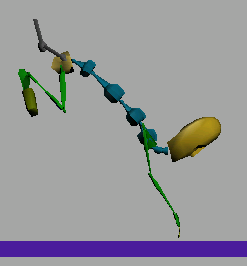
Create the landing pose:
The beetle will land at frame 75. You’ll lock down the hands and adjust the center of mass.
In the
Track Selection rollout, use Body Horizontal and Body Vertical to
move the center of mass so the hands move through the box.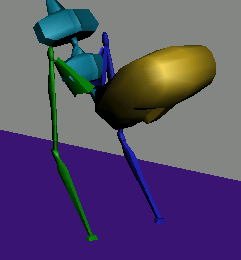
Select
the right hand, and click the Symmetrical button so both hands are
selected. Rotate
the hands forward so the hands are visible and flat against the
ground.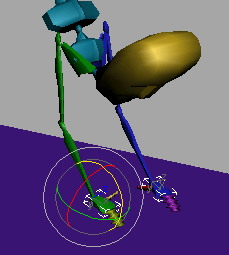
Select
the right hand, and set a sliding key from the Key Info rollout.Now you can set a key to lock the pivot.
Click
the Opposite button to select the left hand, and set another sliding
key.Now both hands are locked to the ground at frame 75.
Select
both feet. Move them outward and up so the legs extend behind and
above the biped. Rotate
the feet so the toes point skyward.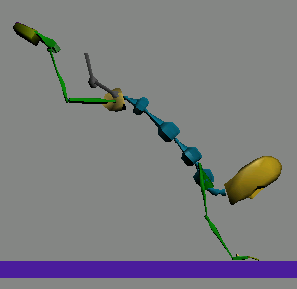
The biped prepares for impact; the landing pose completed.
You’ve created a little kick with the legs.
Adjust the arms to create the landing:
Next you'll bend the arms so the impact is absorbed as the beetle lands.
The hands are locked to the box and the elbows should bend in response to the movement.
This makes it look like the hands are hitting the ground independently.
The hands don’t land together.
Rotate
the left hand up so it's parallel to the ground.Adjust the legs to create the landing:
Select
both thighs. Rotate them so the legs are under the biped.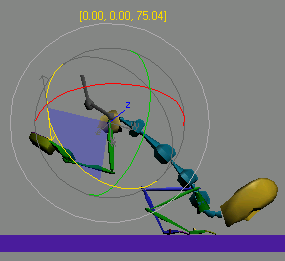
When an animal lands, its feet don’t hit the ground at the same time.
Hitting-the-ground pose.

Move
the feet so the beetle compresses as he lands.The feet should be tucked under the tail.
Create the last pose:
Select
the right hand, and click Set Planted Key. Click
the Opposite button. Click Set Planted Key for the left hand. Select
the left foot, and set a planted key.The left foot is already on the ground.
In the
Track Selection rollout, use Body Vertical to move the biped so
the right foot touches the ground.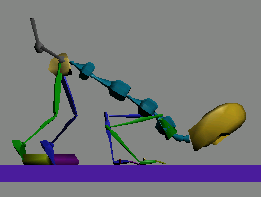
Select
the right foot, and set a planted key.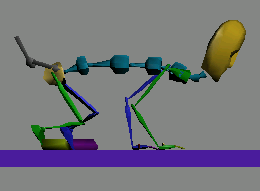
Last pose
Adjust the timing:
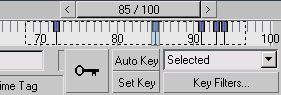
The takeoff and landing are too slow. Use the keys in the track bar to improve the timing.
The keys displayed in the track bar are the keys for the entire animation.
There is too much time between frames 30 and 40.

Note the readout on the status bar showing you information about how the frames are being shifted.
The take off and landing is much quicker.