Autodesk 3ds Max Tutorials > Materials and Mapping Tutorials > Vertex Color and Interactive Shading > Painting Vertex Color >
Painting the Garage with VertexPaint
Now you will explore the vertex paint modifier tools.
Set up the tutorial:
If you are opening the provided file, select the VertPt_set from the toolbar Named Selection sets list. On the Modify panel, display the floating vertex paintbox by clicking the Edit button.
Blur the shadows:
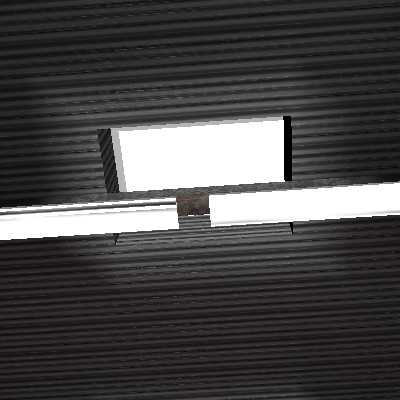
Problems on the ceiling
It's easy to smooth this out using the blur command.
Next you’ll select the faces that need work.
 On the
Parameters rollout in the Selection group, turn on Ignore Backfacing,
then click the Face Selection button.
On the
Parameters rollout in the Selection group, turn on Ignore Backfacing,
then click the Face Selection button. On the
toolbar, turn on Window selection, then drag a selection rectangle
around one of the skylight areas.
On the
toolbar, turn on Window selection, then drag a selection rectangle
around one of the skylight areas.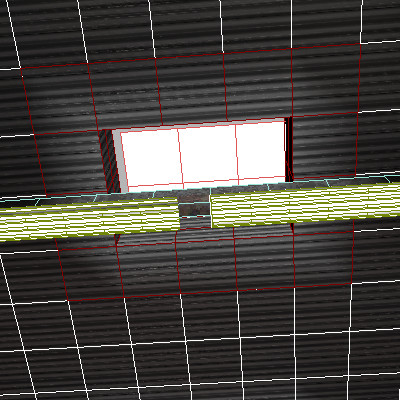
You can use Soft selection for the blur operation since you want to make sure the blur happens smoothly.
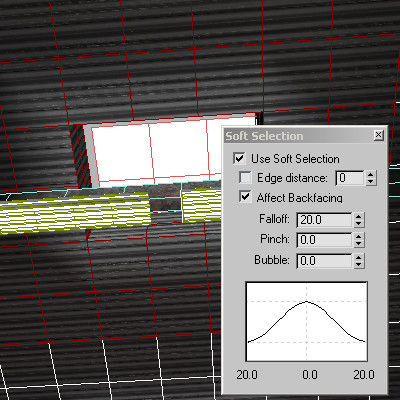
Use Soft Selection
 To blur
the selected area, click the Blur All button.
To blur
the selected area, click the Blur All button.The lighting is smoothed out in the ceiling.
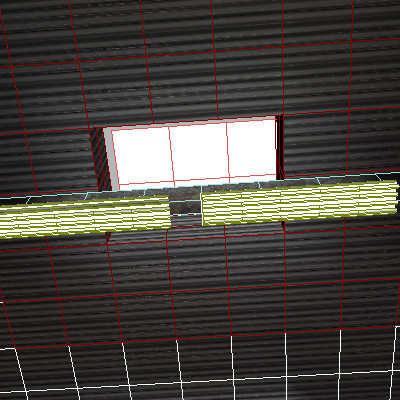
Blur applied to ceiling faces
If you like, you can repeat the blurring procedure on the roof areas surrounding the other two skylights.
Paint additional layers:
You can add as many layers as you want. Each layer is applied as another VertexPaint modifier in the stack. These layers can be adjusted or animated individually.
 On the
vertex paintbox, click New Layer. Accept the default setting in
the dialog that appears, then click OK.
On the
vertex paintbox, click New Layer. Accept the default setting in
the dialog that appears, then click OK.A second modifier is added to the stack.
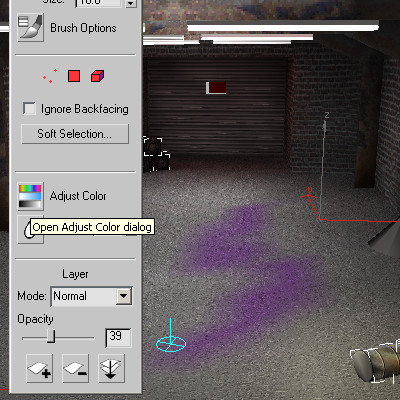
 Click
the Paint button, then move your cursor over the garage floor and
paint.
Click
the Paint button, then move your cursor over the garage floor and
paint.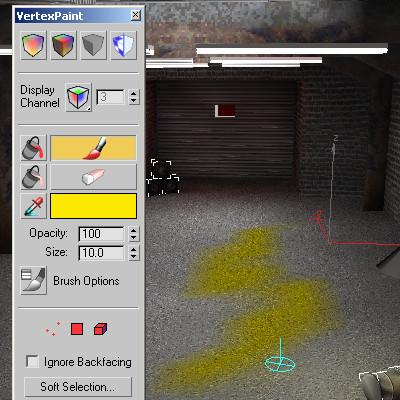
Painting a second layer
This paint layer is very versatile. In the next few steps, you'll see some of the adjustments you can make to this layer.
This creates the effect of a washed out spot on the floor.
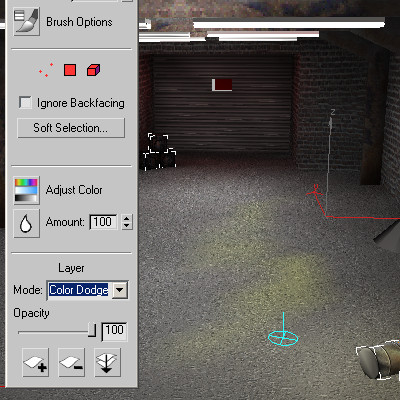
You can use the Adjust Color command to change the Hue, Saturation or Value.
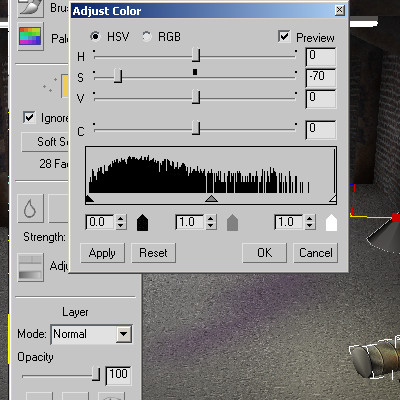
 Click
the Adjust Color button. In the Adjust Color dialog, drag the hue
slider to change the color. Click Apply.
Click
the Adjust Color button. In the Adjust Color dialog, drag the hue
slider to change the color. Click Apply.