
Flash / HTML 5 Player Options
|
Scan QR codes with a mobile device to view online video tutorials. An Internet connection is required to view online content. |
Custom Production Settings
|
TechSmith Smart Player: What You Should Know
|
 Online Videos Available


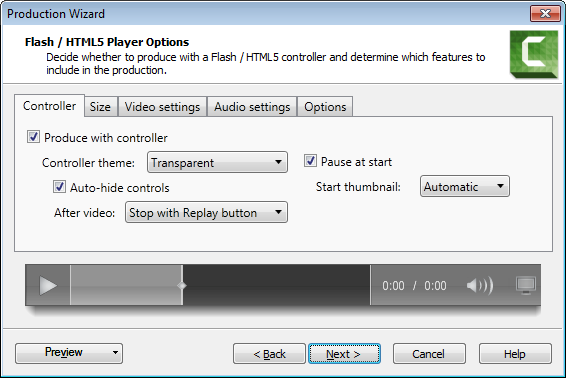
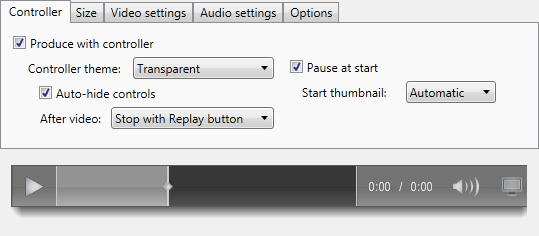
Flash/HTML 5 Player Options
The Flash/HTML 5 Player options allow you to choose the look of the controller, turn features on or off in your video, and adjust video settings like quality, keyframes, and more.
Continue with
Controller Tab
In this tab, choose the controller theme (look) and the video start/stop actions.
| Option | Description |
|---|---|
| Produce with controller |
Turn the video controller on or off. If you only want to produce a video file, uncheck this option. When unchecked, Camtasia Studio features like quizzes, hotspots, table of contents, and closed captions are not included in the video. |
| Controller Theme | From the dropdown, choose the look of the controller. A preview is seen below the options. |
| Pause at Start |
When checked, the video begins in a paused state. The viewer must click the play button to view the video. When unchecked, the video begins immediately. |
| Start Thumbnail |
Choose an image that displays before the video begins. When Pause at Start is unchecked, you cannot choose a start thumbnail. |
| Auto-Hide Controls |
When checked, the playback controls appear when the mouse is moved over the video. When unchecked, the playback controls are always visible. |
| After Video |
Options for when the video ends includes:
|
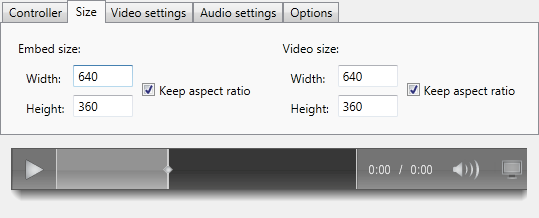
Size Tab
| Option | Description |
|---|---|
| Embed Size |
The size of the frame in the HTML page, where the video is initially displayed. When the Embed size and Video size are the same:
When the Embed size is smaller than the Video size:
|
| Video Size |
The size that the video is produced at.
|
| Keep aspect ratio | Maintain the current aspect ratio of the video when resizing. |
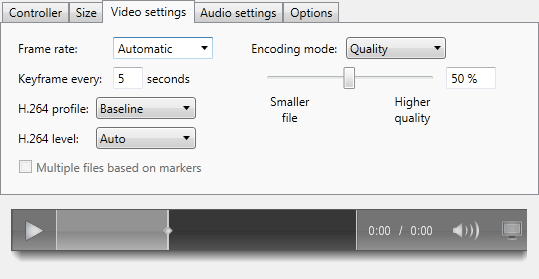
Video Settings Tab
| Option | Description |
|---|---|
| Frame Rate |
|
| Encoding Mode |
Select an option from the dropdown and then use the slider to adjust the quality.
|
| Keyframe every |
|
| H.264 profile |
The default option is recommended. Do not change this setting unless you are familiar with H.264 encoding options. |
| H.264 level |
The default option is recommended. Do not change this setting unless you are familiar with H.264 encoding options. |
| Multiple files based on markers |
Produce a separate video production for each marker on the timeline. |
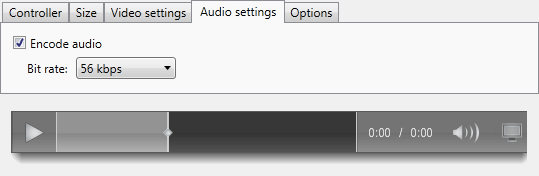
Audio Settings Tab
| Option | Description |
|---|---|
| Encode Audio |
|
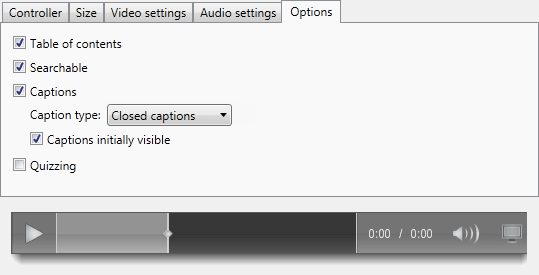
Options Tab
In this tab, choose the features to include in the video. Options that are grayed out are not available.
| Option | Description |
|---|---|
| Table of Contents |
Check to include a table of contents in the video. If you have markers in your video, these can be used to include a table of contents in the final video. You are able to rename the markers and choose which markers to include in the table of contents in the Production Wizard's Marker options screen. |
| Searchable |
Check to make the video searchable. The Searchable feature adds a search pane to the video and allows viewers to search for text in captions, PowerPoint slides, PowerPoint notes, and markers. Viewers can click a search result to jump to that location in the video. |
| Captions |
Check to include captions in the video. Caption type options include:
Caption initially visible:
|
| Quizzing |
Check to include quizzes in the video. You are able to choose the reporting and viewer options in the Production Wizard's Quiz Reporting options screen. |