In this lesson, you will associate the bones with the character mesh so the bones will deform the mesh. This process is called skinning. In 3ds Max, you skin a character with the Skin modifier.
Prepare the scene:

Apply the Skin modifier:
You apply the Skin modifier the mesh that you want to deform with bones.
If MeshSmooth has been applied to the character, as it has in this case, it is usually better to apply the Skin modifier below MeshSmooth on the stack. With this technique, you will have fewer vertices to control with the Skin modifier, and the character will still deform smoothly at the MeshSmooth level of the stack.
 On the
Modify panel, turn on the Show End Result On/Off Toggle if it's
not already turned on.
On the
Modify panel, turn on the Show End Result On/Off Toggle if it's
not already turned on.This will show you the results of the MeshSmooth modifier as you work, even though it is higher on the stack than the current level.
The Skin modifier is applied above Editable Poly, but below MeshSmooth. Now you will associate the bones with the mesh.
There is no need to select the control objects, as they will not deform the mesh. The control objects move the bones, which in turn deform the mesh. The bones at the tip of the head and toe are not inside the mesh, and so should have no influence on the mesh deformation.
Adjust the scene to help you see the skinning results:
It will be easier to use the animation between frames 0 and 10 to test the skinning if the active time segment is shorter.
 Click
Time Configuration, and change the Length to 100. Click OK
to close the dialog.
Click
Time Configuration, and change the Length to 100. Click OK
to close the dialog.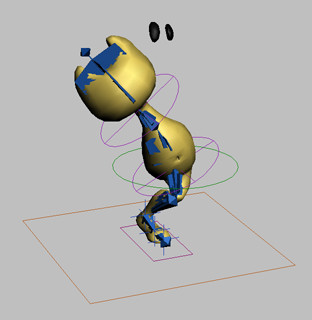
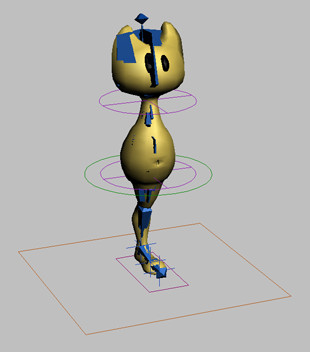
The mesh follows the bones, but the eyes are left behind. The eyes must be linked to the head bone to animate correctly.
 Select Pluggo_EyeLeft and Pluggo_EyeRight,
and link them to BoneHead.
Select Pluggo_EyeLeft and Pluggo_EyeRight,
and link them to BoneHead.Now, when you scrub the time slider, the eyes go with the head.
You could have applied the Skin modifier to the eyes as well as the body, but this is not necessary unless the head will deform. In this character rig, the head will always be rigid, so it is easier to link the eyes to the head bone.
Now that you have applied the Skin modifier, you no longer need the bones in the scene, and it will be easier to adjust the Skin modifier with the bones and controls hidden.
 Click
Select to turn it on and turn off Select And Link.
Click
Select to turn it on and turn off Select And Link.Look at the envelopes:
When you apply the Skin modifier, each bone is assigned a pair of envelopes that determine how much the bone affects the vertices within it:
Each envelope pair is defined by two distinct splines:
Any vertices that are not inside the outer envelope are not influenced by the bone. Where two envelopes overlap, the bones share influence over the vertices.
Ideally, the inner envelope surrounds the non-bending part of the skin, such as the main part of the thigh or calf. Outer envelopes from adjoining bones should overlap somewhat to provide influence over joints, such as the knee and ankle.
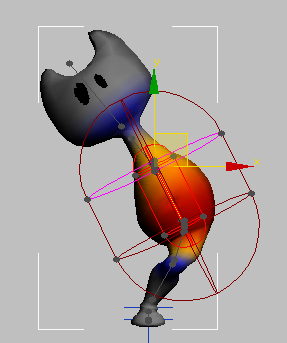
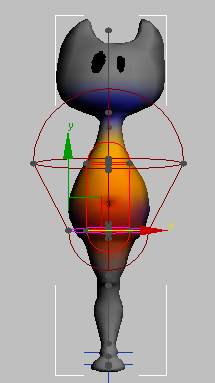
The initial size of the envelopes is determined by the size of the bone at the time the Skin modifier is applied. In shaded viewports, the selected envelope's influence is shown as a color on the mesh. Red areas are the most influenced, while yellow and orange areas receive some influence. Blue areas receive no influence at all from the selected envelope.

Envelope for BoneSpine01 with colors showing influence
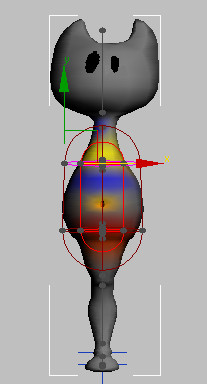
The mesh goes with the bones, but the joints are not well defined. For example, the crease at the top of the thigh does not bend cleanly. Instead, the entire thigh bends. This is because the envelope around BoneSpine01 is too large, and it encompasses half of the thigh. In addition, the head envelope is very large, and it encompasses the body.
Adjust the envelopes:
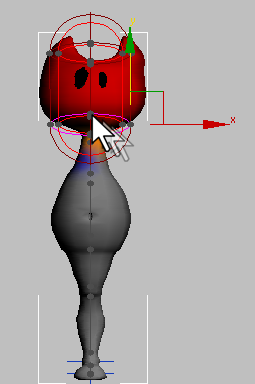
Now you will adjust the head and lower spine envelopes so they encompass more appropriate parts of the mesh. You can adjust envelopes by moving their handles. Handles appears as round shapes on the envelope spline.
Test the skinning:
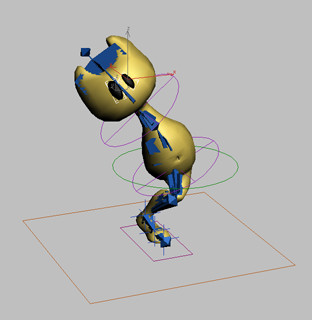
There is now a definite crease at the thigh, and the thigh itself is no longer bending.

If you continue to see problems after you adjust a skin's envelopes, one way to fix these is to adjust vertex weights. That technique is shown in the lesson, Applying Skin to the Alien .
You can find a version of this scene in the file tut_introrig_skin.max.
In this case, you applied the Skin modifier to just one object. You can also apply it to multiple objects at the same time.
There are many more adjustments you could make to the envelopes and vertex weights to make the mesh deform more realistically. There are several sample files you can look at to learn more about rigging:


